
By Becky Hardin
Updated Jan 13, 2025
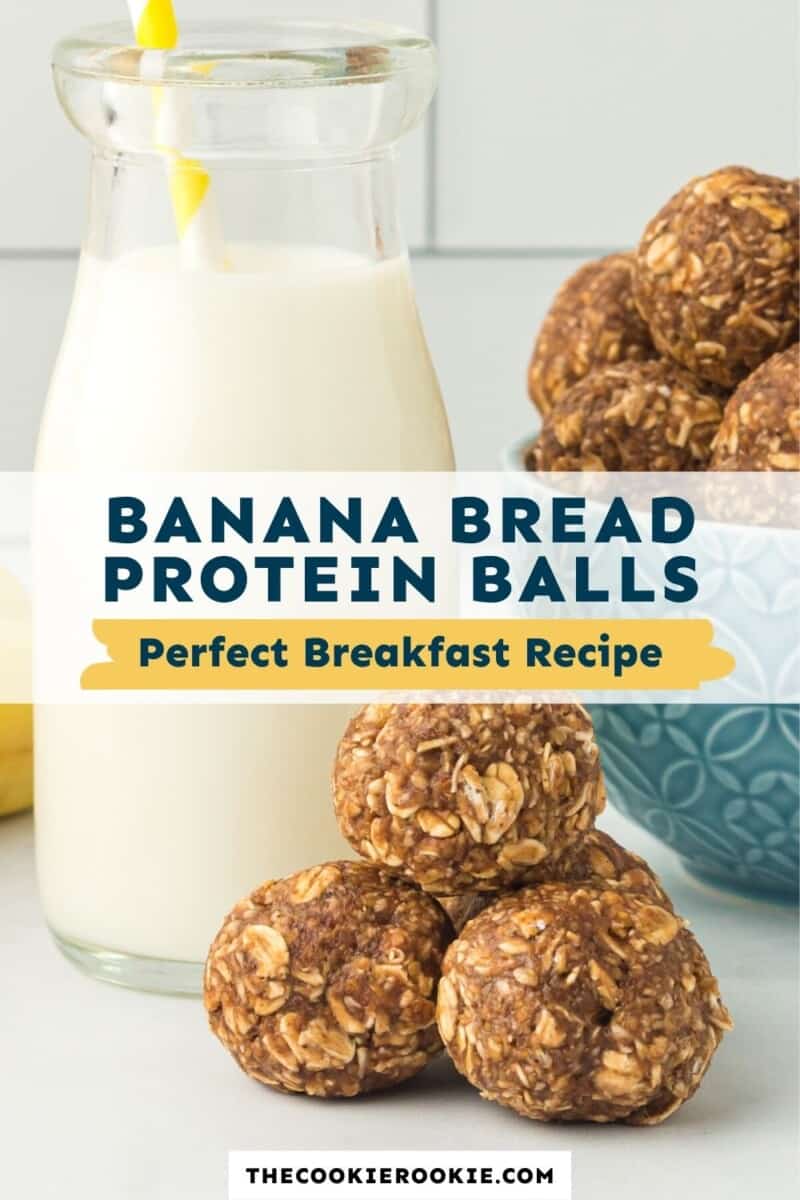
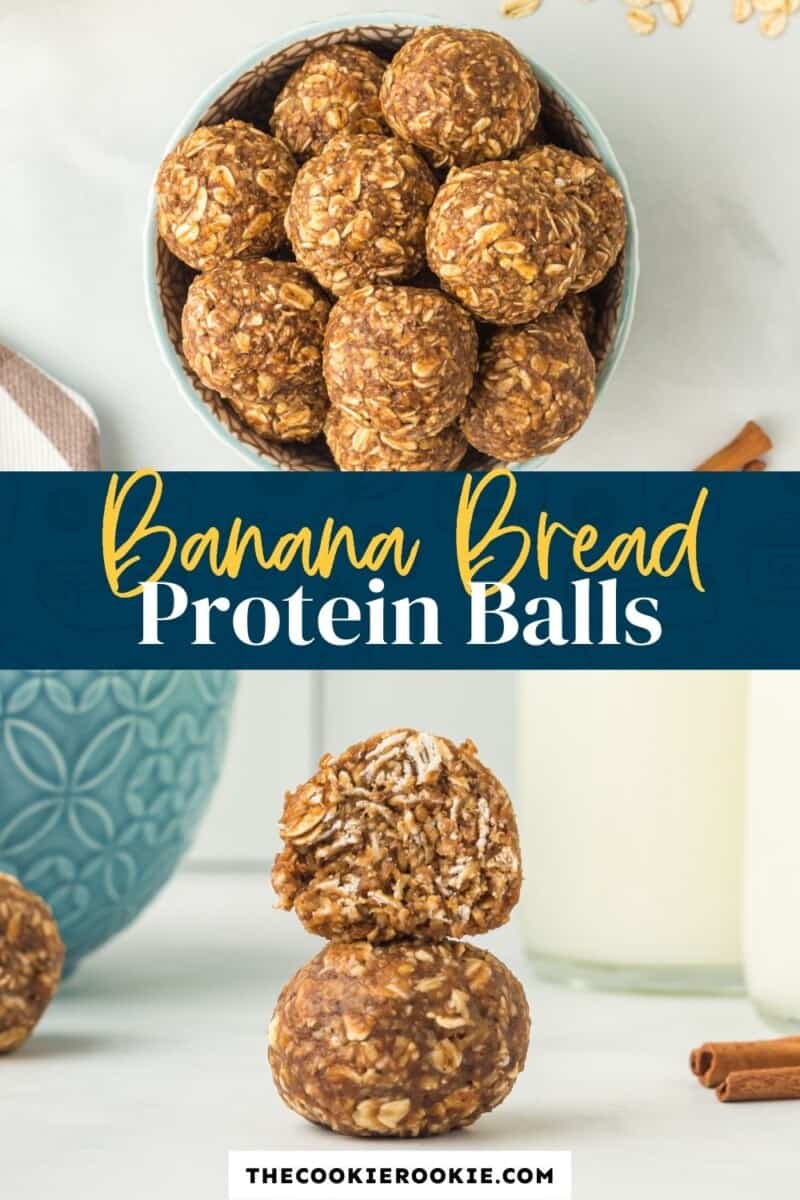
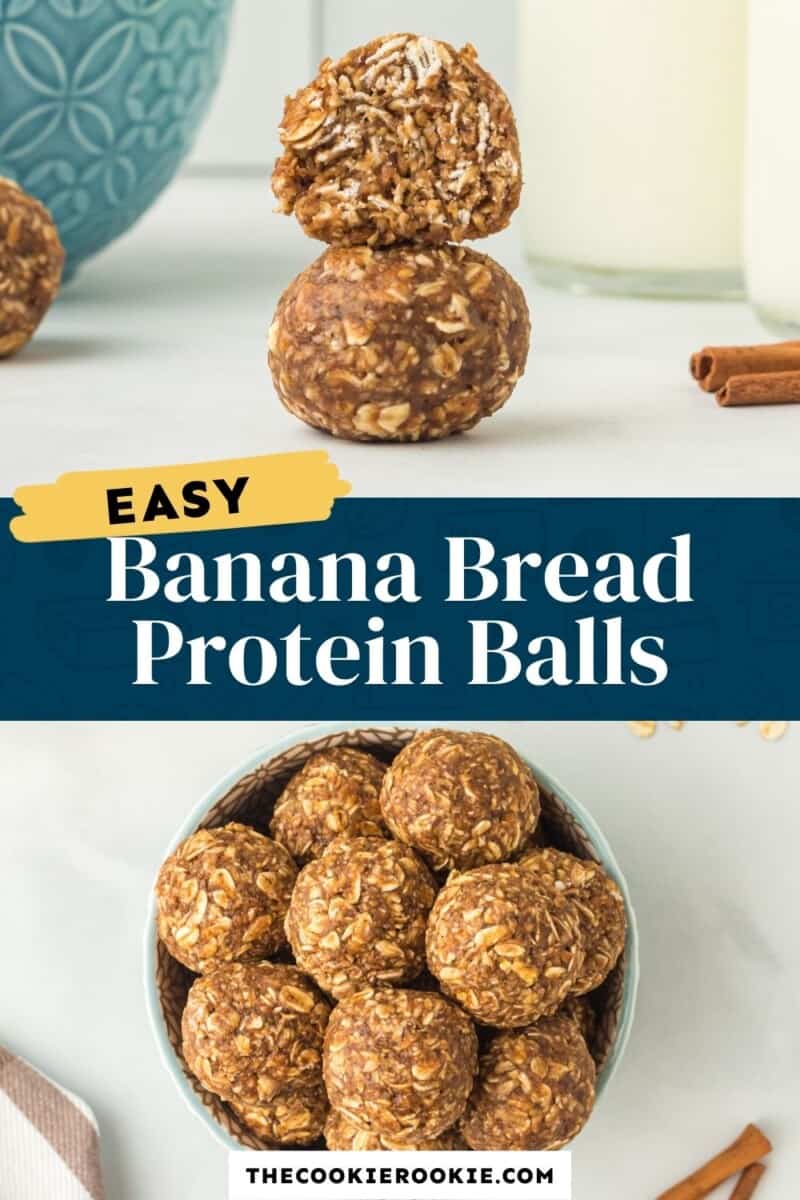
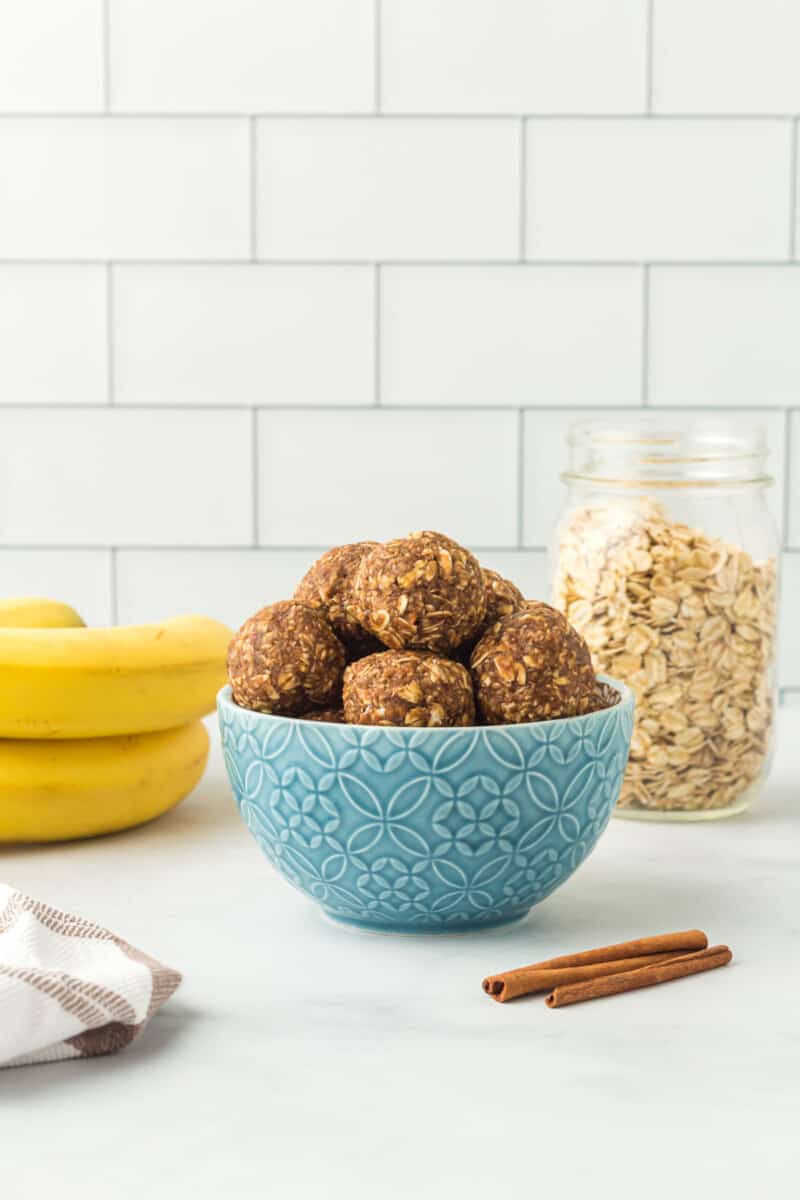
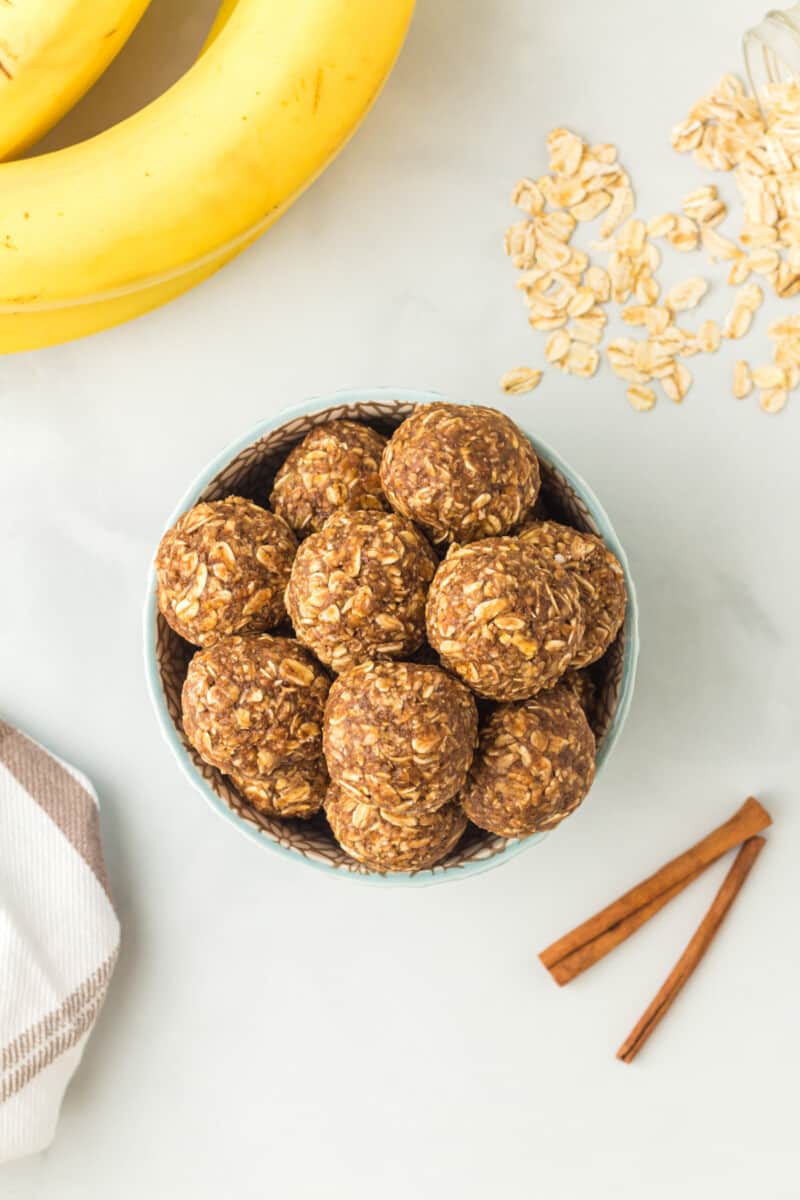
What if I say skip the store-bought snacks and whip up a batch of these protein balls instead!! Banana Bread Protein Balls made with oats, bananas, peanut butter, and protein powder, each bite is an energy boost. They have the same warm and comforting flavors of banana bread. Homemade energy balls always taste better!
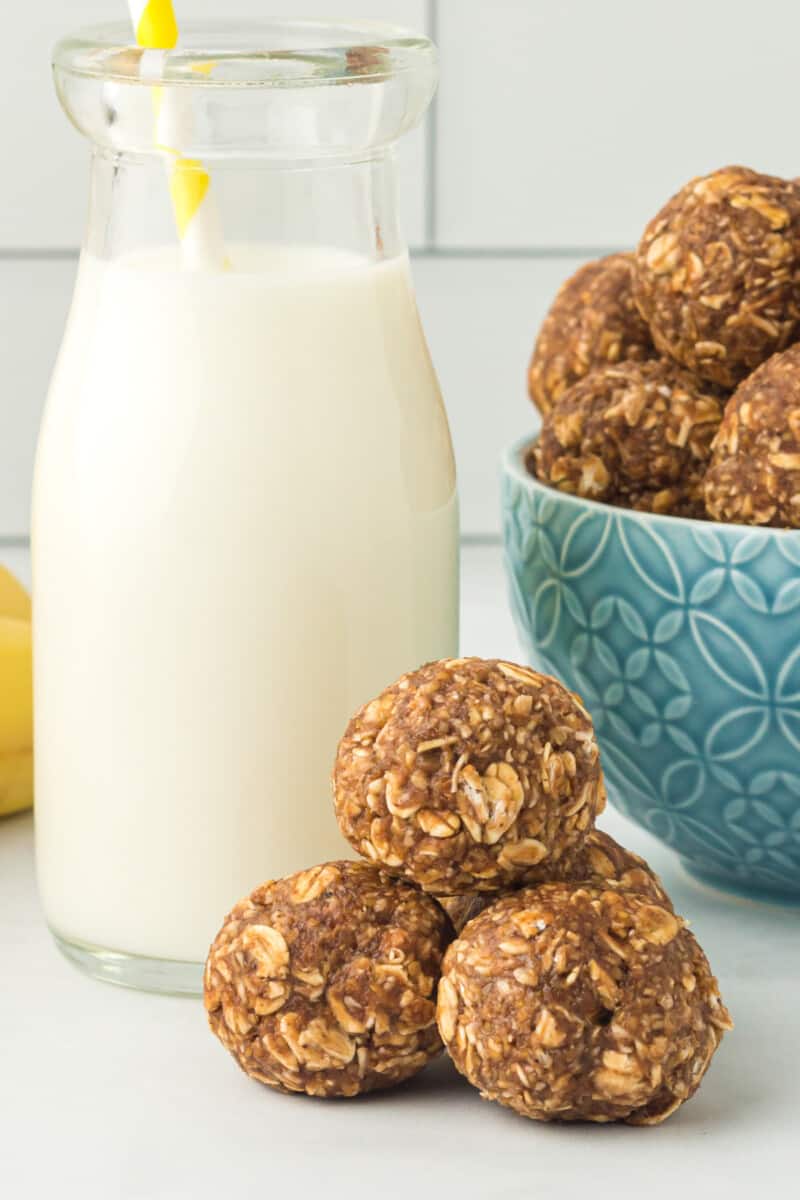
These no bake Banana Bread Energy Balls are healthy (isn’t obvious), and flavorful with sweet ripe bananas, warm cinnamon, and salty peanut butter.
Shall I tell you a secret!! Use those yellow bananas for making these delicious bites that are waiting on your kitchen counter. Isn’t fun!!
These protein balls are naturally sweetened with bananas and have the same great flavors we love about banana bread . Oats add texture and peanut butter pairs wonderfully with chocolate protein powder.
Banana and Oat Protein Balls
Protein balls, Energy balls, Energy bites, Bliss Balls, Protein bites are all same thing. Basically made with ingredients like oats, sweetener, nuts, and few more add-ins.
Oats is a complex carb that provides quick energy. Other than carbs, almost any variety of energy balls have fiber and fat sources that will provide you energy until you next meal. And that’s what is all about “Energy” packed in small “balls or bites”- Energy balls or Energy Bites. Period!!
The name mainly reflects the primary ingredient. For example, in my recipe “banana” is prime ingredient and so reflects the name as “Banana Protein Balls”. Be sure to check my Peanut Butter Energy Balls recipe too.
Can you guess the main ingredient here!!!
Instead of snacking on unhealthy stuff, you can enjoy a couple protein bites pre or post workout, on your way to work, or for a late night treat. No preservatives or additives and perfect snack for those sweet cravings.
It’s easy to make healthy choices when these banana bread protein balls are around!
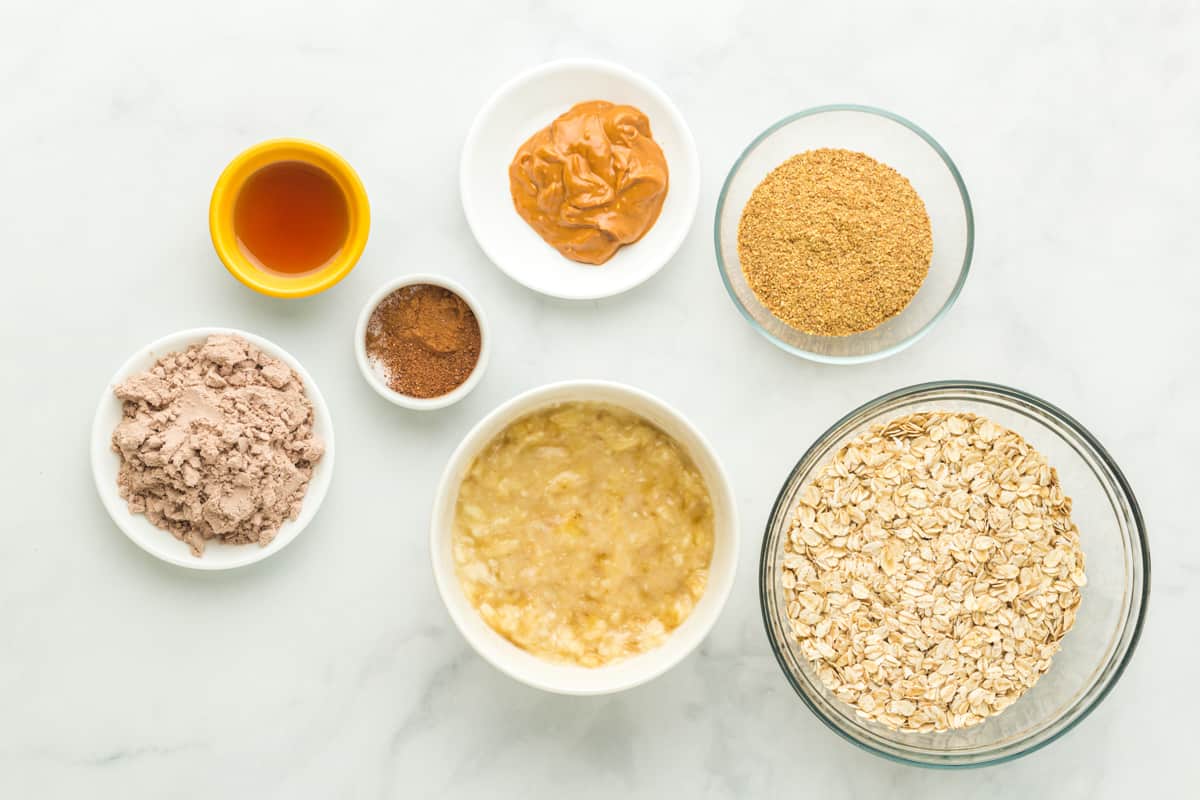
Ingredients
Oats: For best results, use old-fashioned rolled oats. In a pinch, you can use quick oats but they won’t have the same chewy texture. For dietary limitations use certified gluten free oats to ensure these protein balls remain gluten free.
Banana: This is the star ingredient of my protein energy bites. Use yellowest bananas lying in the kitchen. Overripe bananas are best! They’re naturally sweeter and will combine more easily with the other ingredients.
Flexseeds: Seeds are good source of omega oil. In my recipe I am using flexseeds, but use any seeds like pumpkin seeds, chia seeds, or sunflower seeds.
Protein Powder: I like to use chocolate flavored protein powder in my protein bites. But you can use any vanilla or any other flavored protein powder as well. To make it gluten free use certified gluten-free protein powder to ensure that your energy bites remain gluten-free. Simply replace the chocolate protein powder with an equal amount of your favorite protein powder.
Peanut Butter: Chocolate, banana and peanut butter, is a combo made in heaven and so the reason why I love peanut butter in my protein bliss balls. Use any nut butter like, almond butter, pecan butter, cashew butter, any seed butter. To make them nut free just replace the peanut butter with an equal amount of a nut butter alternative (like sunflower seed butter) and make sure all of the other ingredients you use are also nut free.
Honey: I use honey for combining and sweetening all ingredients. Use maple or agave for vegan protein balls.
Tips For Success
- The mixture is super sticky, so wet your hands before rolling the mixture into balls.
- Ripened bananas are best to use. They would mash easily and mix well with rest of ingredients.
- Feel free to play around fruits like peach, apple, carrot, pumpkin, or a variety of nut butters. Combine as you want and make your own.
How to Store
Store protein balls in an airtight container in the refrigerator for up to 1 week or in the freezer for up to 2 months. Make sure they’ve chilled in a single layer in the refrigerator first to prevent the protein balls from sticking to each other.
Serving Suggestions
I love keeping a batch of these protein balls at hand for a quick breakfast, or afternoon pick-me-up, or a healthy dessert. Beat the afternoon slump with these banana bread protein balls!
5-Star Review
“I made this last night and it was the moistest chicken we’ve ever had. A bit of crispy and the flavor was wonderful. I didn’t have buttermilk and did add lemon juice to 1% milk. I am making it again today. Thank you for this recipe.” – Dawn
Ingredients1x2x3x
- ▢ 3 cups old-fashioned rolled oats 300 grams
- ▢ ½ cup ground flaxseed 70 grams
- ▢ 2 ounces chocolate protein powder 60 grams (approximately 2 scoops)
- ▢ 2 teaspoons ground cinnamon 6 grams
- ▢ ½ teaspoon ground nutmeg
- ▢ ¼ teaspoon kosher salt
- ▢ 2 overripe bananas mashed
- ▢ ¼ cup natural peanut butter 68 grams
- ▢ 2 tablespoons honey 44 grams
Video
Instructions
- Line a baking sheet with parchment paper. Set aside.
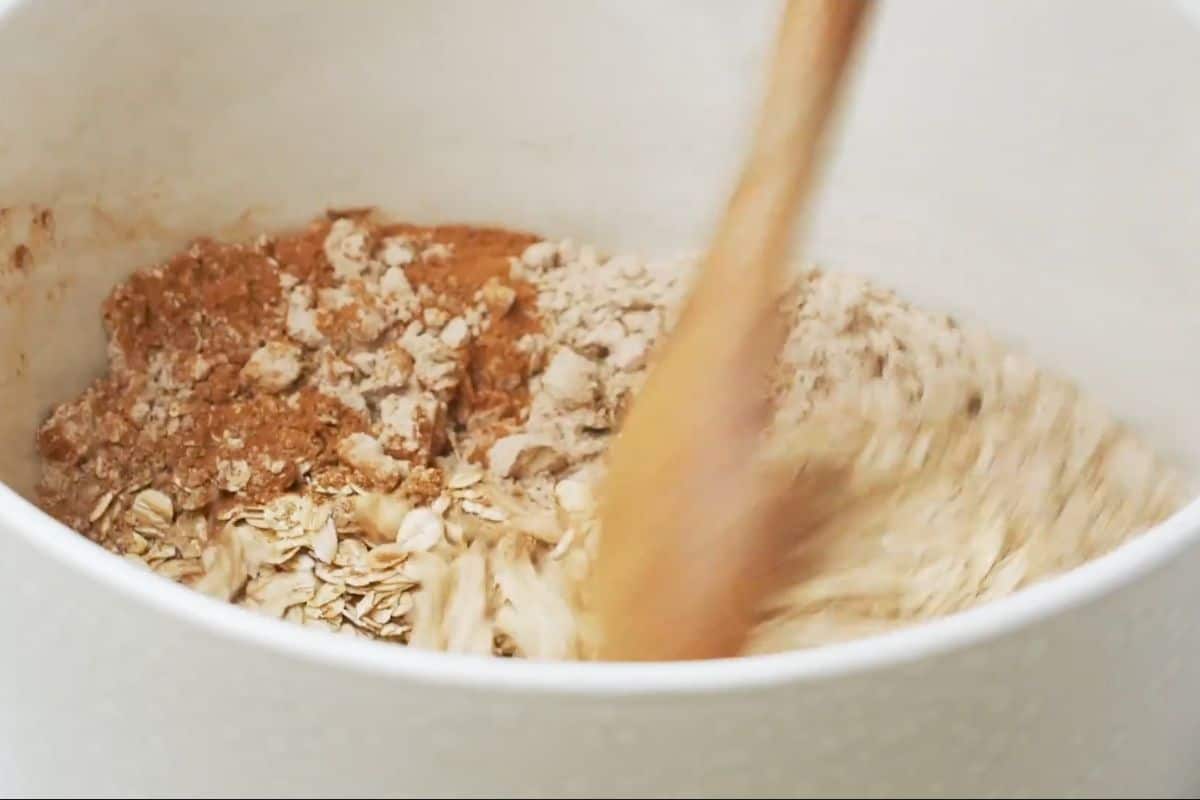
- In a large bowl, whisk the oats, flaxseed, protein powder, cinnamon, nutmeg, and salt together. 3 cups old-fashioned rolled oats, ½ cup ground flaxseed, 2 ounces chocolate protein powder, 2 teaspoons ground cinnamon, ½ teaspoon ground nutmeg, ¼ teaspoon kosher salt
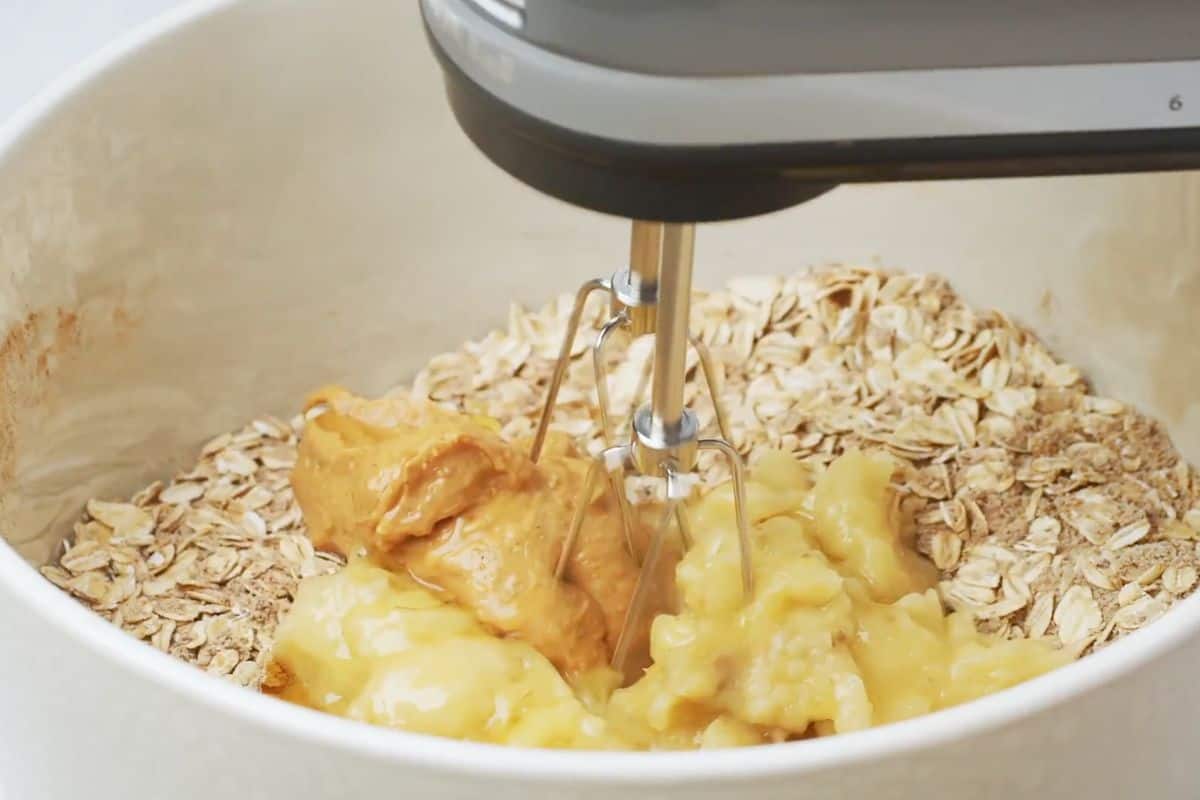
- Add the mashed bananas, peanut butter, and honey. Use a hand mixer or spatula to combine. 2 overripe bananas, ¼ cup natural peanut butter, 2 tablespoons honey
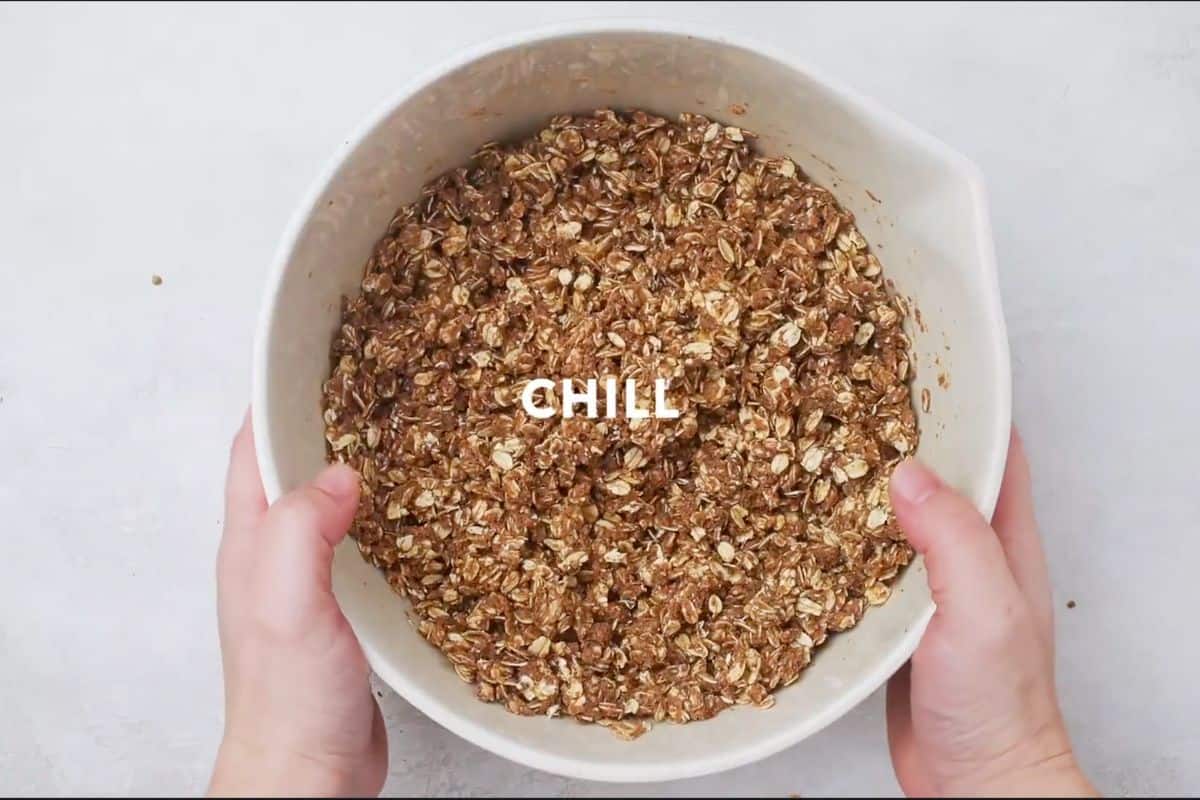
- Tightly cover the bowl with plastic wrap and refrigerate for 1 hour.
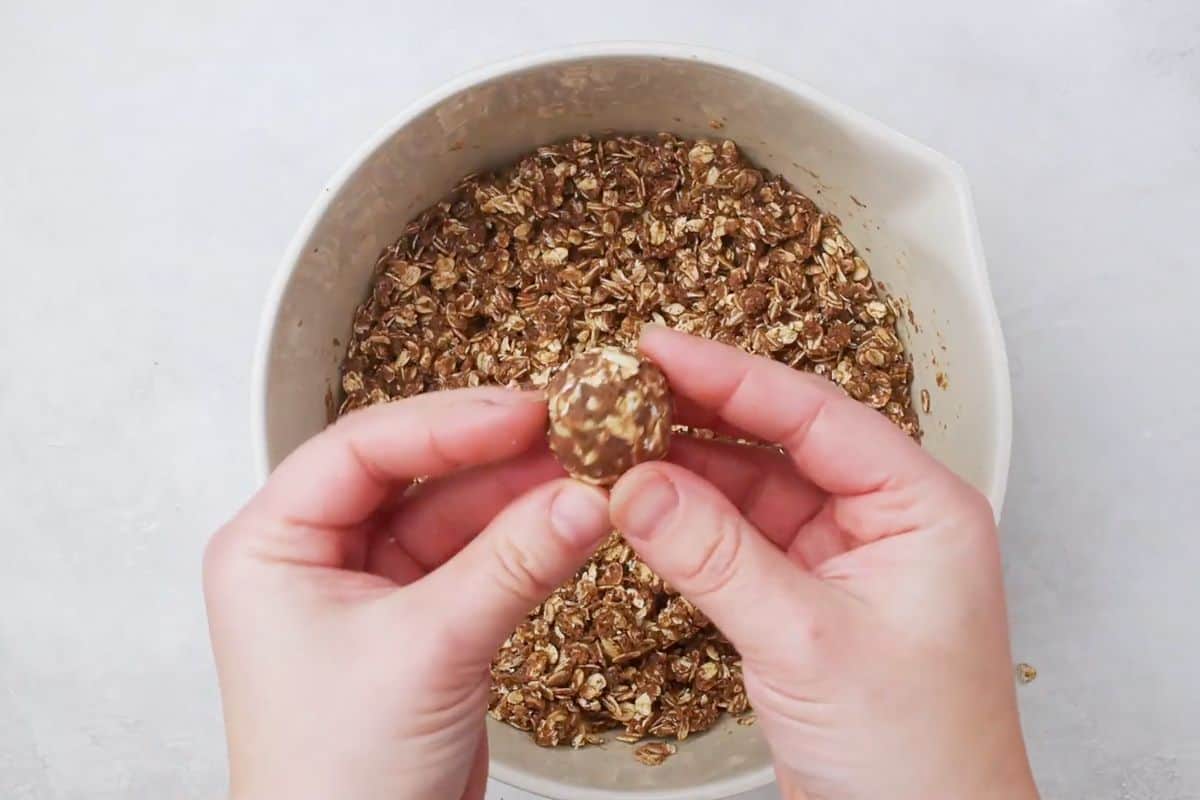
- Once the mixture has chilled, remove the bowl from the refrigerator. Use a 1-tablespoon-sized scoop to scoop out protein balls. Use your hands to shape the scoops into balls and place them in a single layer on the prepared baking sheet. This is a sticky process so wet your hands to prevent the mixture from sticking to your hands.
- Repeat until all of the protein ball mixture has been shaped into balls. To prevent protein balls from sticking to each other, wrap the baking sheet in plastic wrap and refrigerate for 1 hour before combining the protein balls into an airtight container. Protein balls can be enjoyed immediately without any additional chill time.
Equipment
- Kitchen Scale (optional)
- Baking Sheet
- Hand Mixer (optional)
- Cookie Portion Scoop (optional)
Becky’s Tips
- For a vegan alternative, use maple syrup instead of honey and make sure the protein powder is also vegan.
- To make these nut free you can use any seed butter or just eliminate nuts from the recipe. Make sure all of the other ingredients you use are also nut free.
- To make it gluten free use certified gluten-free protein powder to ensure that your energy bites remain gluten-free. Simply replace the chocolate protein powder with an equal amount of your favorite protein powder.
- You can use certified gluten free oats to ensure these protein balls remain gluten free.
- The mixture is super sticky, so wet your hands before rolling the mixture into balls.
- Overripe bananas are best! They’re naturally sweeter and will combine more easily with the other ingredients.
Nutrition information is automatically calculated, so should only be used as an approximation.
How to Make Banana Bread Protein Balls Step by Step
Line a Baking Sheet: Prepare a baking sheet lined with parchment paper. Keep it aside.
Mix the dry ingredients together: In a large bowl combine 3 cups old-fashioned rolled oats, ½ cup ground flaxseed, 2 ounces chocolate protein powder, 2 teaspoons ground cinnamon, ½ teaspoon ground nutmeg, and ¼ teaspoon kosher salt. together.
Add the remaining ingredients: In the same bowl add 2 overripe mashed bananas, ¼ cup natural peanut butter, and 2 tablespoons honey. Use a hand mixer or spatula to combine everything evenly.
Chill the protein ball mixture: At this point, banana bread protein balls mixture is very sticky. Cover the bowl with plastic wrap and refrigerate for an hour. Do not skip this step. This step allows the mixture to firm up a bit before scooping and shaping into balls.
Scoop the mixture into balls: Once the mixture is chilled take out the bowl from the refrigerator. Use a 1-tablespoon-sized scoop to scoop out protein balls. Use your hands to shape the scoops into balls and place them in a single layer on the prepared baking sheet.
Repeat until all of the protein ball mixture has been shaped into balls.

Refrigerate and enjoy: To prevent protein balls from sticking to each other, wrap the baking sheet with scooped protein balls in plastic wrap and refrigerate for 1 hour before combining the protein balls into an airtight container.
Enjoy Protein bliss balls immediately without any additional chill time.
More Quick Breakfast Recipes We Love
Instant Pot Apple Pie Oatmeal
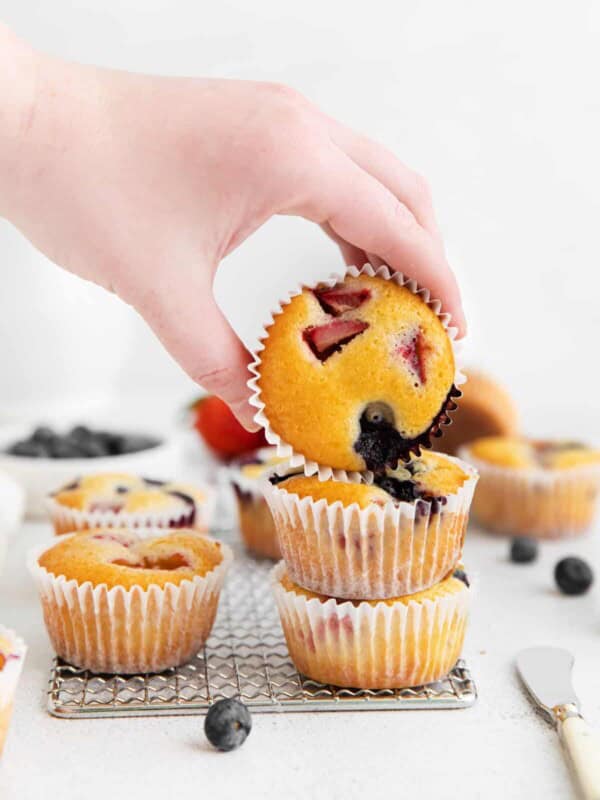
Mixed Berry Muffins
<img loading=“lazy” src=“https://www.thecookierookie.com/wp-content/uploads/2017/02/oatmeal-chocolate-chip-crinkles-2-of-8-600x800.jpg" onerror=“this.onerror=null;this.src=‘https://blogger.googleusercontent.com/img/a/AVvXsEhe7F7TRXHtjiKvHb5vS7DmnxvpHiDyoYyYvm1nHB3Qp2_w3BnM6A2eq4v7FYxCC9bfZt3a9vIMtAYEKUiaDQbHMg-ViyGmRIj39MLp0bGFfgfYw1Dc9q_H-T0wiTm3l0Uq42dETrN9eC8aGJ9_IORZsxST1AcLR7np1koOfcc7tnHa4S8Mwz_xD9d0=s16000';" alt=“The BEST OATMEAL CHOCOLATE CHIP COOKIES recipe is crunchy on the outside and chewy on the inside. We call them “Oatmeal Doozies” because they are my Mom’s master creation! - 18”>
<img loading=“lazy” src=“https://www.thecookierookie.com/wp-content/uploads/2017/02/oatmeal-chocolate-chip-crinkles-2-of-8-600x800.jpg" onerror=“this.onerror=null;this.src=‘https://blogger.googleusercontent.com/img/a/AVvXsEhe7F7TRXHtjiKvHb5vS7DmnxvpHiDyoYyYvm1nHB3Qp2_w3BnM6A2eq4v7FYxCC9bfZt3a9vIMtAYEKUiaDQbHMg-ViyGmRIj39MLp0bGFfgfYw1Dc9q_H-T0wiTm3l0Uq42dETrN9eC8aGJ9_IORZsxST1AcLR7np1koOfcc7tnHa4S8Mwz_xD9d0=s16000';" alt=“The BEST OATMEAL CHOCOLATE CHIP COOKIES recipe is crunchy on the outside and chewy on the inside. We call them “Oatmeal Doozies” because they are my Mom’s master creation! - 19”>
Oatmeal Chocolate Chip Cookies (Oatmeal Doozies)
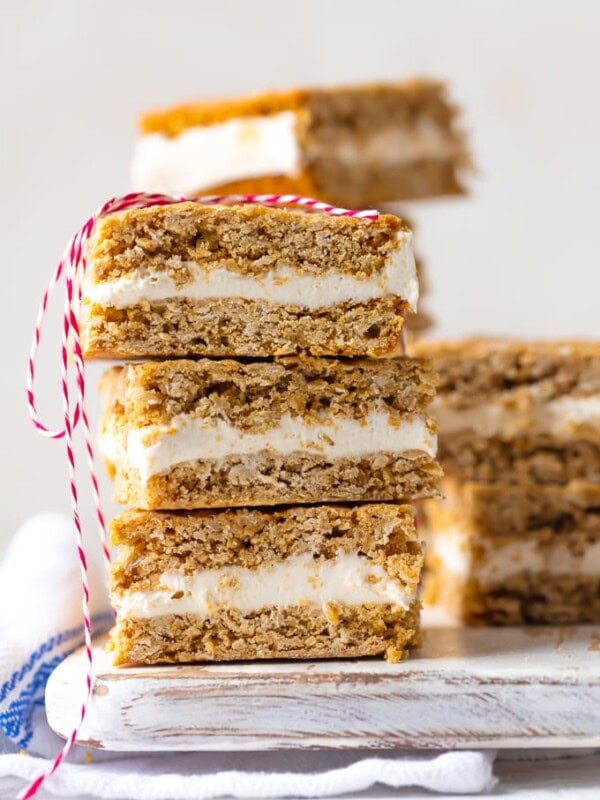
Homemade Oatmeal Cream Pie Bars (Copycat Recipe)
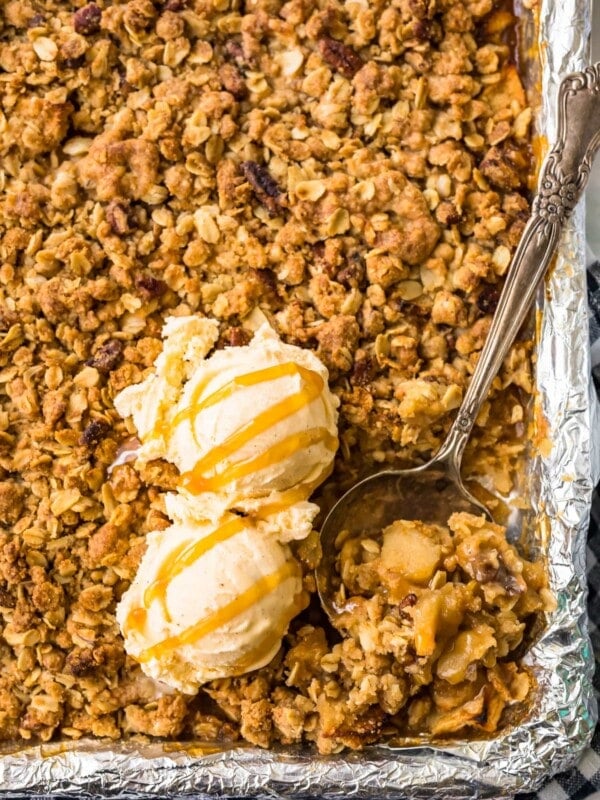
Sheet Pan Apple Crisp Recipe
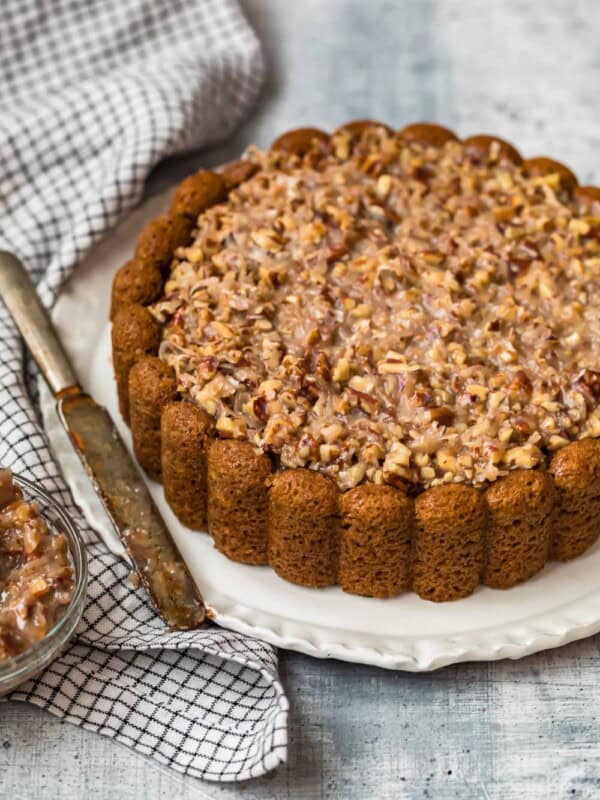
Old Fashioned Oatmeal Cake Recipe
Mango Smoothie Recipe

Banana Bread Protein Balls Recipe
Equipment
- Kitchen Scale (optional)
- Baking Sheet
- Hand Mixer (optional)
- Cookie Portion Scoop (optional)
Ingredients
- 3 cups old-fashioned rolled oats 300 grams
- ½ cup ground flaxseed 70 grams
- 2 ounces chocolate protein powder 60 grams (approximately 2 scoops)
- 2 teaspoons ground cinnamon 6 grams
- ½ teaspoon ground nutmeg
- ¼ teaspoon kosher salt
- 2 overripe bananas mashed
- ¼ cup natural peanut butter 68 grams
- 2 tablespoons honey 44 grams
Instructions
- Line a baking sheet with parchment paper. Set aside.
- In a large bowl, whisk the oats, flaxseed, protein powder, cinnamon, nutmeg, and salt together. 3 cups old-fashioned rolled oats, ½ cup ground flaxseed, 2 ounces chocolate protein powder, 2 teaspoons ground cinnamon, ½ teaspoon ground nutmeg, ¼ teaspoon kosher salt
- Add the mashed bananas, peanut butter, and honey. Use a hand mixer or spatula to combine. 2 overripe bananas, ¼ cup natural peanut butter, 2 tablespoons honey
- Tightly cover the bowl with plastic wrap and refrigerate for 1 hour.
- Once the mixture has chilled, remove the bowl from the refrigerator. Use a 1-tablespoon-sized scoop to scoop out protein balls. Use your hands to shape the scoops into balls and place them in a single layer on the prepared baking sheet. This is a sticky process so wet your hands to prevent the mixture from sticking to your hands.
- Repeat until all of the protein ball mixture has been shaped into balls. To prevent protein balls from sticking to each other, wrap the baking sheet in plastic wrap and refrigerate for 1 hour before combining the protein balls into an airtight container. Protein balls can be enjoyed immediately without any additional chill time.
Video
Notes
- For a vegan alternative, use maple syrup instead of honey and make sure the protein powder is also vegan.
- To make these nut free you can use any seed butter or just eliminate nuts from the recipe. Make sure all of the other ingredients you use are also nut free.
- To make it gluten free use certified gluten-free protein powder to ensure that your energy bites remain gluten-free. Simply replace the chocolate protein powder with an equal amount of your favorite protein powder.
- You can use certified gluten free oats to ensure these protein balls remain gluten free.
- The mixture is super sticky, so wet your hands before rolling the mixture into balls.
- Overripe bananas are best! They’re naturally sweeter and will combine more easily with the other ingredients.
Nutrition
By Becky Hardin
Published Jul 12, 2017


This Essential Grocery List is an absolute life saver for my family on the busy weeks. When I started this journey to learn how to cook, I quickly realized that the first step in cooking is having staple ingredients on hand. I want to avoid having to run out to the grocery store every single time I prepare a new recipe. Having a well-stocked pantry has made my life in the kitchen so much simpler, because when it’s time to cook, I have what I need.

Essential Grocery List
It’s so helpful to have a basic grocery list to help me remember which foods to buy at the store. This food shopping list is my go-to!
It’s better to stock up on things like grains, seasonings and spices, baking essentials, oils, condiments, canned and frozen foods, etc. so I can just grab them when I need them. These things have a long shelf life , so I keep them in my kitchen for convenience.
However, I do have to go to the supermarket sometimes, and there’s a way to make that trip easy and hassle-free: I keep a grocery list! If I go in blindly, I’ll leave with things I don’t need, and nothing that actually helps me prepare a good meal.
In the list below, I’ve compiled everything I always have on my stock-up grocery list.
I’ve got you covered! I created an easy grocery list filled with all of the essentials. Plus there’s a free printable version that you can take with you to the grocery store. It has everything you need to stock your pantry, your freezer, and your refrigerator.

Click to get my Free Printable Grocery List
What to Buy at the Grocery Store
This is the perfect grocery list filled with all the basics and essentials. It should help get you going if you’re new to cooking, or if you’re just left staring helplessly at an empty pantry and don’t know how to fill it.
When I first started cooking, things could seem overwhelming. I quickly realized that they more prepared I could be, the more confident I felt. If you already have the basics in your kitchen, then you can shop stress-free.
So print out our easy grocery list, stock up your pantry and fridge, and you’ll be cooking in no time!
Click to get my Free Printable Grocery List for the perfectly stocked pantry and freezer!
Fresh Produce
- Apples
- Bananas
- Strawberries
- Avocados
- Bell Peppers
- Carrots
- Broccoli
- Garlic
- Lemons/Limes
- Onion
- Parsley
- Cilantro
- Basil
- Potatoes
- Spinach
- Tomatoes
GRAINS
- Breadcrumbs
- Pasta
- Quinoa
- Rice
- Sandwich Bread
- Tortillas
MEAT/PROTEIN
- Chicken
- Eggs
- Ground Beef
- Sliced Turkey
- Lunch Meat
DAIRY
- Butter
- Sliced Cheese
- Shredded Cheese
- Milk
- Sour Cream
- Greek Yogurt
BAKING GOODS
- Baking powder
- Baking Soda
- Granulated Sugar
- Brown Sugar
- Flour
- Honey
- Vanilla Extract
- Dry Yeast
- Chocolate Chips
- Cocoa Powder
- Powdered Sugar
FREEZER
- Fruit and Berries
- Frozen Veggies (Corn, Peas, Broccoli, etc)
- Juice Concentrate
- Pizza or Other Convenience Meals
- Pie Crust
- Cookie Dough
CANNED/DRIED GOODS
- Chicken stock/broth
- Salsa
- Diced Tomatoes
- Jam/Jelly
- Peanut Butter
- Pasta Sauce
- Beans (Black Beans, Chickpeas, Baked Beans, etc)
- Soups
- Tuna
- Green Chiles
- Canned Veggies
- Coffee or Tea
Get more details on the best non-perishable and pantry foods
CONDIMENTS/SPICES
- Black Pepper
- Chili Powder
- Cinnamon
- Crushed Red Pepper
- Cumin
- Garlic Powder
- Ketchup
- Mustard
- Mayo
- Nutmeg
- Paprika
- Salt (Course Sea Salt and Kosher Salt)
- Soy Sauce
- Steak Sauce
- Hot Sauce/ Buffalo Sauce
- Salad Dressings
OILS/VINEGARS
- Apple cider vinegar
- Balsamic vinegar
- Coconut Oil
- Olive Oil
- Vegetable/Canola Oil
- Red Wine Vinegar
- White Vinegar
- Cooking Wine
- White Wine Vinegar
SNACKS
- Crackers
- Nuts
- Quick Oats
- Popcorn
- Tortilla Chips
- Cereal
Click to get my Free Printable Grocery List for the perfectly stocked pantry and freezer!

Click ☝🏻 for my FREE Grocery List Printable!
I hope this essential grocery list can help you buy what you need and make your home cooking so much easier!
Stock Your Kitchen
Find more ideas for your grocery list, stock up your kitchen, and print more cooking guides and charts to keep handy!

Non-Perishable Foods to Stock Up On

Frozen Vegetables to Stock Up On (and Recipes to Make)

Ultimate List of Cooking Herbs for Your Kitchen

Ultimate List of Cooking Spices for Your Kitchen

Cooking Oil 101: Types of Cooking Oils to Use

26 Types of Pasta and When to Use Them

What Fruits and Vegetables are in Season?

Meat Temperature Chart (Free Printable)

How to Meal Prep (Guide for Beginners)

Basic Cooking Measurements & Kitchen Conversion Chart

