
By Becky Hardin
Published May 7, 2018
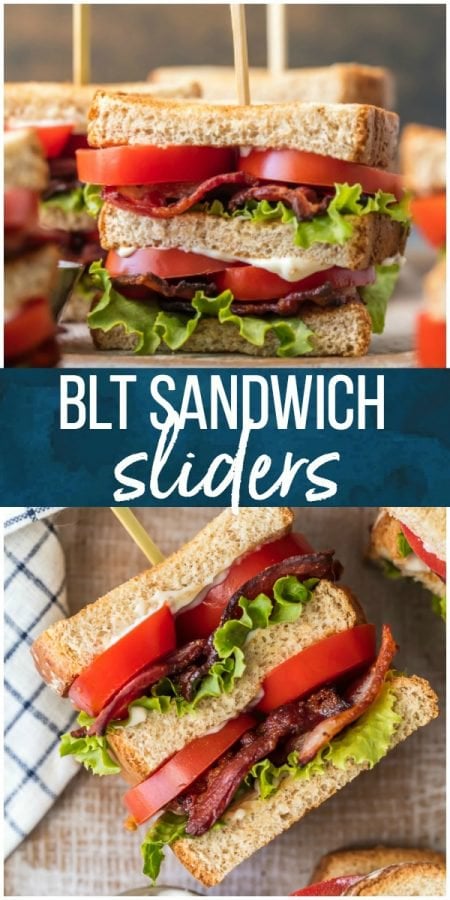
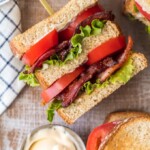
These BLT sandwich sliders are one of my favorite fun and tasty recipes to bring to a summer party. These mini BLTs have toasty bread, crunchy thick-cut bacon, juicy ripe tomatoes, fresh crisp lettuce, and creamy real mayonnaise. It just doesn’t get better than that! They’re the perfect shareable appetizer or main course. This is truly such a simple and foolproof recipe for a crowd.
These BLT sandwich sliders have become a summer staple at my house. My husband and I just love the fresh classic flavors of a BLT , and Henry loves to snack on the bacon and tomato. I love finding recipes that the entire family can enjoy on a hot balmy day. Something about that cool, creamy mayo makes me think it’s cooler outside than it actually is!
What’s in This BLT Sliders Recipe?
- Bread: I prefer to use wheat bread for this recipe, but of course, any kind of sandwich bread will work.
- Bacon : I used thick-cut bacon for a bit more chew, but any kind works. Cook to your preference.
- Tomatoes: I used Roma tomatoes for large slices. They help keep the sandwiches moist and juicy.
- Lettuce: Adds a bit of crunch. I like green leaf lettuce, but iceberg or Romaine also work.
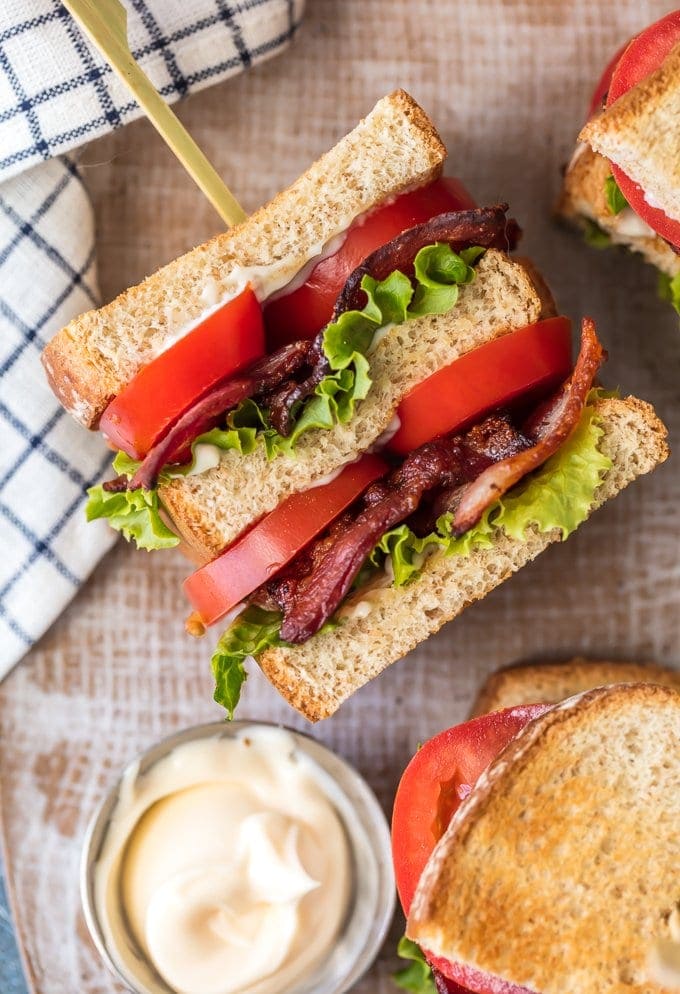
- Mayonnaise : No arguing here! Real mayo is an absolute must. It just is. End of story. :)
Tips for Success
- Always use fresh ingredients. I’m talking the best and freshest Roma tomatoes, crisp green leaf lettuce from the organic section, and thick-cut bacon from the deli counter. With such a simple and classic recipe, the best ingredients are a must. They make all the difference.
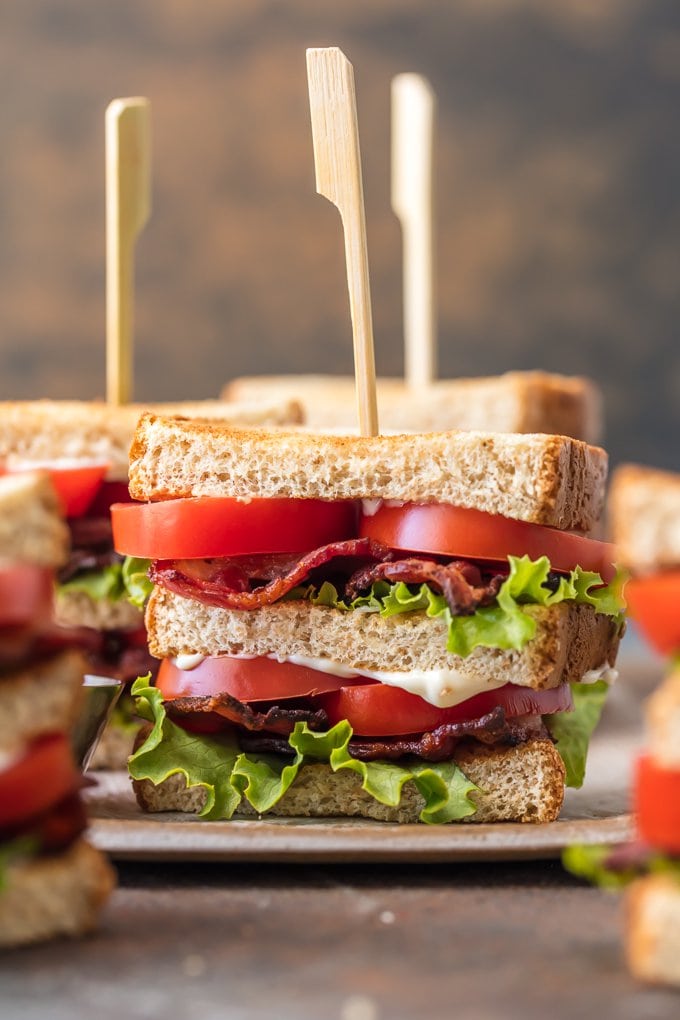
- I love the simple flavor and texture addition of toasting the bread. Although the sandwiches are served cold, toasting the bread adds a nice crunch and keeps these sandwiches from getting soggy.
- Feel free to customize these sandwiches by adding honey ham, mozzarella cheese, or sliced avocado. I also love the addition of fresh basil leaves!
- Cut the bread into quarters (instead of halves) and load up a long skewer to create mini BLT sandwiches.
How to Store
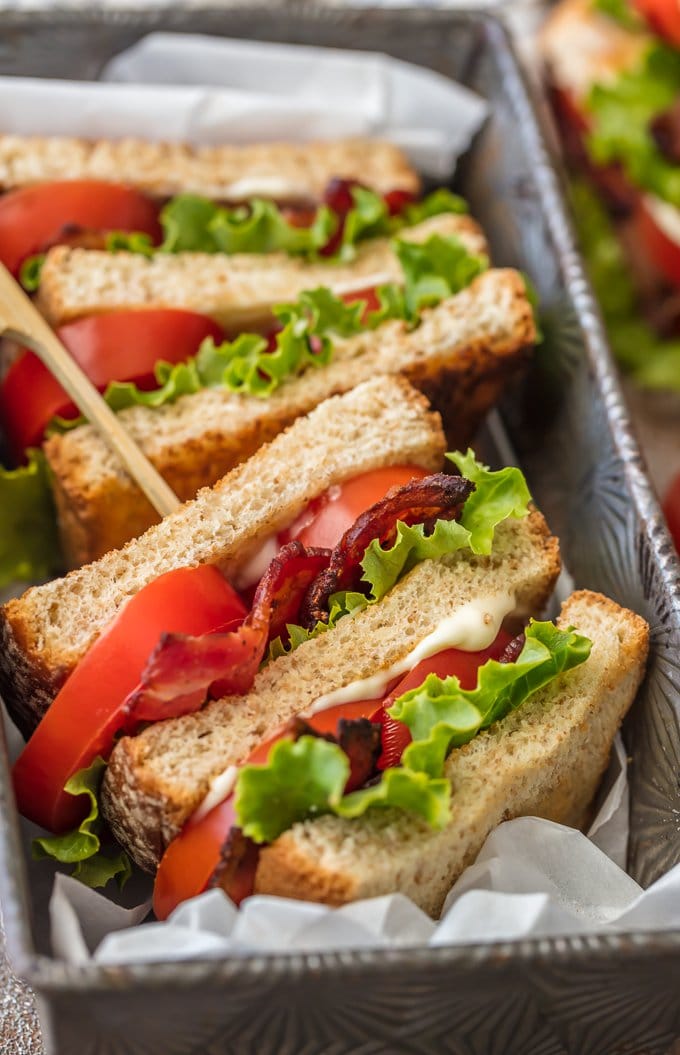
I have found that these BLT sliders taste best fresh, but they will keep well overnight in the refrigerator. Keep in mind that the bread may start to go soggy the longer they sit.
Serving Suggestions
I have so many favorite side dishes for serving with BLT sliders. Typically I will serve them with sweet potato chips , french fries , or avocado fries . For a real indulgence, I like to dip mine in some BLT guacamole — yum!
Ingredients1x2x3x
- ▢ 6 slices wheat bread
- ▢ 8 slices thick-cut bacon
- ▢ 4 large Roma tomatoes
- ▢ 4 leaves green leaf lettuce cut into 8 squares
- ▢ ½ cup mayonnaise
Instructions
- Toast the six slices of bread in a toaster, cut in half, and set aside. 6 slices wheat bread
- Set a large frying pan to medium heat. Slice each piece of bacon in half. Fry the bacon for 3-4 minutes and then flip and allow the other side to cook for 2 minutes, or until crispy to your liking. I like my bacon well done and extra crispy :). Set aside on a paper towel lined plate to drain. 8 slices thick-cut bacon
- Slice each roma tomato into 4 slices. Set aside. 4 large Roma tomatoes
- We are going to use 3 half slices of bread per slider. So you’ll want to put ½ tablespoon of mayo on the inside of the bottom piece, both sides of the middle piece, and the inside of the top piece. You can do that as you assemble, or right before. ½ cup mayonnaise
- After you’ve added your mayo, add one square of lettuce to the mayo side of the bottom half piece of bread. Top with 2 pieces of cooked bacon, two slices of tomato, and the middle piece of bread. 4 leaves green leaf lettuce
- Top the middle piece again with lettuce, 2 pieces of cooked bacon, and two slices of tomato. Top with the final half piece of bread and secure with a large toothpick. Repeat with the remaining ingredients, creating 4 half-sandwich sliders total.
Equipment
- Large wooden toothpicks for assembly
Becky’s Tips
Nutrition information is automatically calculated, so should only be used as an approximation.
More Slider Recipes to Try!

Cheeseburger Sliders (Baked Sliders Recipe)
Turkey Sliders
Ham and Cheese Sliders

Healthy Chicken Salad Sliders
BLT Sandwich Sliders Recipe
Equipment
- Large wooden toothpicks for assembly
Ingredients
- 6 slices wheat bread
- 8 slices thick-cut bacon
- 4 large Roma tomatoes
- 4 leaves green leaf lettuce cut into 8 squares
- ½ cup mayonnaise
Instructions
- Toast the six slices of bread in a toaster, cut in half, and set aside. 6 slices wheat bread
- Set a large frying pan to medium heat. Slice each piece of bacon in half. Fry the bacon for 3-4 minutes and then flip and allow the other side to cook for 2 minutes, or until crispy to your liking. I like my bacon well done and extra crispy :). Set aside on a paper towel lined plate to drain. 8 slices thick-cut bacon
- Slice each roma tomato into 4 slices. Set aside. 4 large Roma tomatoes
- We are going to use 3 half slices of bread per slider. So you’ll want to put ½ tablespoon of mayo on the inside of the bottom piece, both sides of the middle piece, and the inside of the top piece. You can do that as you assemble, or right before. ½ cup mayonnaise
- After you’ve added your mayo, add one square of lettuce to the mayo side of the bottom half piece of bread. Top with 2 pieces of cooked bacon, two slices of tomato, and the middle piece of bread. 4 leaves green leaf lettuce
- Top the middle piece again with lettuce, 2 pieces of cooked bacon, and two slices of tomato. Top with the final half piece of bread and secure with a large toothpick. Repeat with the remaining ingredients, creating 4 half-sandwich sliders total.
Notes
Nutrition
By Becky Hardin
Published Jul 12, 2017


This Essential Grocery List is an absolute life saver for my family on the busy weeks. When I started this journey to learn how to cook, I quickly realized that the first step in cooking is having staple ingredients on hand. I want to avoid having to run out to the grocery store every single time I prepare a new recipe. Having a well-stocked pantry has made my life in the kitchen so much simpler, because when it’s time to cook, I have what I need.

Essential Grocery List
It’s so helpful to have a basic grocery list to help me remember which foods to buy at the store. This food shopping list is my go-to!
It’s better to stock up on things like grains, seasonings and spices, baking essentials, oils, condiments, canned and frozen foods, etc. so I can just grab them when I need them. These things have a long shelf life , so I keep them in my kitchen for convenience.
However, I do have to go to the supermarket sometimes, and there’s a way to make that trip easy and hassle-free: I keep a grocery list! If I go in blindly, I’ll leave with things I don’t need, and nothing that actually helps me prepare a good meal.
In the list below, I’ve compiled everything I always have on my stock-up grocery list.
I’ve got you covered! I created an easy grocery list filled with all of the essentials. Plus there’s a free printable version that you can take with you to the grocery store. It has everything you need to stock your pantry, your freezer, and your refrigerator.

Click to get my Free Printable Grocery List
What to Buy at the Grocery Store
This is the perfect grocery list filled with all the basics and essentials. It should help get you going if you’re new to cooking, or if you’re just left staring helplessly at an empty pantry and don’t know how to fill it.
When I first started cooking, things could seem overwhelming. I quickly realized that they more prepared I could be, the more confident I felt. If you already have the basics in your kitchen, then you can shop stress-free.
So print out our easy grocery list, stock up your pantry and fridge, and you’ll be cooking in no time!
Click to get my Free Printable Grocery List for the perfectly stocked pantry and freezer!
Fresh Produce
- Apples
- Bananas
- Strawberries
- Avocados
- Bell Peppers
- Carrots
- Broccoli
- Garlic
- Lemons/Limes
- Onion
- Parsley
- Cilantro
- Basil
- Potatoes
- Spinach
- Tomatoes
GRAINS
- Breadcrumbs
- Pasta
- Quinoa
- Rice
- Sandwich Bread
- Tortillas
MEAT/PROTEIN
- Chicken
- Eggs
- Ground Beef
- Sliced Turkey
- Lunch Meat
DAIRY
- Butter
- Sliced Cheese
- Shredded Cheese
- Milk
- Sour Cream
- Greek Yogurt
BAKING GOODS
- Baking powder
- Baking Soda
- Granulated Sugar
- Brown Sugar
- Flour
- Honey
- Vanilla Extract
- Dry Yeast
- Chocolate Chips
- Cocoa Powder
- Powdered Sugar
FREEZER
- Fruit and Berries
- Frozen Veggies (Corn, Peas, Broccoli, etc)
- Juice Concentrate
- Pizza or Other Convenience Meals
- Pie Crust
- Cookie Dough
CANNED/DRIED GOODS
- Chicken stock/broth
- Salsa
- Diced Tomatoes
- Jam/Jelly
- Peanut Butter
- Pasta Sauce
- Beans (Black Beans, Chickpeas, Baked Beans, etc)
- Soups
- Tuna
- Green Chiles
- Canned Veggies
- Coffee or Tea
Get more details on the best non-perishable and pantry foods
CONDIMENTS/SPICES
- Black Pepper
- Chili Powder
- Cinnamon
- Crushed Red Pepper
- Cumin
- Garlic Powder
- Ketchup
- Mustard
- Mayo
- Nutmeg
- Paprika
- Salt (Course Sea Salt and Kosher Salt)
- Soy Sauce
- Steak Sauce
- Hot Sauce/ Buffalo Sauce
- Salad Dressings
OILS/VINEGARS
- Apple cider vinegar
- Balsamic vinegar
- Coconut Oil
- Olive Oil
- Vegetable/Canola Oil
- Red Wine Vinegar
- White Vinegar
- Cooking Wine
- White Wine Vinegar
SNACKS
- Crackers
- Nuts
- Quick Oats
- Popcorn
- Tortilla Chips
- Cereal
Click to get my Free Printable Grocery List for the perfectly stocked pantry and freezer!

Click ☝🏻 for my FREE Grocery List Printable!
I hope this essential grocery list can help you buy what you need and make your home cooking so much easier!
Stock Your Kitchen
Find more ideas for your grocery list, stock up your kitchen, and print more cooking guides and charts to keep handy!

Non-Perishable Foods to Stock Up On

Frozen Vegetables to Stock Up On (and Recipes to Make)

Ultimate List of Cooking Herbs for Your Kitchen

Ultimate List of Cooking Spices for Your Kitchen

Cooking Oil 101: Types of Cooking Oils to Use

26 Types of Pasta and When to Use Them

What Fruits and Vegetables are in Season?

Meat Temperature Chart (Free Printable)

How to Meal Prep (Guide for Beginners)

Basic Cooking Measurements & Kitchen Conversion Chart

