
By Becky Hardin
Published Sep 23, 2019

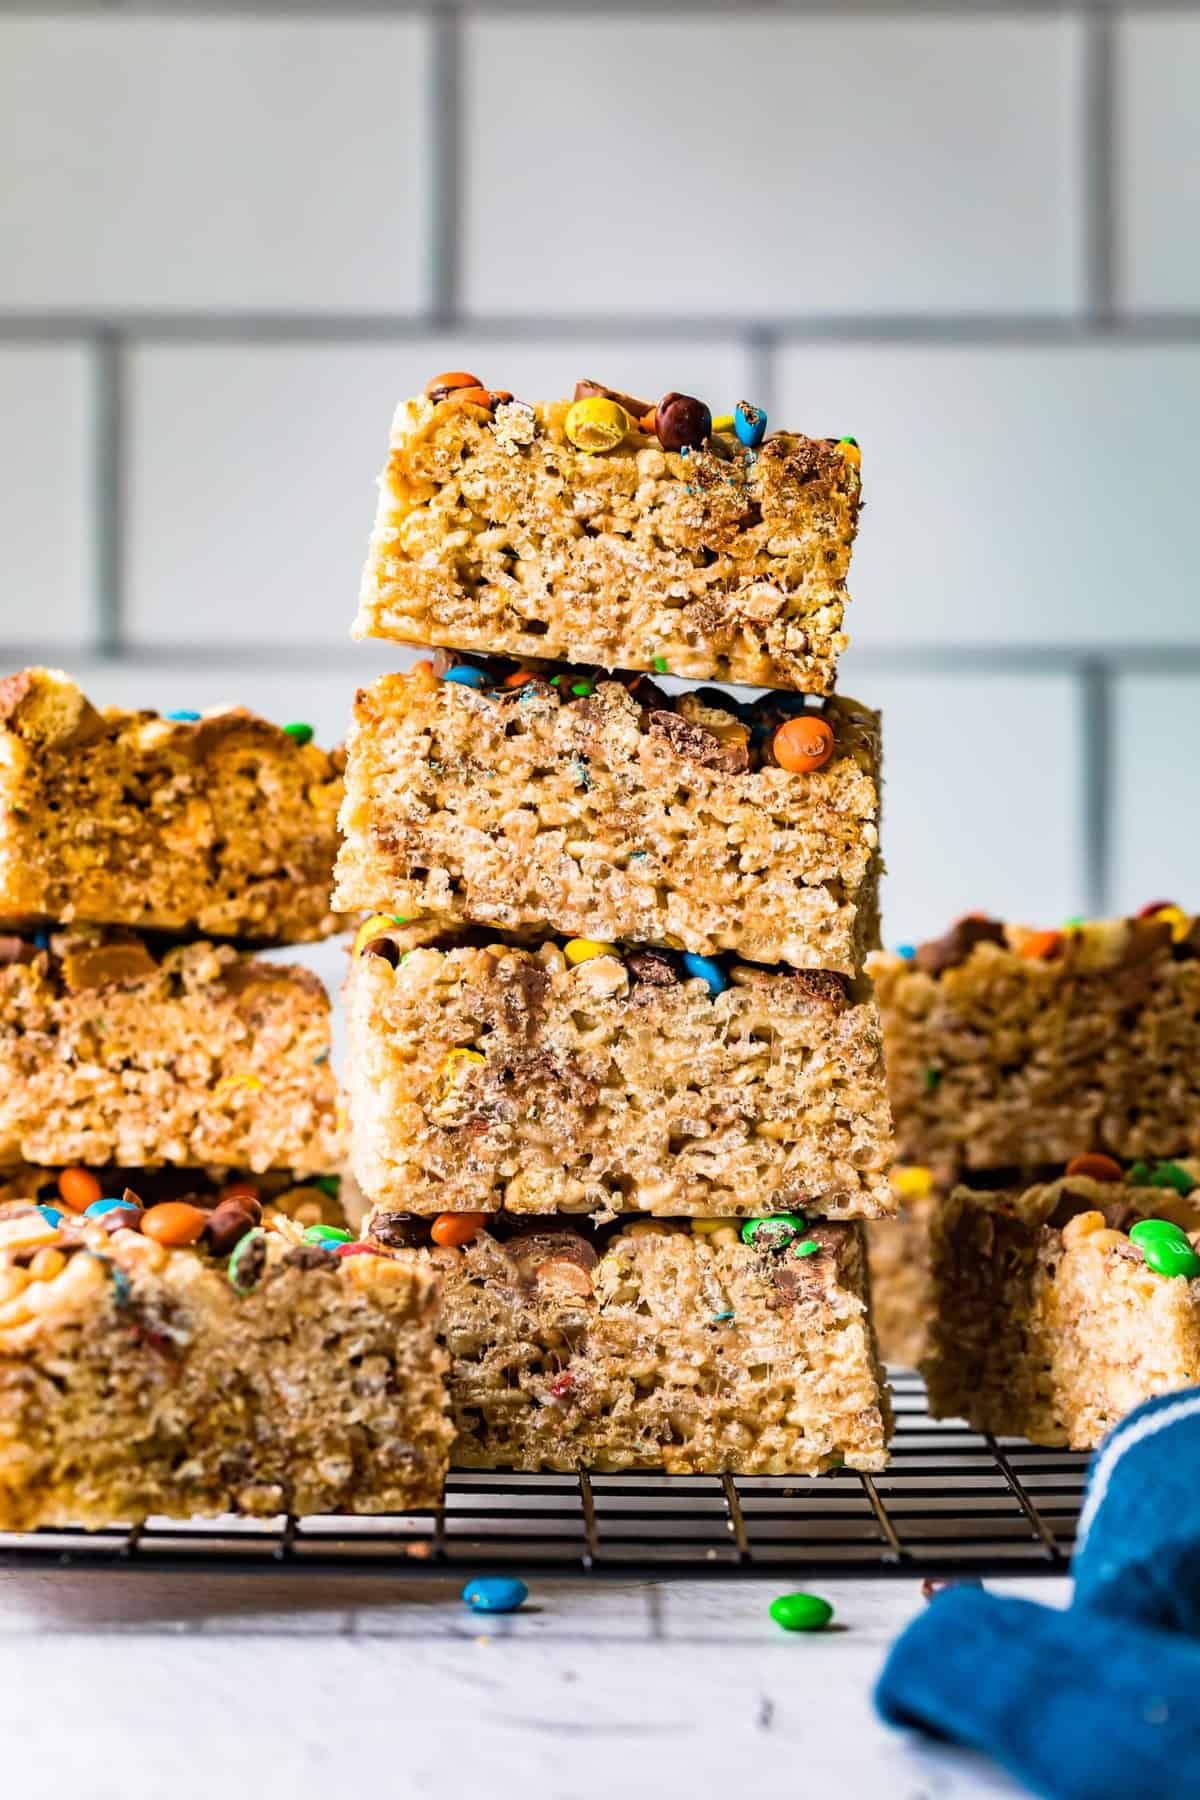
These Candy Bar Rice Krispie Treats are the perfect Halloween treat, or a great way to use up your Halloween candy! Easy and quick to make with simple pantry ingredients, they’re perfect to serve at parties!
I have got the perfect Halloween treat for you, that kids and adults will all love! Fun to make, it’s a great way to use up all the candy collected from trick or treating!
How to Make These Candy Bar Rice Krispie Treats
- Spray a 13×9-inch baking pan with nonstick cooking spray.
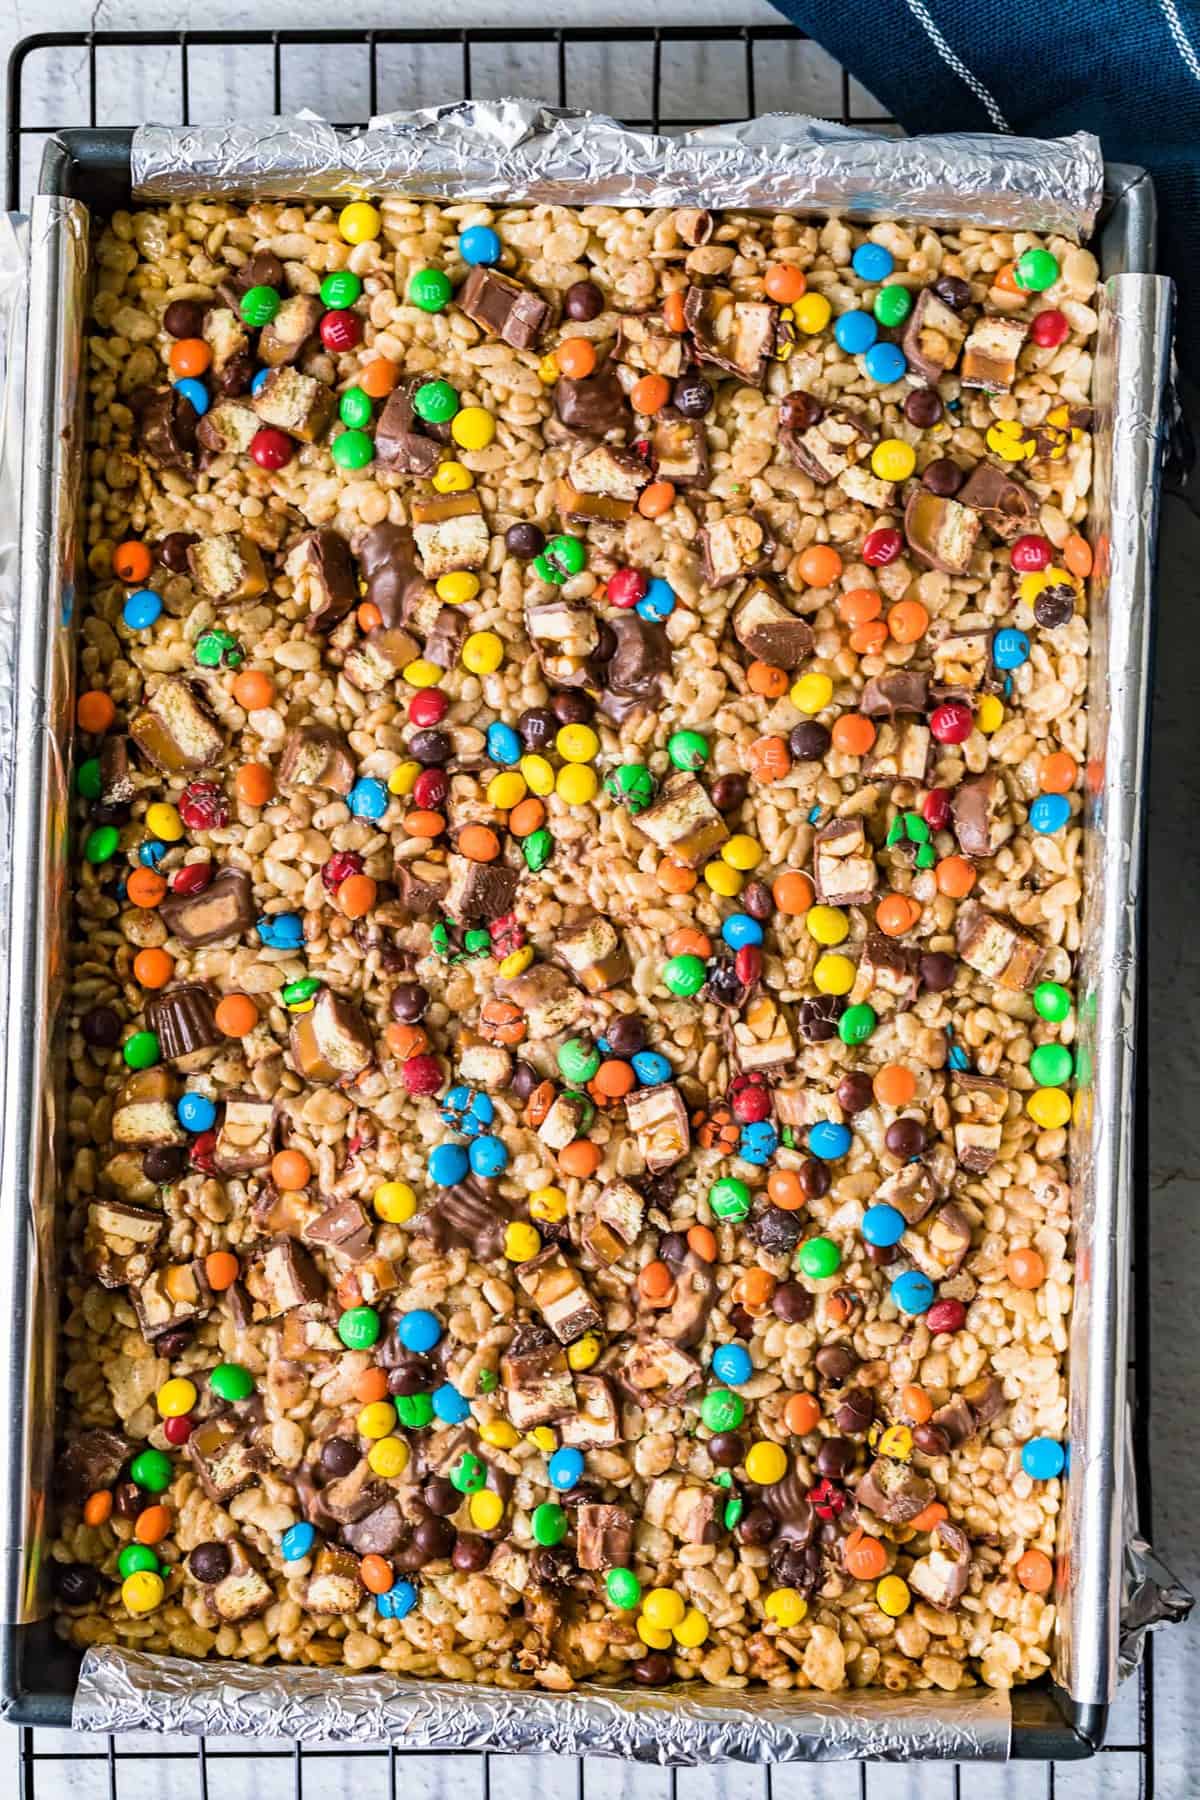
- Make one aluminum foil sling by cutting one piece of foil 18-inches long and folding it 8-inches wide. Fit the foil into the length of the pan, pushing it against the sides and corners of the pan. The excess should hang over about 2-inches on the sides.
- Cut another piece of foil 14-inches long ((if using extra large foil, fold it to a 12-inch width.) and fit it, perpendicular, over the first sheet. Again, the foil should have an excess of a couple of inches on each end.
- Spray the foil pieces with nonstick cooking spray.
- Spray a rubber spatula with non-stick cooking spray.
- Cut the candy bars into 8 pieces each and combine all candy in a medium-size mixing bowl. Mix well.
- Melt the butter in a large Dutch oven set over medium-low heat. Add marshmallows, vanilla and salt. Cook and stir with sprayed spatula (re-spraying as needed) about 3 minutes or until marshmallows are just melted.
- Remove from the heat and stir in cereal and half of the candy mixture. Stir until the candy is fully incorporated.
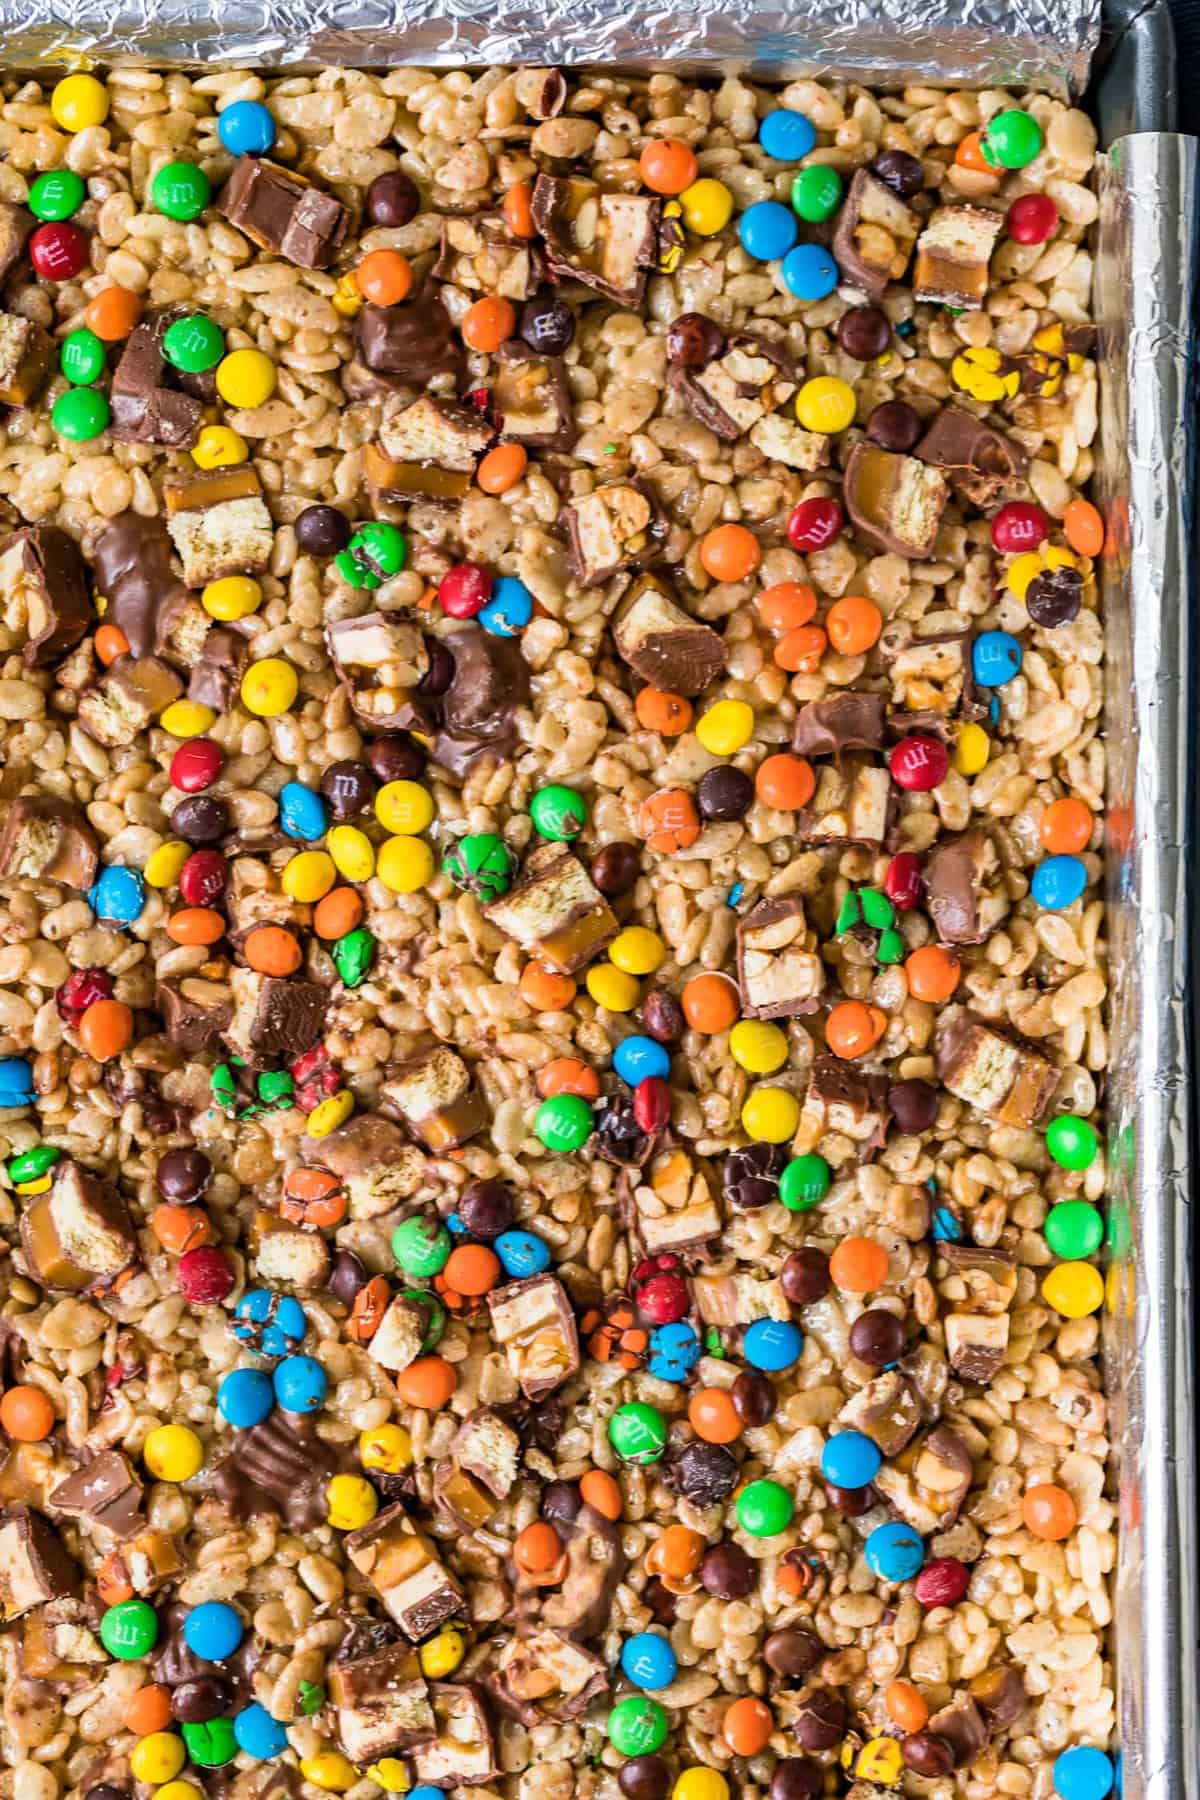
- Spray the spatula or spray your hands and pour the mixture into the prepared pan. Press the Rice Krispie/marshmallow mixture evenly into the pan. Top with the remaining candy and lightly press the candy into the cereal mixture.
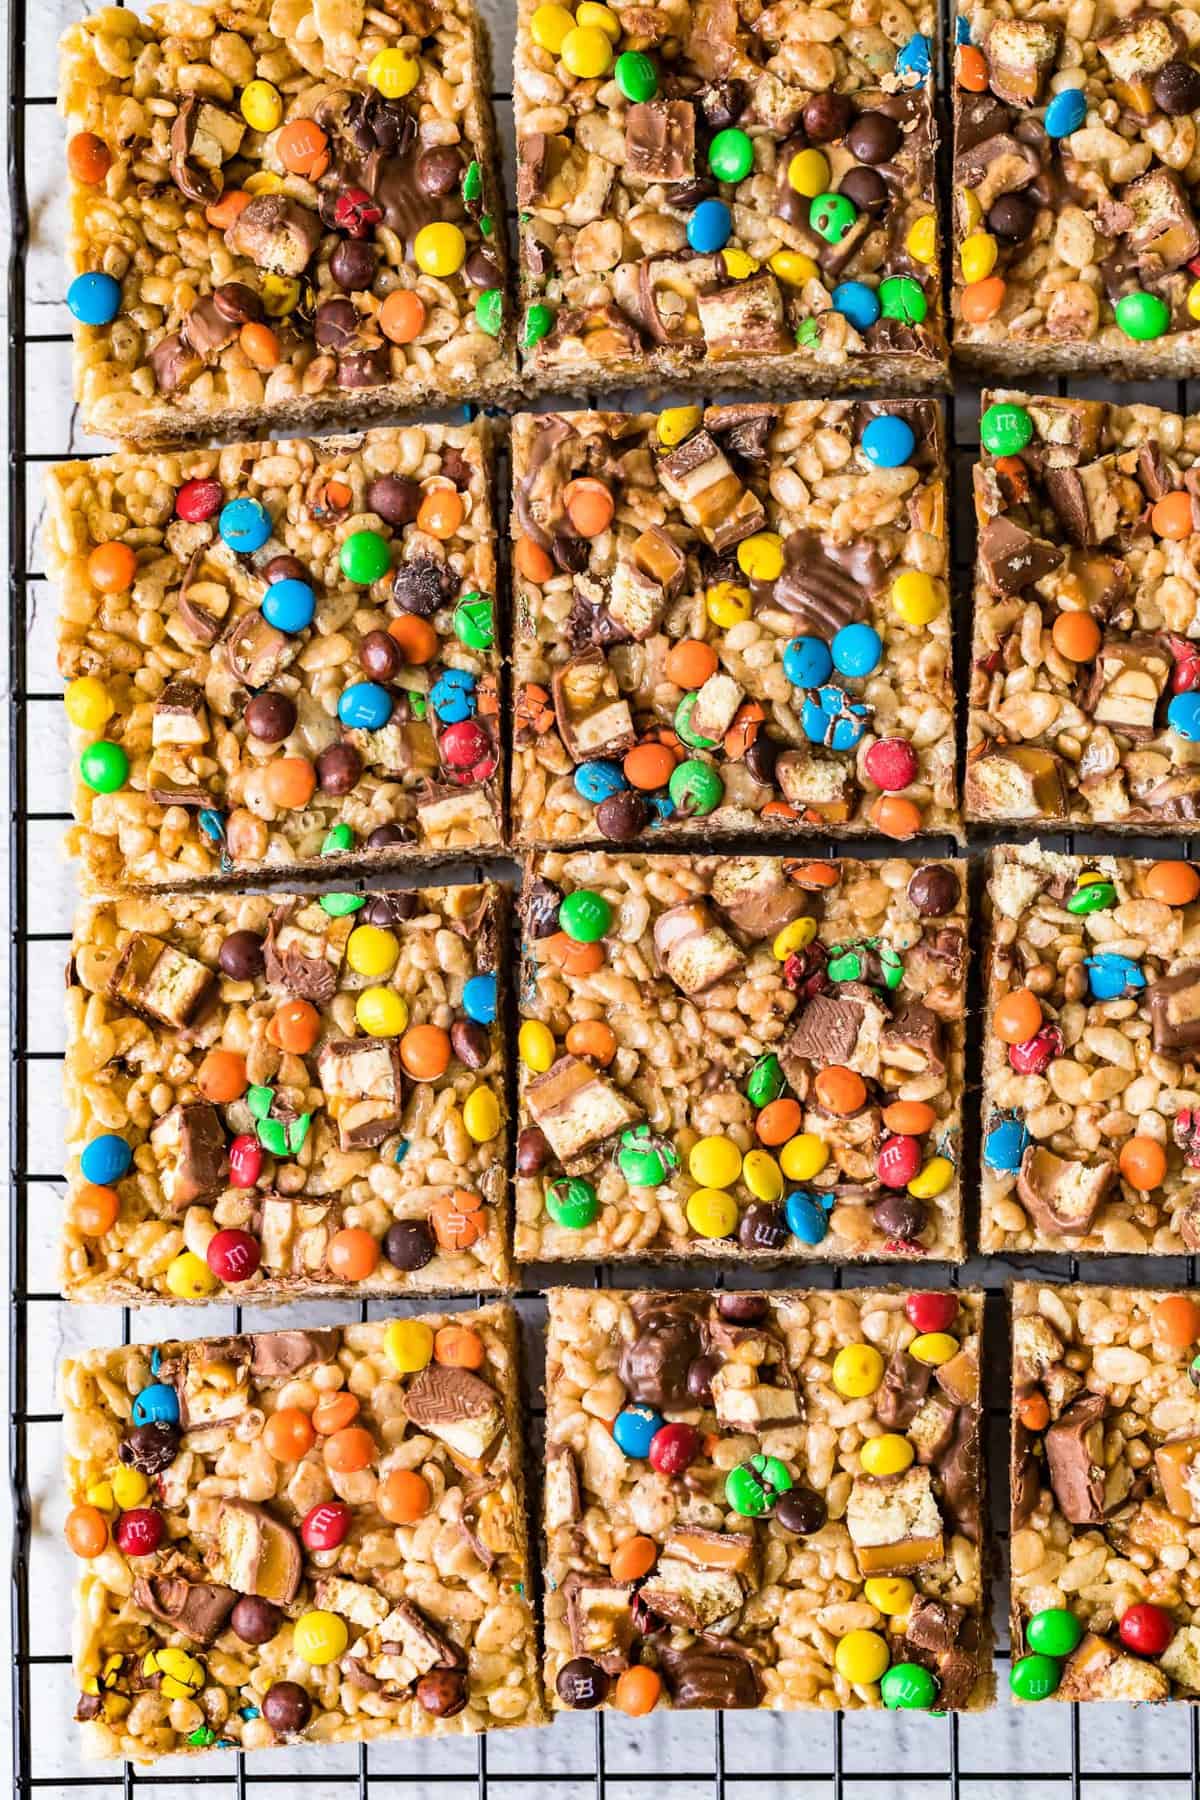
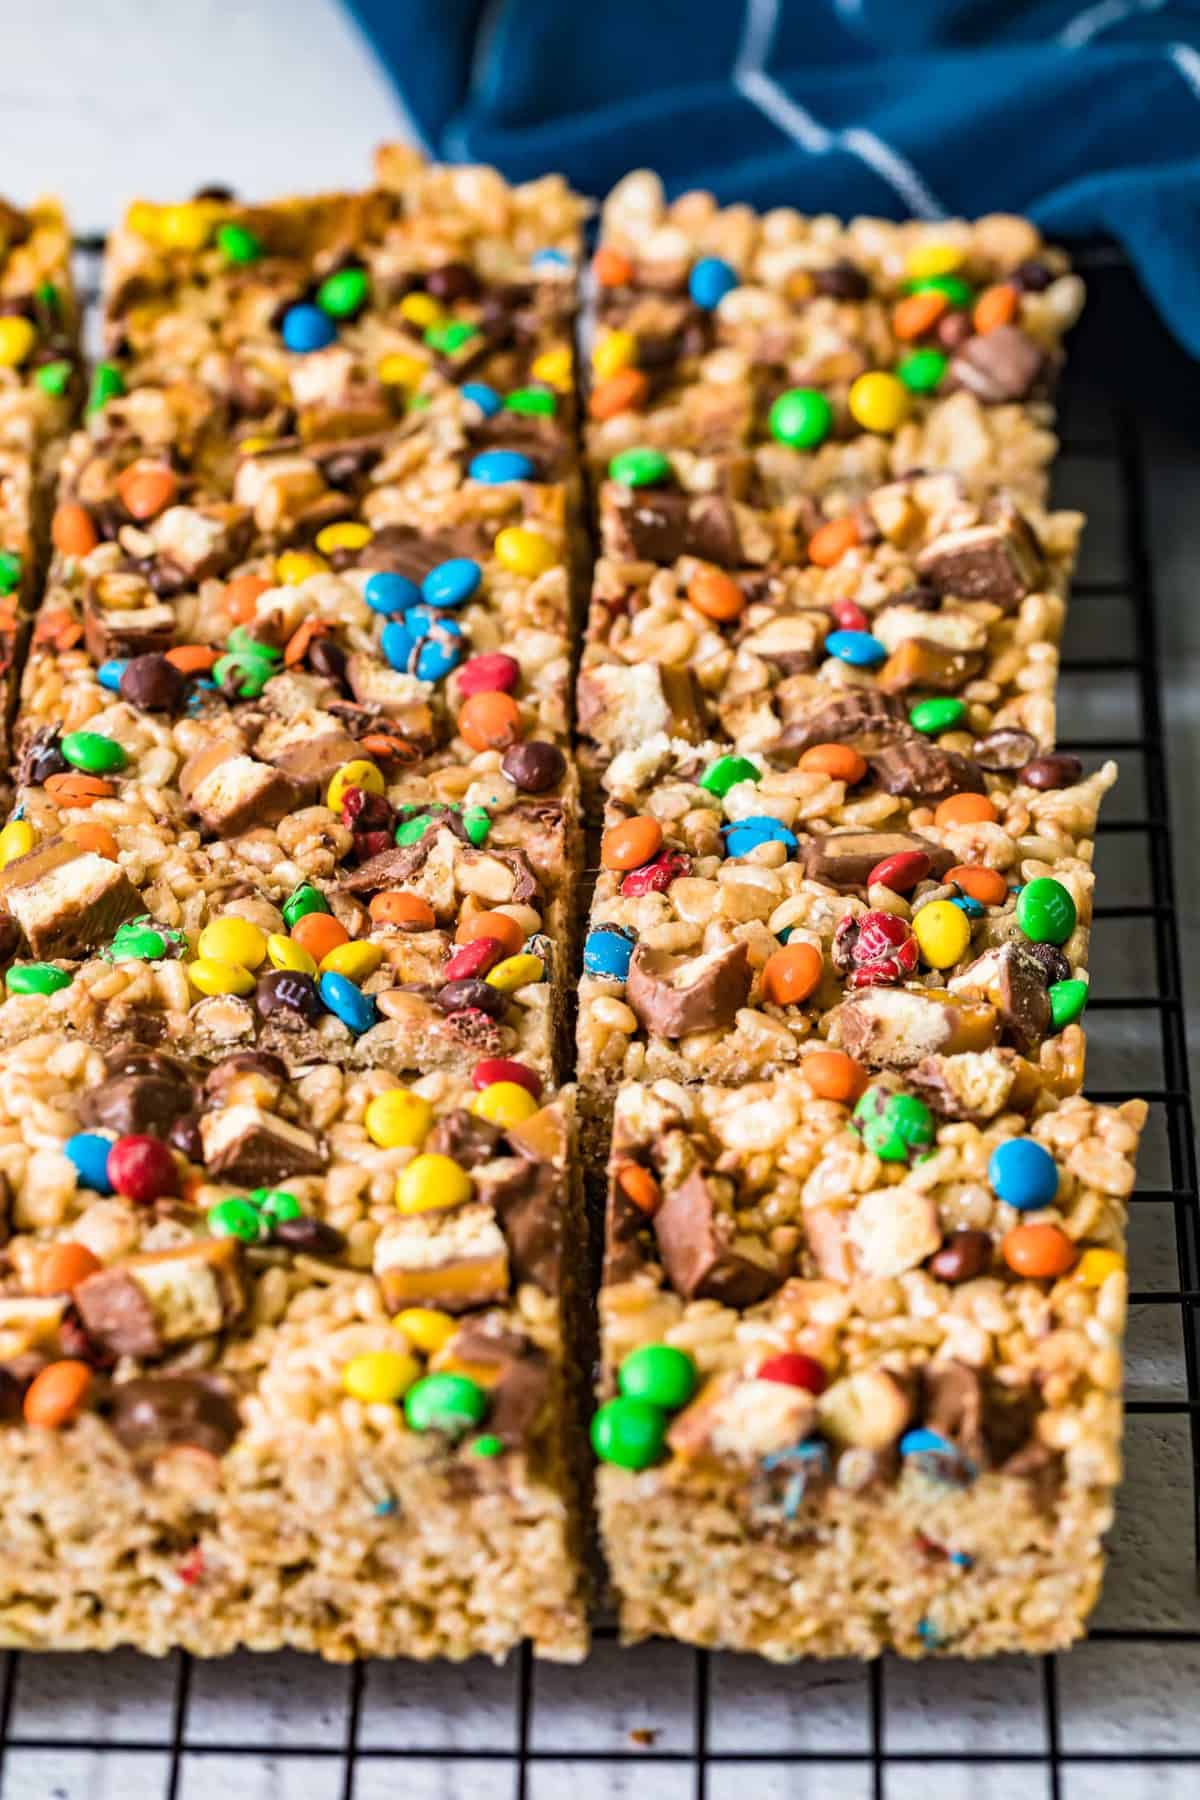
- Set the Rice Krispie Treats on a cooling rack and let sit for 1 hour to firm. After an hour, lift the Krispies by the foil sling and return to the cooling rack to cool completely. Cut into equal-sized 12-24 bars.
Loaded Rice Krispie Treats
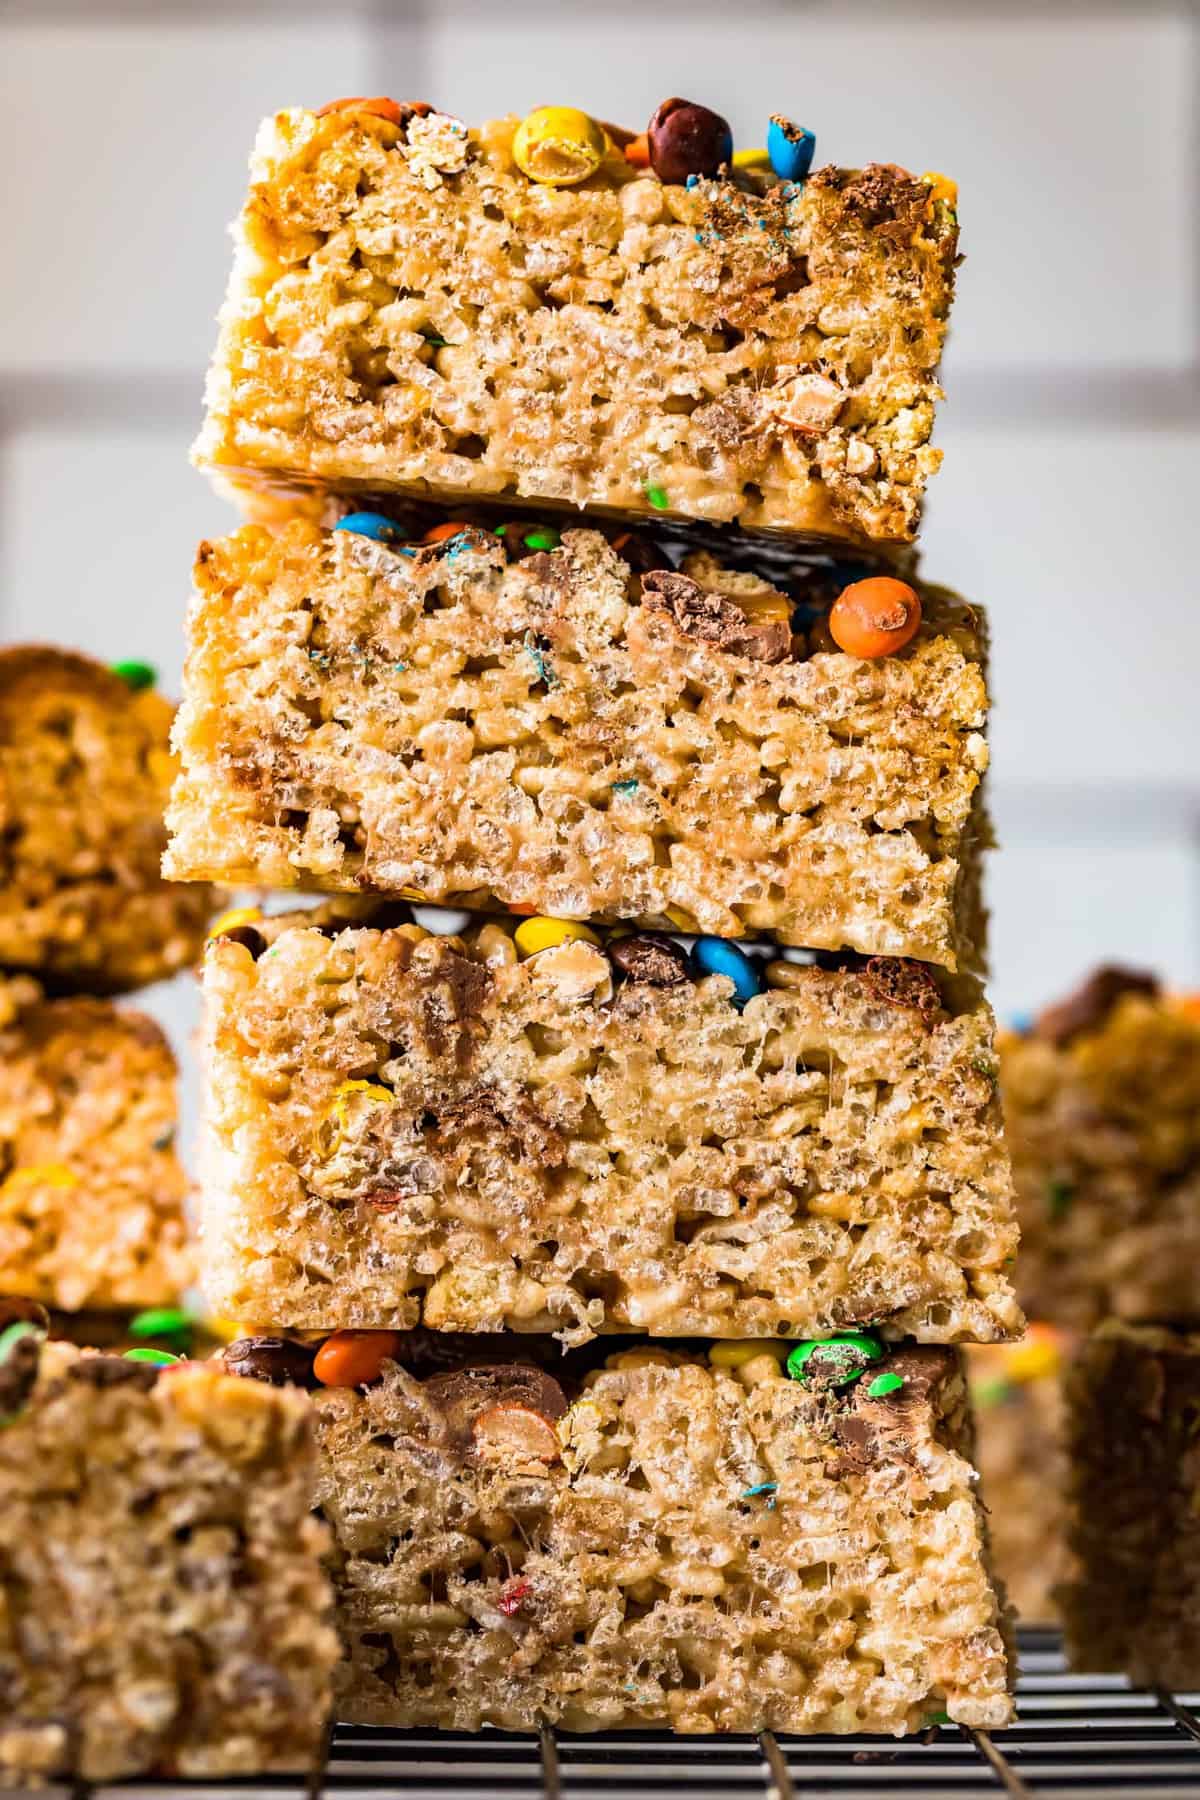
I love how colorful and fun these treats are, and they’re a great recipe to get the kids to help with too! I use M&Ms, Twix, Snickers and Peanut Butter Cups, but you can use your favorite chocolate candies! They take no time at all to make and bake, you just have to be patient and let them cool before you eat them!
The best rice krispie treats!
These treats are everything that a rice krispie bar should be! Deliciously crunchy and chewy and perfect for any sweet tooth! The recipe makes a big batch, so they’re great to hand out to the neighborhood kids this Halloween.
Try these other rice krispies recipes too!
- Oreo Rice Krispie Treats
- Chocolate Rice Krispies
- Lucky Charms Treats
- Easter Rice Krispies
How long do rice krispie treats stay fresh?
Once the rice krispie treats have cooled to room temperature, store then in an airtight container at room temperature. They will keep fresh for around a week. Be sure to make a double batch!
Top Tips to Make This Recipe
- Feel free to whatever chocolate based candy you have left over!
- Line a pan with foil and spray with cooking oil for easy removal.
- Allow the krispies to cool completely before serving.
Be sure to check out these other Halloween treats!
- Pumpkin Pie Punch (Thanksgiving or Halloween Punch Idea)
- Pumpkin Brownies (Super Easy Fall Dessert Recipe)
- Movie Night Cookies
- How to Make Rock Candy
- Homemade Scotcheroos
Ingredients1x2x3x
- ▢ 10 mini Twix candy bars 100 grams, chopped (about 1¼ cups)
- ▢ 10 mini Snickers candy bars 90 grams, chopped (about 1¼ cups)
- ▢ ¾ cup mini M&M’s 133 grams
- ▢ ¾ cup mini Reese’s Peanut Butter Cups 104 grams, halved
- ▢ 8 tablespoons unsalted butter 113 grams (1 stick)
- ▢ 20 ounces jumbo marshmallows 567 grams (2 packages)
- ▢ 2 teaspoons pure vanilla extract 8 grams
- ▢ ¼ teaspoon kosher salt
- ▢ 10 cups Rice Krispies cereal 283 grams (10 ounces)
Video
Instructions
- Spray a 9x13-inch baking pan with nonstick cooking spray.
- Make one aluminum foil sling by cutting one piece of foil 18 inches long and folding it 8 inches wide. Fit the foil into the length of the pan, pushing it against the sides and corners of the pan. The excess should hang over about 2 inches on the sides.
- Cut another piece of foil 14 inches long (if using extra-large foil, fold it to a 12-inch width) and fit it, perpendicular, over the first sheet. Again, the foil should have an excess of a couple of inches on each end.
- Spray the foil pieces with nonstick cooking spray and spray a rubber spatula with nonstick cooking spray.
- Combine all candy in a medium-size mixing bowl. Mix well. 10 mini Twix candy bars, 10 mini Snickers candy bars, ¾ cup mini M&M’s, ¾ cup mini Reese’s Peanut Butter Cups
- Melt the butter in a large Dutch oven set over medium-low heat. Add marshmallows, vanilla, and salt. Cook and stir with the sprayed spatula (re-spraying as needed) until the marshmallows are just melted, about 3 minutes. 8 tablespoons unsalted butter, 20 ounces jumbo marshmallows, 2 teaspoons pure vanilla extract, ¼ teaspoon kosher salt
- Remove from the heat and stir in cereal and half of the candy mixture. Stir until the candy is fully incorporated. 10 cups Rice Krispies cereal
- Spray the spatula or spray your hands and pour the mixture into the prepared pan. Press the Rice Krispie/marshmallow mixture evenly into the pan. Top with the remaining candy and lightly press the candy into the cereal mixture.
- Set the Krispie Treats on a cooling rack and let sit for 1 hour to firm. After an hour, lift the Krispies by the foil sling and return to the cooling rack to cool completely. Cut into 24 equal-sized bars.
Equipment
- Kitchen Scale (optional)
- 9x13 Baking Pan
- Dutch Oven
Becky’s Tips
- Feel free to whatever chocolate-based candy you have left over!
- Line a pan with foil and spray with cooking oil for easy removal.
- Allow the krispies to cool completely before serving.
Nutrition information is automatically calculated, so should only be used as an approximation.

Candy Bar Rice Krispie Treats Recipe
Equipment
- Kitchen Scale (optional)
- 9x13 Baking Pan
- Dutch Oven
Ingredients
- 10 mini Twix candy bars 100 grams, chopped (about 1¼ cups)
- 10 mini Snickers candy bars 90 grams, chopped (about 1¼ cups)
- ¾ cup mini M&M’s 133 grams
- ¾ cup mini Reese’s Peanut Butter Cups 104 grams, halved
- 8 tablespoons unsalted butter 113 grams (1 stick)
- 20 ounces jumbo marshmallows 567 grams (2 packages)
- 2 teaspoons pure vanilla extract 8 grams
- ¼ teaspoon kosher salt
- 10 cups Rice Krispies cereal 283 grams (10 ounces)
Instructions
- Spray a 9x13-inch baking pan with nonstick cooking spray.
- Make one aluminum foil sling by cutting one piece of foil 18 inches long and folding it 8 inches wide. Fit the foil into the length of the pan, pushing it against the sides and corners of the pan. The excess should hang over about 2 inches on the sides.
- Cut another piece of foil 14 inches long (if using extra-large foil, fold it to a 12-inch width) and fit it, perpendicular, over the first sheet. Again, the foil should have an excess of a couple of inches on each end.
- Spray the foil pieces with nonstick cooking spray and spray a rubber spatula with nonstick cooking spray.
- Combine all candy in a medium-size mixing bowl. Mix well. 10 mini Twix candy bars, 10 mini Snickers candy bars, ¾ cup mini M&M’s, ¾ cup mini Reese’s Peanut Butter Cups
- Melt the butter in a large Dutch oven set over medium-low heat. Add marshmallows, vanilla, and salt. Cook and stir with the sprayed spatula (re-spraying as needed) until the marshmallows are just melted, about 3 minutes. 8 tablespoons unsalted butter, 20 ounces jumbo marshmallows, 2 teaspoons pure vanilla extract, ¼ teaspoon kosher salt
- Remove from the heat and stir in cereal and half of the candy mixture. Stir until the candy is fully incorporated. 10 cups Rice Krispies cereal
- Spray the spatula or spray your hands and pour the mixture into the prepared pan. Press the Rice Krispie/marshmallow mixture evenly into the pan. Top with the remaining candy and lightly press the candy into the cereal mixture.
- Set the Krispie Treats on a cooling rack and let sit for 1 hour to firm. After an hour, lift the Krispies by the foil sling and return to the cooling rack to cool completely. Cut into 24 equal-sized bars.
Video
Notes
- Feel free to whatever chocolate-based candy you have left over!
- Line a pan with foil and spray with cooking oil for easy removal.
- Allow the krispies to cool completely before serving.
Nutrition
By Becky Hardin
Published Jul 12, 2017


This Essential Grocery List is an absolute life saver for my family on the busy weeks. When I started this journey to learn how to cook, I quickly realized that the first step in cooking is having staple ingredients on hand. I want to avoid having to run out to the grocery store every single time I prepare a new recipe. Having a well-stocked pantry has made my life in the kitchen so much simpler, because when it’s time to cook, I have what I need.

Essential Grocery List
It’s so helpful to have a basic grocery list to help me remember which foods to buy at the store. This food shopping list is my go-to!
It’s better to stock up on things like grains, seasonings and spices, baking essentials, oils, condiments, canned and frozen foods, etc. so I can just grab them when I need them. These things have a long shelf life , so I keep them in my kitchen for convenience.
However, I do have to go to the supermarket sometimes, and there’s a way to make that trip easy and hassle-free: I keep a grocery list! If I go in blindly, I’ll leave with things I don’t need, and nothing that actually helps me prepare a good meal.
In the list below, I’ve compiled everything I always have on my stock-up grocery list.
I’ve got you covered! I created an easy grocery list filled with all of the essentials. Plus there’s a free printable version that you can take with you to the grocery store. It has everything you need to stock your pantry, your freezer, and your refrigerator.

Click to get my Free Printable Grocery List
What to Buy at the Grocery Store
This is the perfect grocery list filled with all the basics and essentials. It should help get you going if you’re new to cooking, or if you’re just left staring helplessly at an empty pantry and don’t know how to fill it.
When I first started cooking, things could seem overwhelming. I quickly realized that they more prepared I could be, the more confident I felt. If you already have the basics in your kitchen, then you can shop stress-free.
So print out our easy grocery list, stock up your pantry and fridge, and you’ll be cooking in no time!
Click to get my Free Printable Grocery List for the perfectly stocked pantry and freezer!
Fresh Produce
- Apples
- Bananas
- Strawberries
- Avocados
- Bell Peppers
- Carrots
- Broccoli
- Garlic
- Lemons/Limes
- Onion
- Parsley
- Cilantro
- Basil
- Potatoes
- Spinach
- Tomatoes
GRAINS
- Breadcrumbs
- Pasta
- Quinoa
- Rice
- Sandwich Bread
- Tortillas
MEAT/PROTEIN
- Chicken
- Eggs
- Ground Beef
- Sliced Turkey
- Lunch Meat
DAIRY
- Butter
- Sliced Cheese
- Shredded Cheese
- Milk
- Sour Cream
- Greek Yogurt
BAKING GOODS
- Baking powder
- Baking Soda
- Granulated Sugar
- Brown Sugar
- Flour
- Honey
- Vanilla Extract
- Dry Yeast
- Chocolate Chips
- Cocoa Powder
- Powdered Sugar
FREEZER
- Fruit and Berries
- Frozen Veggies (Corn, Peas, Broccoli, etc)
- Juice Concentrate
- Pizza or Other Convenience Meals
- Pie Crust
- Cookie Dough
CANNED/DRIED GOODS
- Chicken stock/broth
- Salsa
- Diced Tomatoes
- Jam/Jelly
- Peanut Butter
- Pasta Sauce
- Beans (Black Beans, Chickpeas, Baked Beans, etc)
- Soups
- Tuna
- Green Chiles
- Canned Veggies
- Coffee or Tea
Get more details on the best non-perishable and pantry foods
CONDIMENTS/SPICES
- Black Pepper
- Chili Powder
- Cinnamon
- Crushed Red Pepper
- Cumin
- Garlic Powder
- Ketchup
- Mustard
- Mayo
- Nutmeg
- Paprika
- Salt (Course Sea Salt and Kosher Salt)
- Soy Sauce
- Steak Sauce
- Hot Sauce/ Buffalo Sauce
- Salad Dressings
OILS/VINEGARS
- Apple cider vinegar
- Balsamic vinegar
- Coconut Oil
- Olive Oil
- Vegetable/Canola Oil
- Red Wine Vinegar
- White Vinegar
- Cooking Wine
- White Wine Vinegar
SNACKS
- Crackers
- Nuts
- Quick Oats
- Popcorn
- Tortilla Chips
- Cereal
Click to get my Free Printable Grocery List for the perfectly stocked pantry and freezer!

Click ☝🏻 for my FREE Grocery List Printable!
I hope this essential grocery list can help you buy what you need and make your home cooking so much easier!
Stock Your Kitchen
Find more ideas for your grocery list, stock up your kitchen, and print more cooking guides and charts to keep handy!

Non-Perishable Foods to Stock Up On

Frozen Vegetables to Stock Up On (and Recipes to Make)

Ultimate List of Cooking Herbs for Your Kitchen

Ultimate List of Cooking Spices for Your Kitchen

Cooking Oil 101: Types of Cooking Oils to Use

26 Types of Pasta and When to Use Them

What Fruits and Vegetables are in Season?

Meat Temperature Chart (Free Printable)

How to Meal Prep (Guide for Beginners)

Basic Cooking Measurements & Kitchen Conversion Chart

