
By Becky Hardin
Published Feb 3, 2021

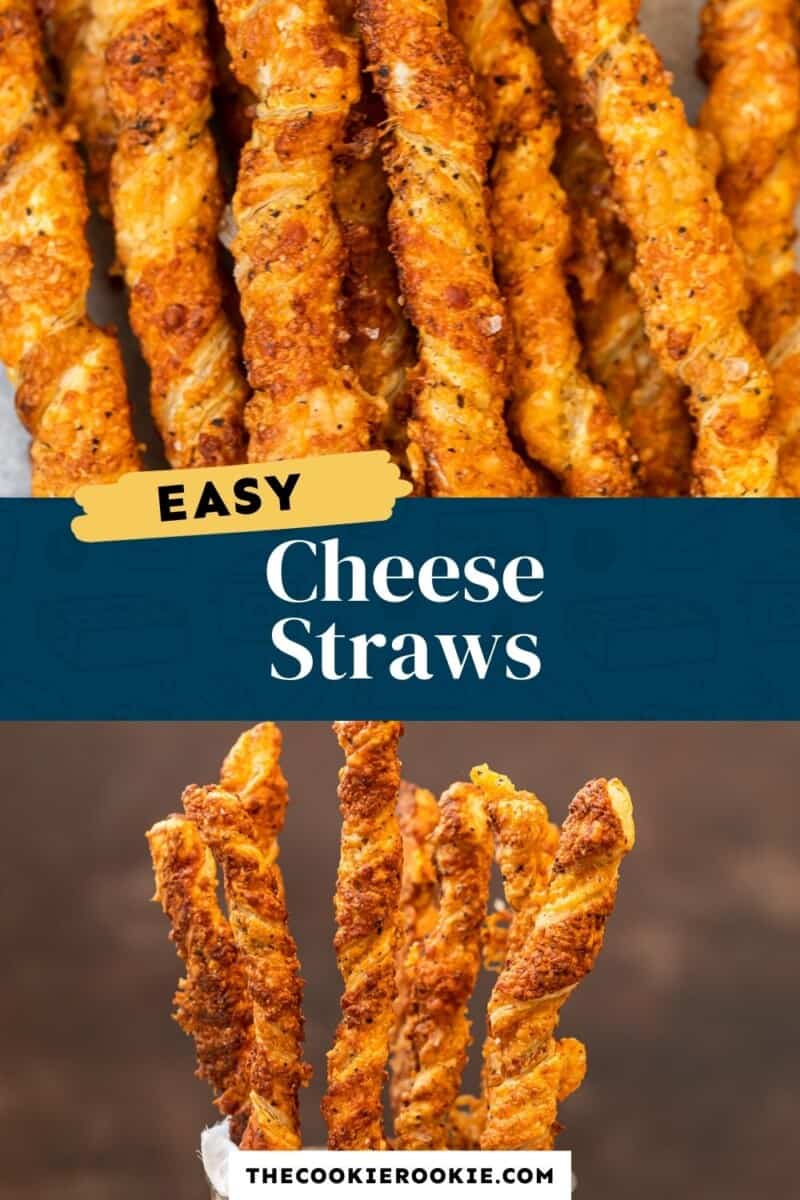

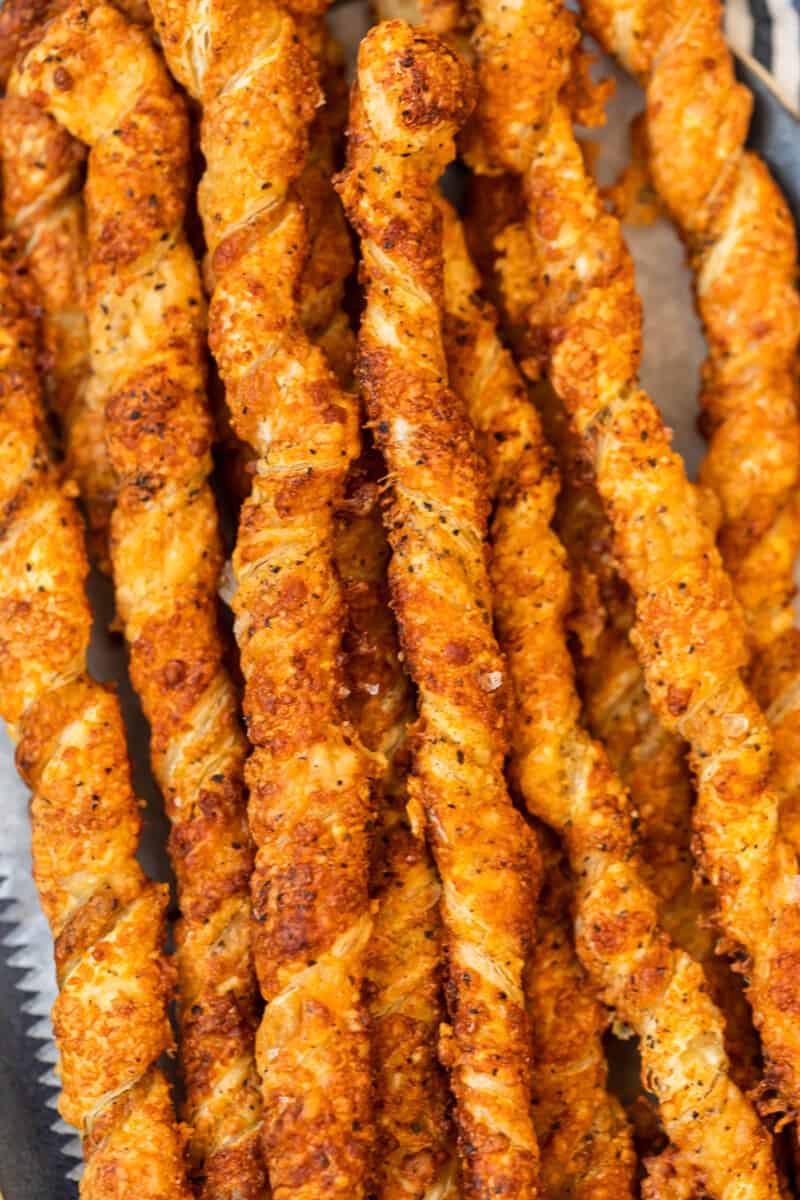
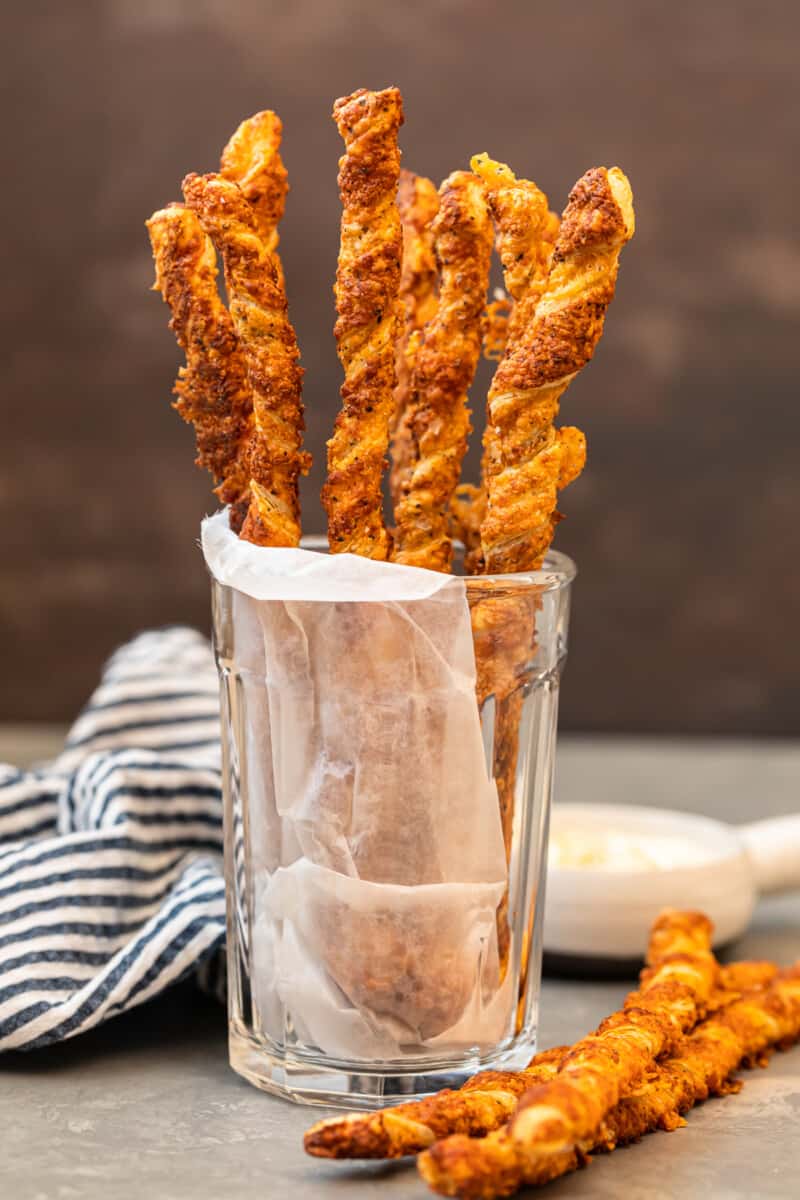
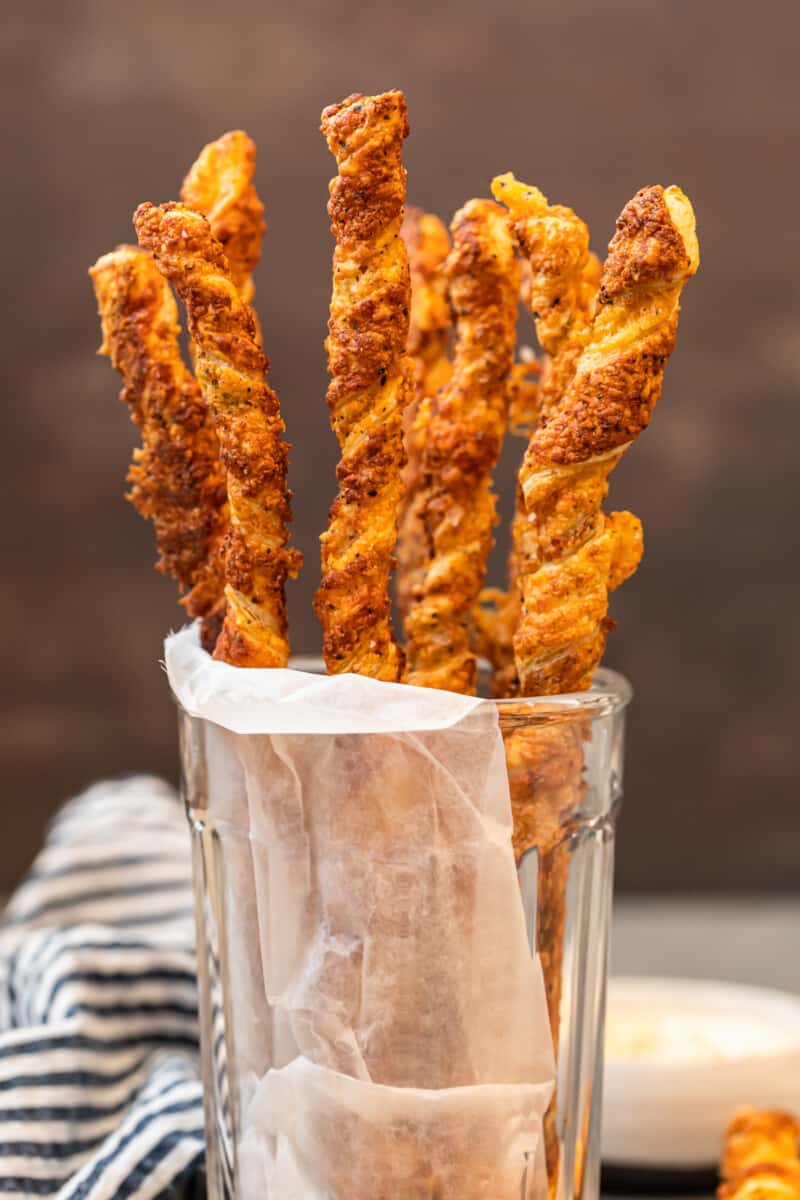
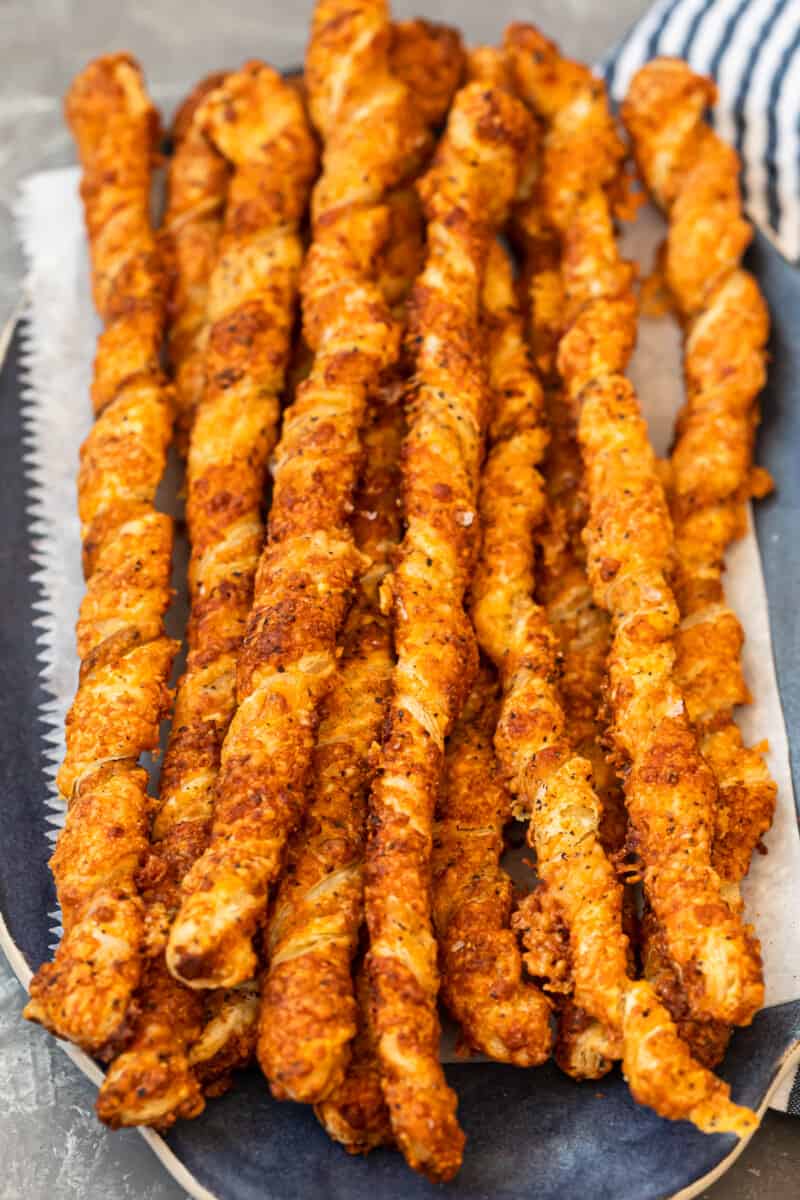
These easy homemade cheese straws are the perfect savory snack to share with friends and family. Made with puff pastry, they are perfectly crispy and cheesy and a breeze to make!
Easy Cheese Straws Recipe
When it comes crowd pleasing appetizers , you really can not go wrong with some melt-in-your-mouth cheese straws!
Simple to make, these puff pastry straws are flavored with Gruyere, parmesan and mustard for one delicious bite!
For more cheesy apps, be sure to try my cheesesteak dip and antipasto skewers !
Why you’ll love this Cheese Straws recipe:
- GREAT FOR A CROWD: Whether you are needing a game day app or a Christmas day snack, it’s easy to make a big batch of these to keep everyone satisfied!
- MAKE AHEAD: These cheese straws are great served warm or cold, and are freezer friendly.
- KID FRIENDLY : Kids of all ages love snacking on these!
How to make Cheese Straws
You can jump to the recipe card for full ingredients & instructions!
- Lay two pieces of puff pastry on top of each other.
- Flatten slightly with a rolling pin.
- Top with the cheeses and seasonings.
- Roll with a rolling pin to press the toppings in to the pastry.
- Brush the other side of the pastry with an egg wash.
- Sprinkle over the remaining cheese.
- Roll the pastry again.
- Cut the pastry into strips and twist.
- Let rest in the fridge before baking until golden brown.

What do you serve them with?
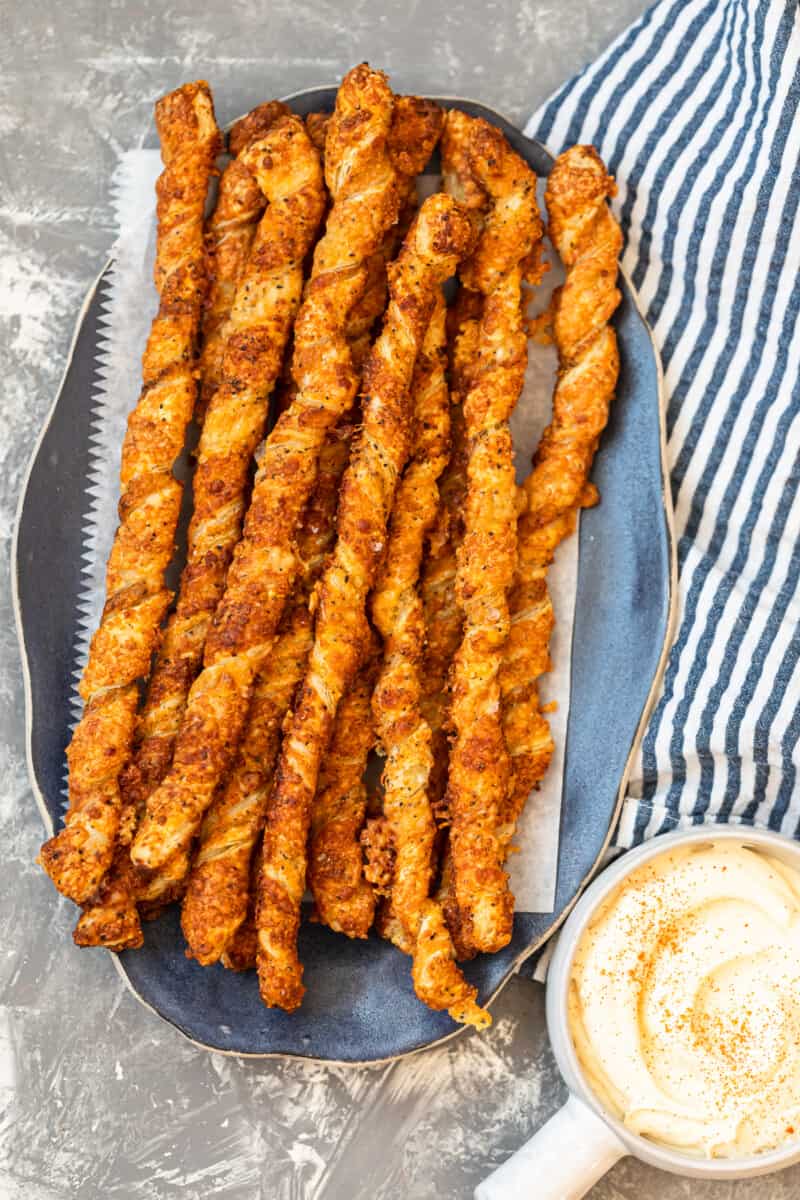
Honestly, these crispy cheese straws are easily enjoyed by themselves, but they are perfect to serve with all your favorite dips and sauces. Try them with:
- Honey Mustard Dip
- White Queso
- Caramelized Onion Dip
- Beer Cheese Dip
How long do they keep?
If you are planning on making these ahead of time, let the straws cool completely before placing in an airtight container. They will keep well for 2 days at room temperature.
After a couple of days, they will start to soften, but will still be delicious. To make them crispy again, simply place them on a baking sheet and reheat for a few minutes at 425F.
Can you freeze them?
Yes, these baked cheesy apps are freezer friendly! Simply placed the cooled straws into a freezer safe bag and they will keep for up to a month.
There’s no need to thaw them, reheat them right from frozen for 15-20 minutes.
Tips!
- Prep them up to 24 hours ahead of time, and keep them covered in the fridge until you are ready to bake.
- Thaw one sheet of puff pastry, covered with a damp cloth, on the counter as the oven is preheating. Grate the cheese (it is very important to use freshly grated cheese and NOT packaged shredded cheese. Four sheets of parchment paper are needed for this recipe.
- This recipe makes enough for 14 cheese straws and is easily doubled.

Game Day is covered!
101+ Super Bowl Appetizer Recipes
If its game day grub you crave, we have all the recipes you need to win big! Check out our easy Super Bowl recipes (or World Series, March Madness, National Championship, you get the idea!)

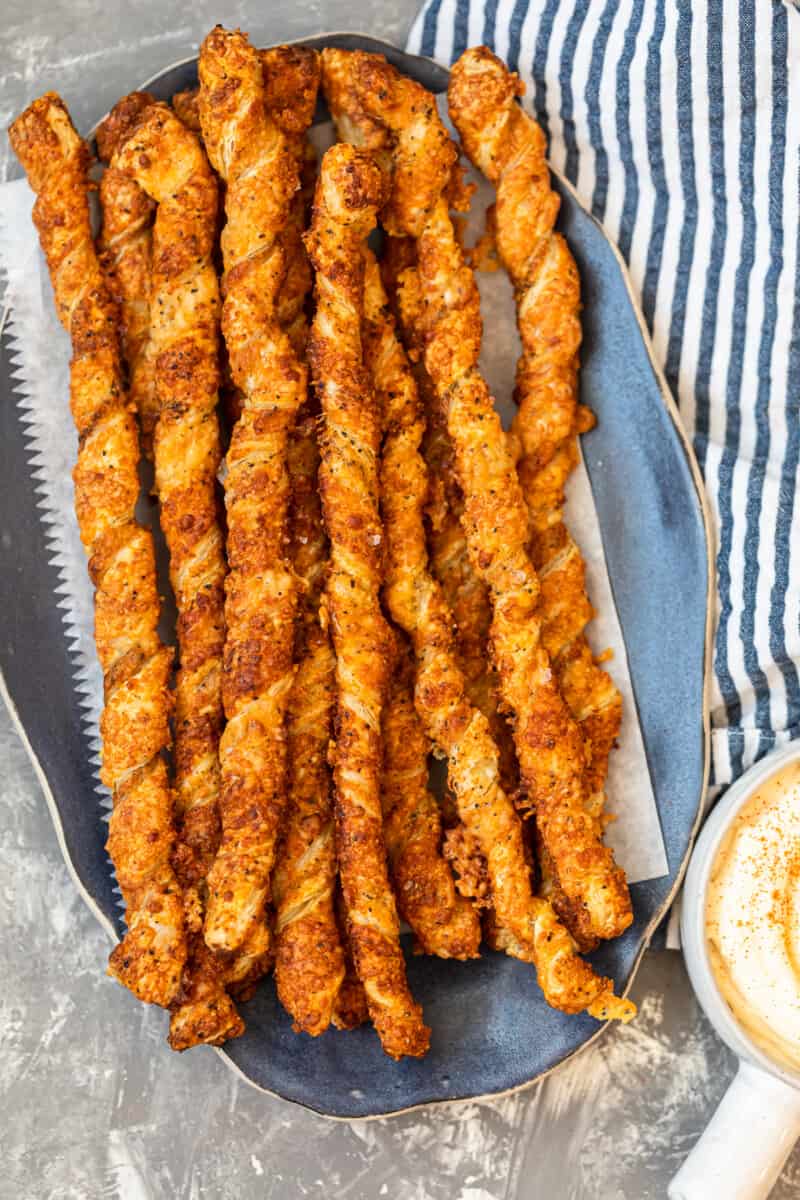
These homemade cheese straws are always so popular, and are an excellent addition to any buffet! Serve them up with your favorite dips and you’ll be everyone’s best friend!
MoreAppetizer Recipeswe Love
- Bacon Wrapped Crackers
- Crockpot Little Smokies
- Fritos Layered Dip
- Ham Roll ups
- Grape Jelly Meatballs
- Kielbasa Sausage Bites
- Herb Marinated Mozzarella Balls
If you make this recipe be sure to upload a photo in the comment section below or leave a rating. Enjoy!
Ingredients1x2x3x
- ▢ 1 frozen puff pastry sheet
- ▢ 2 tablespoons Dijon mustard
- ▢ 1 cup freshly shredded Gruyere or Sharp Cheddar cheese
- ▢ 2/3 cup grated Parmesan cheese
- ▢ Sweet paprika
- ▢ Kosher salt
- ▢ Freshly ground black pepper
- ▢ 1 egg
- ▢ 1 teaspoon water
- ▢ Dipping Sauce; your favorite
Instructions
- Line 2 baking sheets with parchment paper; set aside.
- Place a sheet of parchment paper on a flat surface and spray it lightly with nonstick spray. Lay the puff pastry on top and place a 2nd sheet of sprayed parchment over the puff pastry.
- Use a rolling pin to slightly flatten the puff pastry into a 10×11-inch rectangle. Carefully remove the top parchment. Spread the pastry evenly with a thin layer of 2 tablespoons Dijon mustard. Sprinkle ½ cup shredded cheese over the mustard and top with 1/3 cup grated Parmesan. Lightly & evenly sprinkle the Parmesan with sweet paprika, kosher salt and ground black pepper. Replace the top parchment paper and press the cheeses & seasonings into the pastry by rolling the pin back and forth a few times.
- Flip the parchment-encased pastry over and remove what is now the top parchment. In a small bowl, whisk together the egg and water. Use a pastry brush to evenly coat the top-facing side of pastry. Sprinkle with the remaining ½ cup shredded cheese and 1/3 cup grated Parmesan.
- Replace the top parchment paper and, again, roll the pastry with the rolling pin to press the cheese into the pastry. Remove the top piece of parchment paper.
- Use a large, sharp knife or a pizza cutter to trim off the rough edges of the dough. Cut the pastry into 14 equal (3/4-inch) strips the length of the dough. Beginning in the middle of each strip of dough, gently twist each strip of pastry and place them on the prepared baking sheet 1-inch apart. Refrigerate the dough for 30 minutes.
- While the dough cools in the fridge, adjust the oven rack to the middle positions and preheat the oven to 425°F.
- Place the cooled cheese straws on the baking sheet to the oven and bake 12-16 minutes or until golden brown and fully puffed, rotating the baking sheet halfway through baking. (The cheese straws will crisp a little after removing from the oven.) Cool 5 minutes on the baking sheet before serving.
- Serve with honey mustard, cheese sauce or your favorite dipping sauces. Enjoy!
Becky’s Tips
- Makes 14 Cheese Straws
- Thaw one sheet of puff pastry, covered with a damp cloth, on the counter as the oven is preheating. Grate the cheese (it is very important to use freshly grated cheese and NOT packaged shredded cheese. Four sheets of parchment paper are needed for this recipe.
- Once the cheese straws are completely cooled, store in an airtight container up to 2 days at room temperature. The cheese straws will soften a little in the container. They can be reheated at 425°F for a few minutes if crispy straws are preferred.
- The cheese straws can also be frozen, just place the cooled straws in a zipper-style freezer bag and freeze up to 1 month. Reheat, from frozen, as directed above, 15-20 minutes or until heated through and crispy. The cheese straws will crisp a little after removing from the oven.
Nutrition information is automatically calculated, so should only be used as an approximation.

Easy Cheese Straws Recipe
Ingredients
- 1 frozen puff pastry sheet
- 2 tablespoons Dijon mustard
- 1 cup freshly shredded Gruyere or Sharp Cheddar cheese
- 2/3 cup grated Parmesan cheese
- Sweet paprika
- Kosher salt
- Freshly ground black pepper
- 1 egg
- 1 teaspoon water
- Dipping Sauce; your favorite
Instructions
- Line 2 baking sheets with parchment paper; set aside.
- Place a sheet of parchment paper on a flat surface and spray it lightly with nonstick spray. Lay the puff pastry on top and place a 2nd sheet of sprayed parchment over the puff pastry.
- Use a rolling pin to slightly flatten the puff pastry into a 10x11-inch rectangle. Carefully remove the top parchment. Spread the pastry evenly with a thin layer of 2 tablespoons Dijon mustard. Sprinkle ½ cup shredded cheese over the mustard and top with 1/3 cup grated Parmesan. Lightly & evenly sprinkle the Parmesan with sweet paprika, kosher salt and ground black pepper. Replace the top parchment paper and press the cheeses & seasonings into the pastry by rolling the pin back and forth a few times.
- Flip the parchment-encased pastry over and remove what is now the top parchment. In a small bowl, whisk together the egg and water. Use a pastry brush to evenly coat the top-facing side of pastry. Sprinkle with the remaining ½ cup shredded cheese and 1/3 cup grated Parmesan.
- Replace the top parchment paper and, again, roll the pastry with the rolling pin to press the cheese into the pastry. Remove the top piece of parchment paper.
- Use a large, sharp knife or a pizza cutter to trim off the rough edges of the dough. Cut the pastry into 14 equal (3/4-inch) strips the length of the dough. Beginning in the middle of each strip of dough, gently twist each strip of pastry and place them on the prepared baking sheet 1-inch apart. Refrigerate the dough for 30 minutes.
- While the dough cools in the fridge, adjust the oven rack to the middle positions and preheat the oven to 425°F.
- Place the cooled cheese straws on the baking sheet to the oven and bake 12-16 minutes or until golden brown and fully puffed, rotating the baking sheet halfway through baking. (The cheese straws will crisp a little after removing from the oven.) Cool 5 minutes on the baking sheet before serving.
- Serve with honey mustard, cheese sauce or your favorite dipping sauces. Enjoy!
Notes
- Makes 14 Cheese Straws
- Thaw one sheet of puff pastry, covered with a damp cloth, on the counter as the oven is preheating. Grate the cheese (it is very important to use freshly grated cheese and NOT packaged shredded cheese. Four sheets of parchment paper are needed for this recipe.
- Once the cheese straws are completely cooled, store in an airtight container up to 2 days at room temperature. The cheese straws will soften a little in the container. They can be reheated at 425°F for a few minutes if crispy straws are preferred.
- The cheese straws can also be frozen, just place the cooled straws in a zipper-style freezer bag and freeze up to 1 month. Reheat, from frozen, as directed above, 15-20 minutes or until heated through and crispy. The cheese straws will crisp a little after removing from the oven.
Nutrition
By Becky Hardin
Published Jul 12, 2017


This Essential Grocery List is an absolute life saver for my family on the busy weeks. When I started this journey to learn how to cook, I quickly realized that the first step in cooking is having staple ingredients on hand. I want to avoid having to run out to the grocery store every single time I prepare a new recipe. Having a well-stocked pantry has made my life in the kitchen so much simpler, because when it’s time to cook, I have what I need.

Essential Grocery List
It’s so helpful to have a basic grocery list to help me remember which foods to buy at the store. This food shopping list is my go-to!
It’s better to stock up on things like grains, seasonings and spices, baking essentials, oils, condiments, canned and frozen foods, etc. so I can just grab them when I need them. These things have a long shelf life , so I keep them in my kitchen for convenience.
However, I do have to go to the supermarket sometimes, and there’s a way to make that trip easy and hassle-free: I keep a grocery list! If I go in blindly, I’ll leave with things I don’t need, and nothing that actually helps me prepare a good meal.
In the list below, I’ve compiled everything I always have on my stock-up grocery list.
I’ve got you covered! I created an easy grocery list filled with all of the essentials. Plus there’s a free printable version that you can take with you to the grocery store. It has everything you need to stock your pantry, your freezer, and your refrigerator.

Click to get my Free Printable Grocery List
What to Buy at the Grocery Store
This is the perfect grocery list filled with all the basics and essentials. It should help get you going if you’re new to cooking, or if you’re just left staring helplessly at an empty pantry and don’t know how to fill it.
When I first started cooking, things could seem overwhelming. I quickly realized that they more prepared I could be, the more confident I felt. If you already have the basics in your kitchen, then you can shop stress-free.
So print out our easy grocery list, stock up your pantry and fridge, and you’ll be cooking in no time!
Click to get my Free Printable Grocery List for the perfectly stocked pantry and freezer!
Fresh Produce
- Apples
- Bananas
- Strawberries
- Avocados
- Bell Peppers
- Carrots
- Broccoli
- Garlic
- Lemons/Limes
- Onion
- Parsley
- Cilantro
- Basil
- Potatoes
- Spinach
- Tomatoes
GRAINS
- Breadcrumbs
- Pasta
- Quinoa
- Rice
- Sandwich Bread
- Tortillas
MEAT/PROTEIN
- Chicken
- Eggs
- Ground Beef
- Sliced Turkey
- Lunch Meat
DAIRY
- Butter
- Sliced Cheese
- Shredded Cheese
- Milk
- Sour Cream
- Greek Yogurt
BAKING GOODS
- Baking powder
- Baking Soda
- Granulated Sugar
- Brown Sugar
- Flour
- Honey
- Vanilla Extract
- Dry Yeast
- Chocolate Chips
- Cocoa Powder
- Powdered Sugar
FREEZER
- Fruit and Berries
- Frozen Veggies (Corn, Peas, Broccoli, etc)
- Juice Concentrate
- Pizza or Other Convenience Meals
- Pie Crust
- Cookie Dough
CANNED/DRIED GOODS
- Chicken stock/broth
- Salsa
- Diced Tomatoes
- Jam/Jelly
- Peanut Butter
- Pasta Sauce
- Beans (Black Beans, Chickpeas, Baked Beans, etc)
- Soups
- Tuna
- Green Chiles
- Canned Veggies
- Coffee or Tea
Get more details on the best non-perishable and pantry foods
CONDIMENTS/SPICES
- Black Pepper
- Chili Powder
- Cinnamon
- Crushed Red Pepper
- Cumin
- Garlic Powder
- Ketchup
- Mustard
- Mayo
- Nutmeg
- Paprika
- Salt (Course Sea Salt and Kosher Salt)
- Soy Sauce
- Steak Sauce
- Hot Sauce/ Buffalo Sauce
- Salad Dressings
OILS/VINEGARS
- Apple cider vinegar
- Balsamic vinegar
- Coconut Oil
- Olive Oil
- Vegetable/Canola Oil
- Red Wine Vinegar
- White Vinegar
- Cooking Wine
- White Wine Vinegar
SNACKS
- Crackers
- Nuts
- Quick Oats
- Popcorn
- Tortilla Chips
- Cereal
Click to get my Free Printable Grocery List for the perfectly stocked pantry and freezer!

Click ☝🏻 for my FREE Grocery List Printable!
I hope this essential grocery list can help you buy what you need and make your home cooking so much easier!
Stock Your Kitchen
Find more ideas for your grocery list, stock up your kitchen, and print more cooking guides and charts to keep handy!

Non-Perishable Foods to Stock Up On

Frozen Vegetables to Stock Up On (and Recipes to Make)

Ultimate List of Cooking Herbs for Your Kitchen

Ultimate List of Cooking Spices for Your Kitchen

Cooking Oil 101: Types of Cooking Oils to Use

26 Types of Pasta and When to Use Them

What Fruits and Vegetables are in Season?

Meat Temperature Chart (Free Printable)

How to Meal Prep (Guide for Beginners)

Basic Cooking Measurements & Kitchen Conversion Chart

