
By Becky Hardin
Published Oct 8, 2025


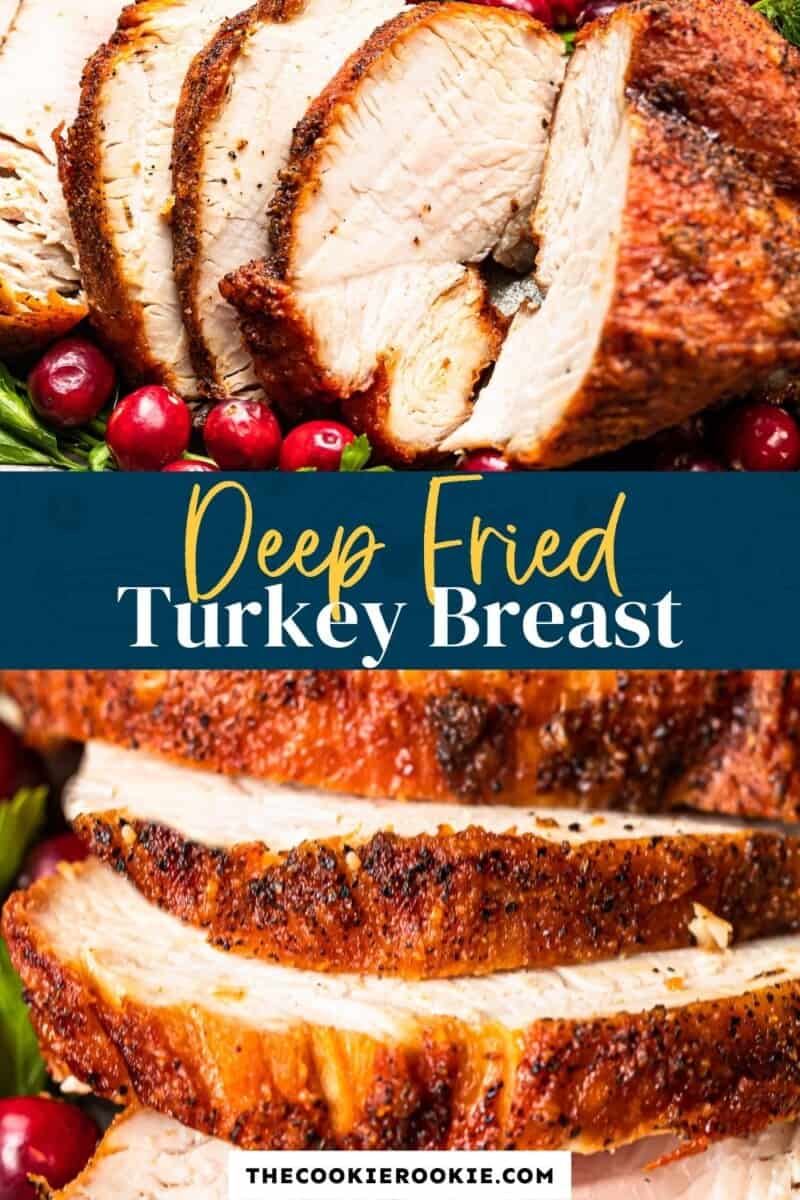
If you’re ready to switch things up from the usual oven-roasted turkey, this Deep Fried Turkey Breast is the perfect way to add excitement to your holiday table. Dry-brined for flavor and fried until golden and crispy, it’s a juicy, delicious twist on the classic Thanksgiving centerpiece.
I love this method because it’s one of the quickest ways to get turkey on the table without giving up flavor or juiciness. Deep frying locks in moisture, crisps up the outside, and cooks a turkey breast in just a fraction of the time it takes to roast. The best part is you don’t need a complicated brine or days of prep. Just a simple seasoning and hot oil deliver a tender, golden-brown turkey that always impresses. It’s a great option for a smaller Thanksgiving dinner or even a cozy weeknight meal when you want something that feels special without being fussy. And if you’re cooking for a crowd, you can always try my whole deep fried turkey recipe for larger gatherings.
Tips for Beginners
- Choose the right pot. Use the largest, heaviest pot you have, and make sure that when filled with oil, it comes no more than halfway up the sides. This prevents dangerous spillovers.
- Measure safely. Before adding oil, measure the correct amount by filling the pot with water and lowering in the turkey breast. Mark the level, then discard the water and dry the pot thoroughly. Any leftover water can cause hot oil to splatter.
- Heat the oil properly. Preheat the oil to 350°F, and always use a deep-frying thermometer to monitor the temperature. Adjust the heat as needed while cooking to keep it steady.
- Know your cook time. A good rule of thumb is about 3–4 minutes per pound, plus 5 minutes. For example, a 3-pound breast takes 15–20 minutes.
- Skip the brine. Unlike a whole turkey, a turkey breast absorbs seasoning quickly—so brining isn’t necessary.
- Plan for oil. You’ll need about 1½ to 2 gallons of oil, depending on the size of the breast and your pot.
- Stay safe while lowering the turkey. Slowly and gently lower the turkey breast into the hot oil. Wearing heat-proof gloves adds an extra layer of safety.
Ingredients1x2x3x
- ▢ 1½-2 gallons canola oil or peanut oil
- ▢ 3 lb boneless, skinless turkey breast
- ▢ 2¼ tsp kosher salt
- ▢ freshly ground black pepper to taste
Video
Instructions
- To determine the amount of oil needed to deep fry the turkey breast, place the breast in a large, deep stock pot and cover with water by 3 inches. Mark the water level and remove the breast—this is the amount of oil needed to fry your turkey breast. Note: The pot should be large enough that the water/oil comes no more than halfway up the sides of the pot. 1½-2 gallons canola oil
- Pat the turkey breast dry with paper towels and liberally season with kosher salt and ground black pepper. Leave at room temperature for 1 hour (or refrigerate, uncovered, 1 to 24 hours). 2¼ tsp kosher salt, freshly ground black pepper, 3 lb boneless, skinless turkey breast
- While the breast air dries, dry the pot and add the measured amount of oil. Heat the oil until it registers 350°F on a deep-frying thermometer. 1½-2 gallons canola oil
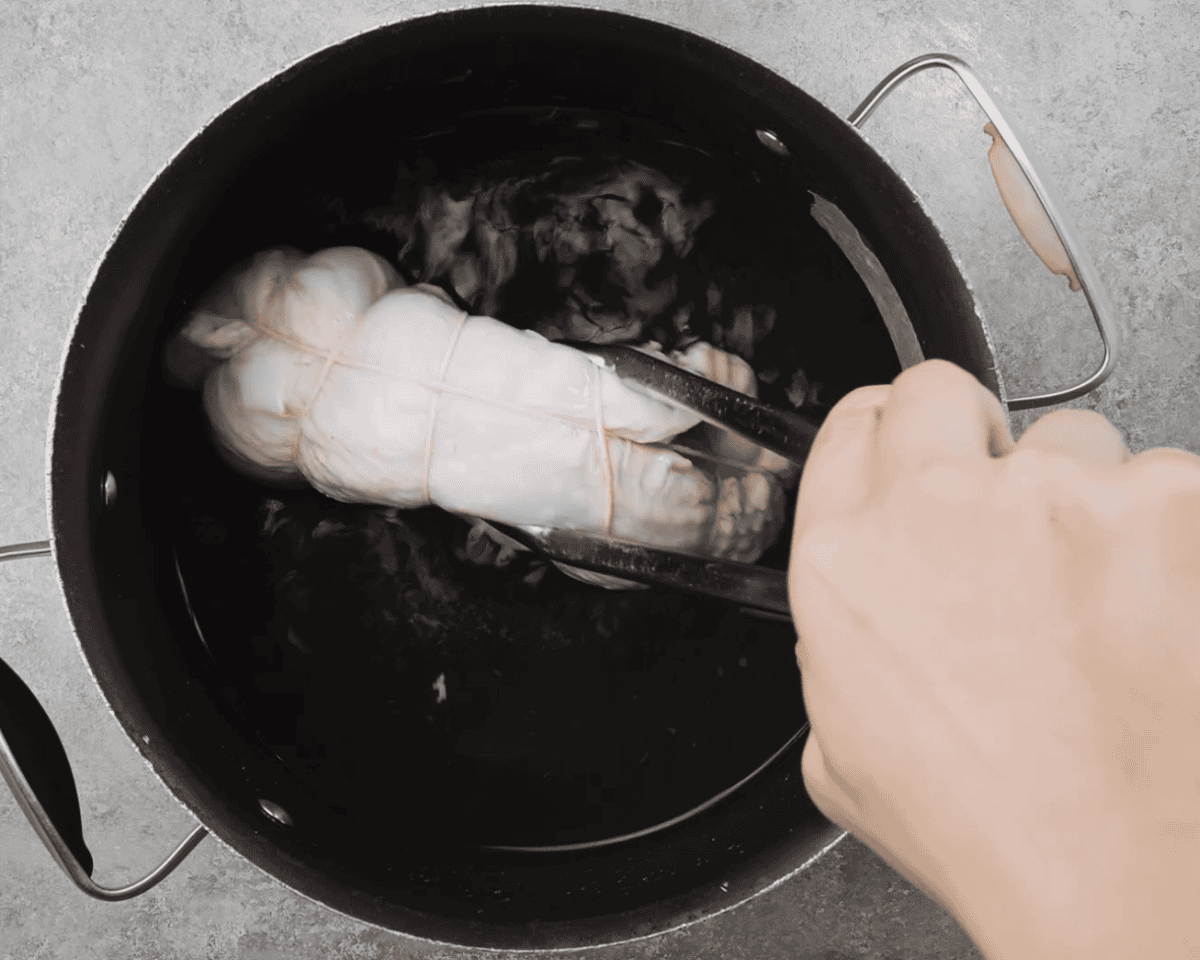
- Very slowly and carefully (protecting yourself from splatters) lower the turkey breast into the hot oil and fry until golden brown, turning it over once. The breast is done when the internal temperature (at the thickest part) registers 165°F on an instant read thermometer. Be sure to check the oil temperature often to maintain the oil at 350°F.
- The cook time will depend how large the breast is, but a rough rule of thumb is about 3-4 minutes per pound plus 5 minutes. (About 15-20 minutes total for a 2½-3 pound breast.)
- Remove the breast and allow it to rest 5 minutes before cutting into ½-inch slices.
Equipment
- Instant Read Meat Thermometer
Nutrition information is automatically calculated, so should only be used as an approximation.
How to Make Deep Fried Turkey Step by Step
Measure the oil : Place a 3-pound boneless, skinless turkey breast in a large, deep stock pot and cover with water by about 3 inches. Mark the water line, then remove the turkey breast. This marked level is how much oil you’ll need—typically 1½ to 2 gallons of canola oil or peanut oil. Make sure the pot is large enough so the oil comes no more than halfway up the sides.
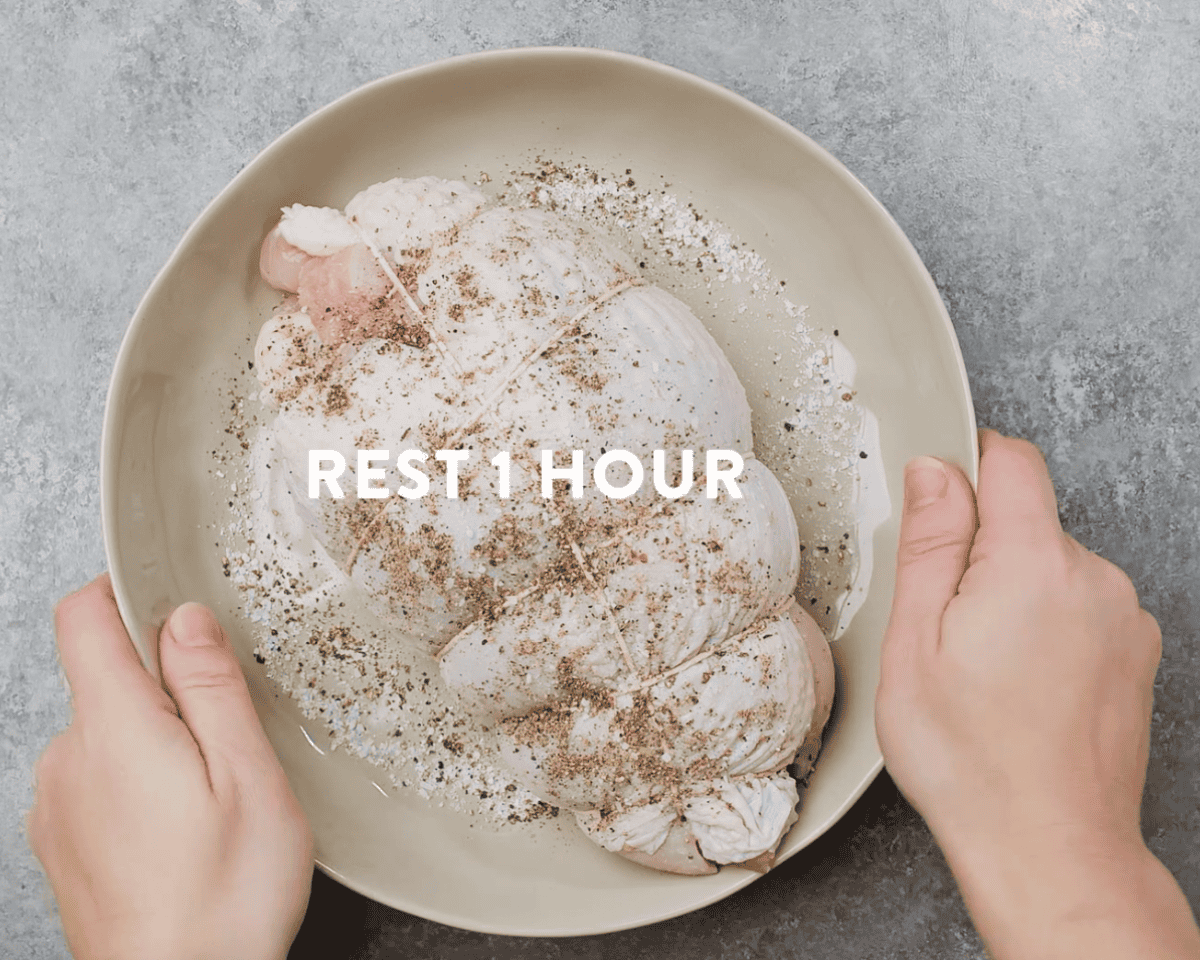
Season the turkey : Pat the turkey breast completely dry with paper towels. Rub it generously with 2¼ tsp kosher salt and freshly ground black pepper to taste. Let it sit at room temperature for 1 hour, or refrigerate uncovered for 1 to 24 hours.
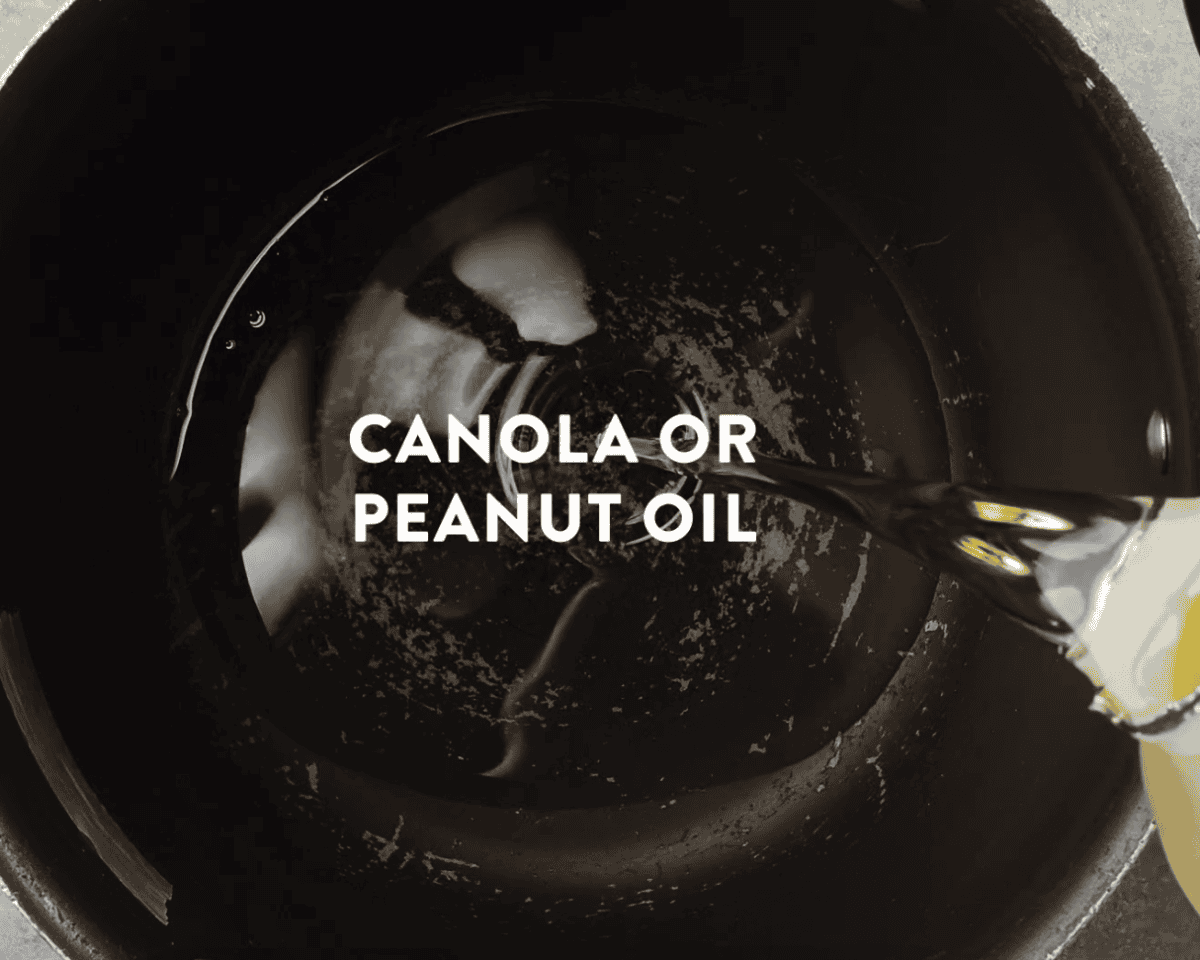
Heat the oil : Dry the stock pot thoroughly and pour in the measured 1½ to 2 gallons of canola or peanut oil. Heat the oil to 350°F, checking with a deep-frying thermometer.
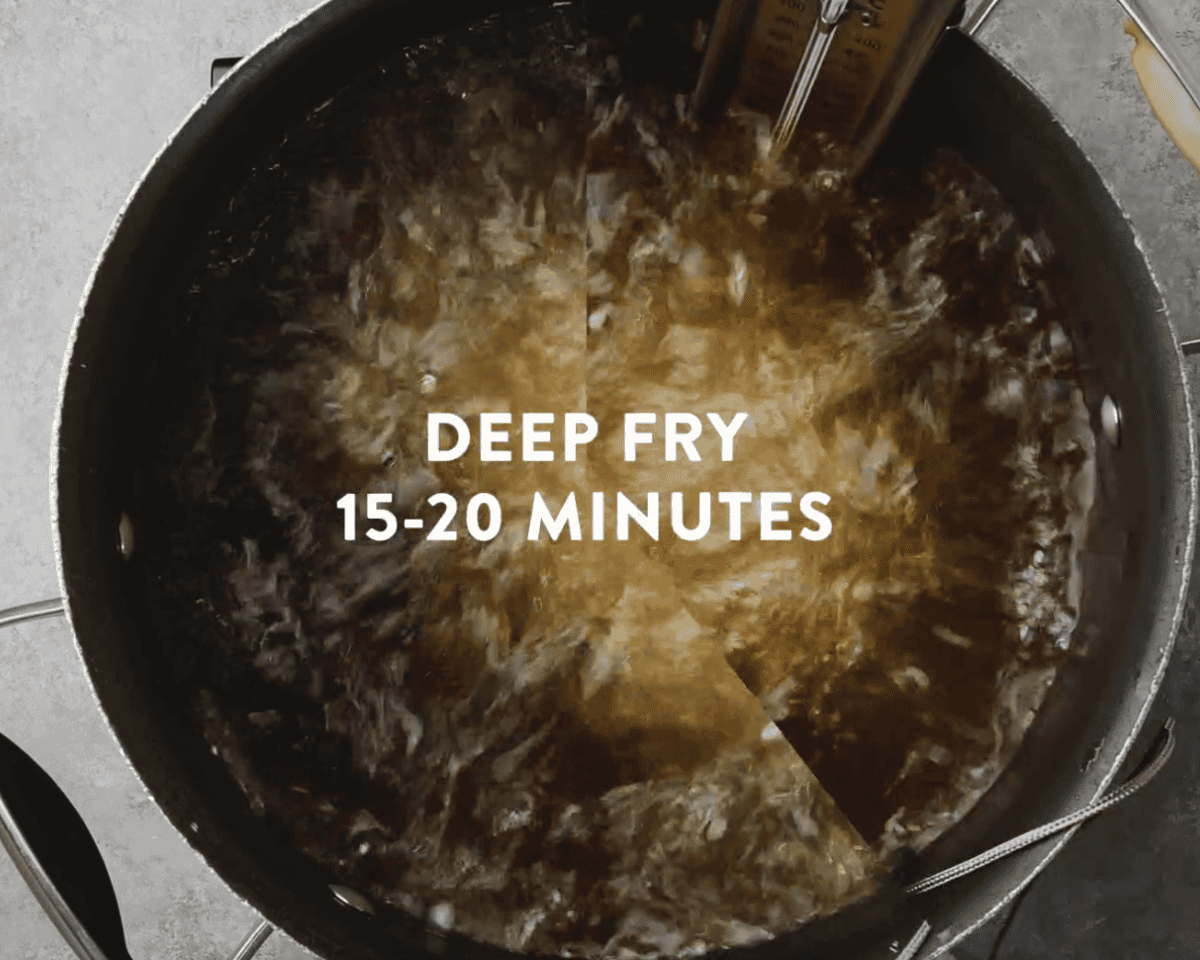
Fry the turkey : Very slowly and carefully, lower the seasoned turkey breast into the hot oil (wearing heatproof gloves helps protect from splatters). Fry until golden brown, turning once. The breast is ready when an instant-read thermometer inserted in the thickest part registers 165°F. Be sure to check and adjust the oil temperature as needed to keep it steady at 350°F. As a rule of thumb, fry the turkey for 3–4 minutes per pound plus 5 minutes. A 3-pound breast will take about 15–20 minutes total.
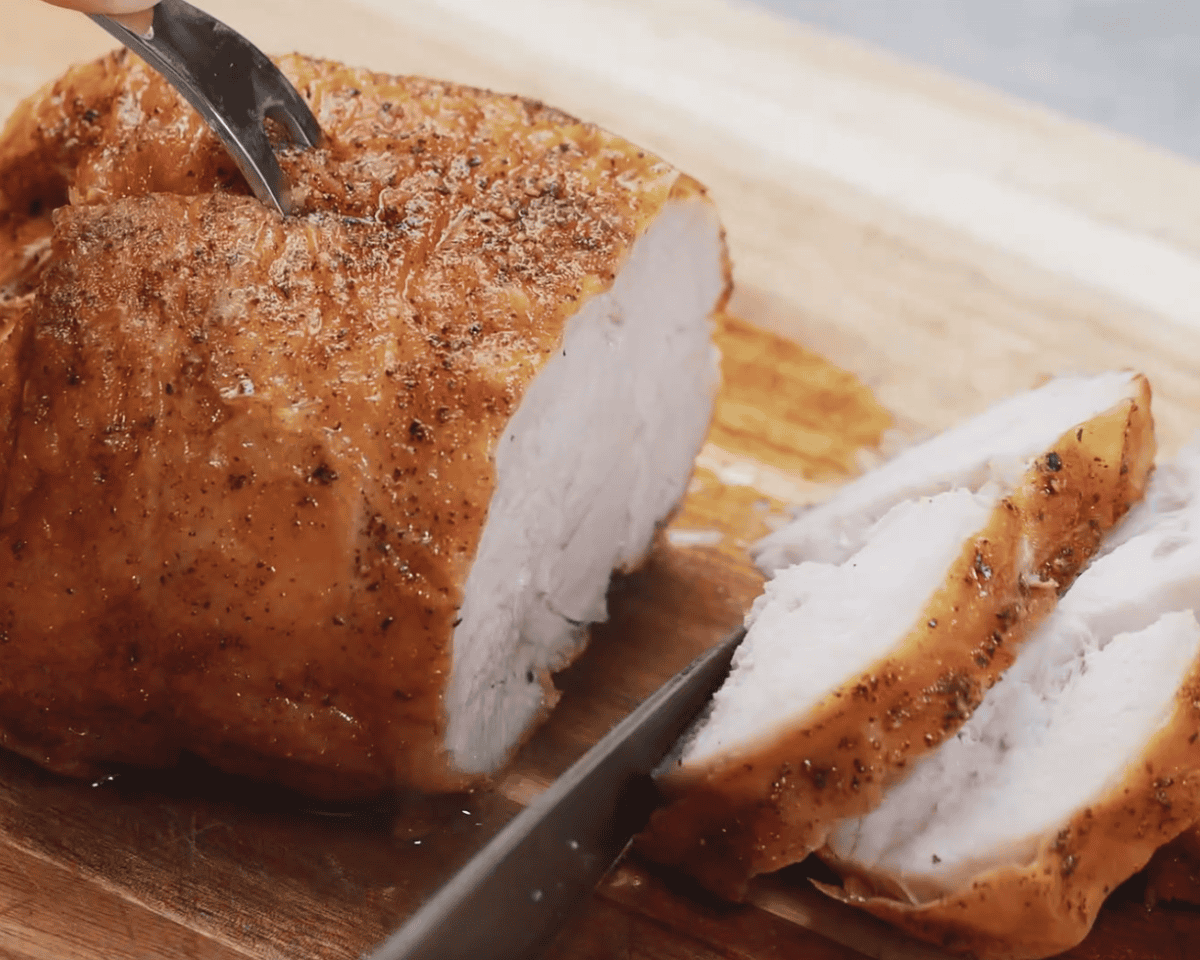
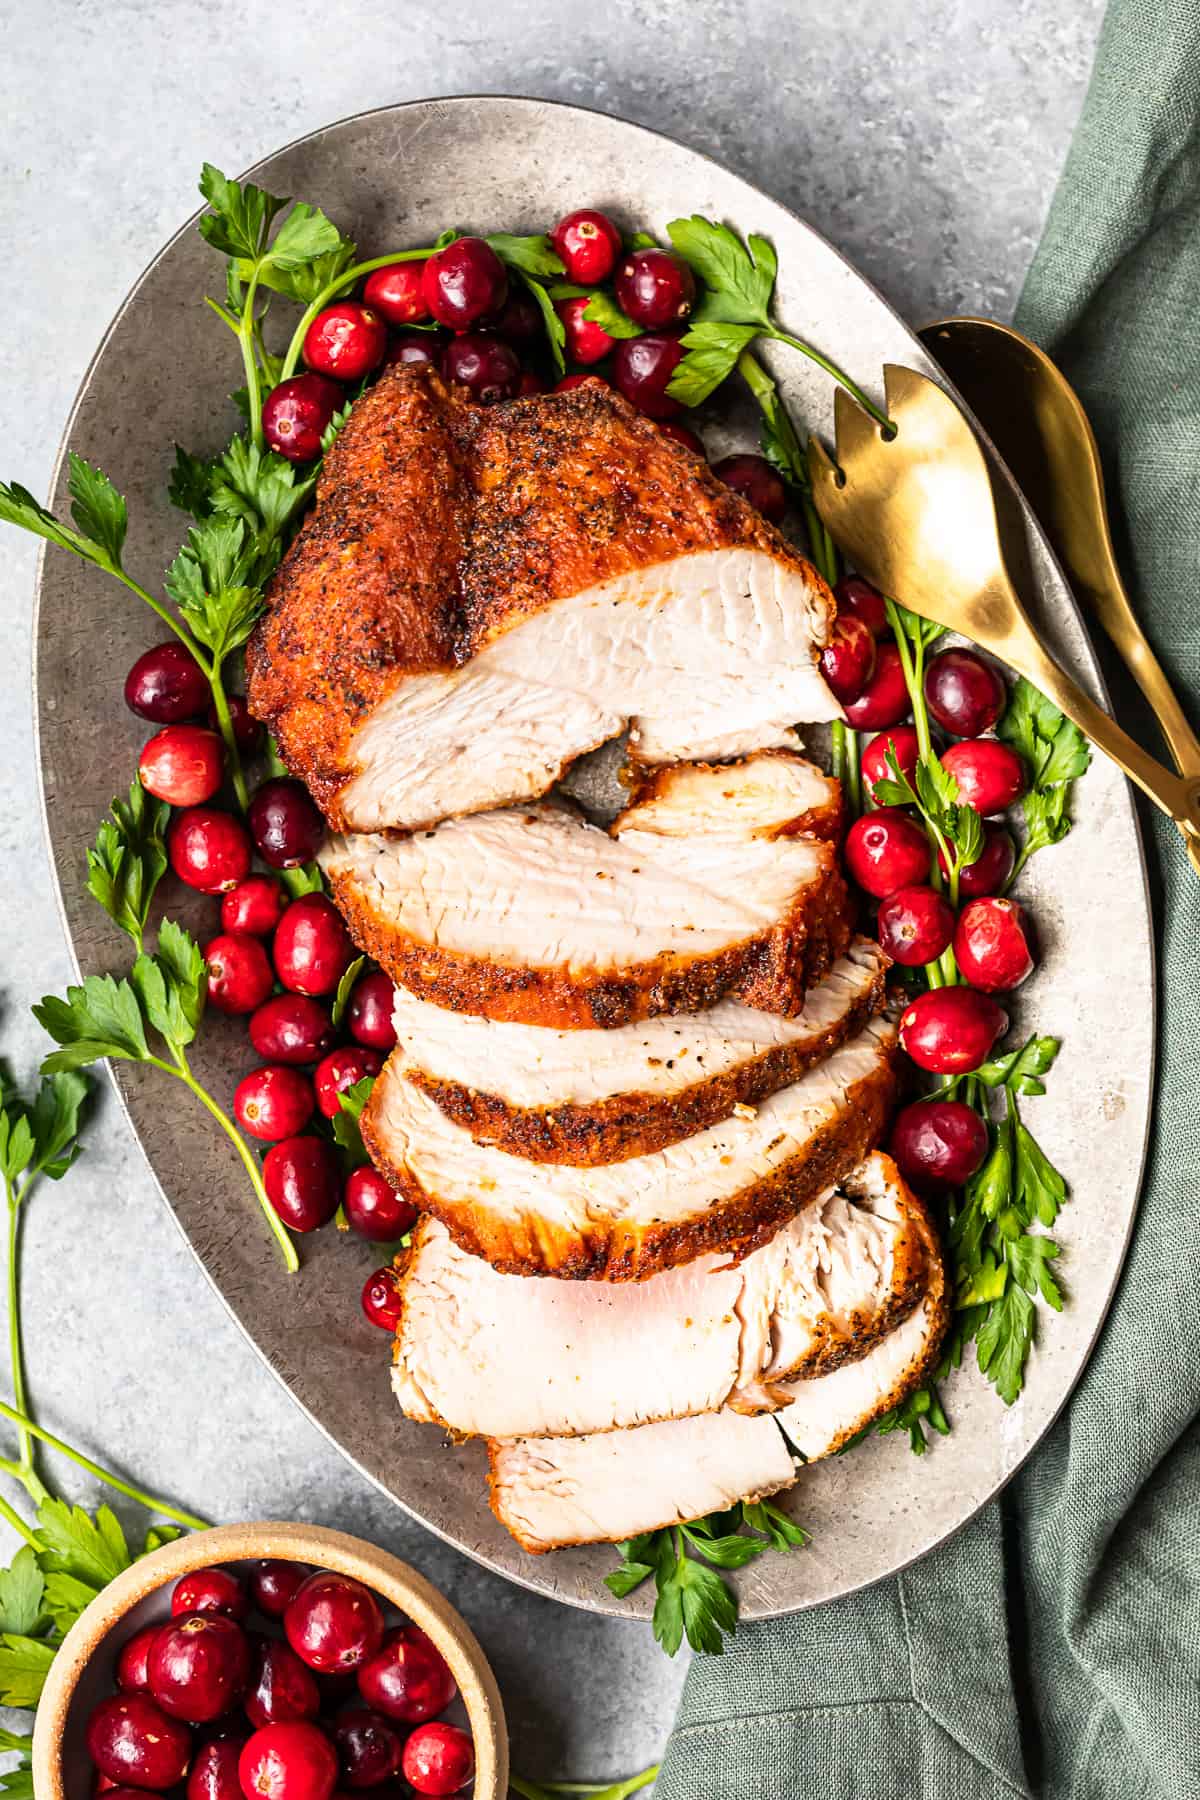
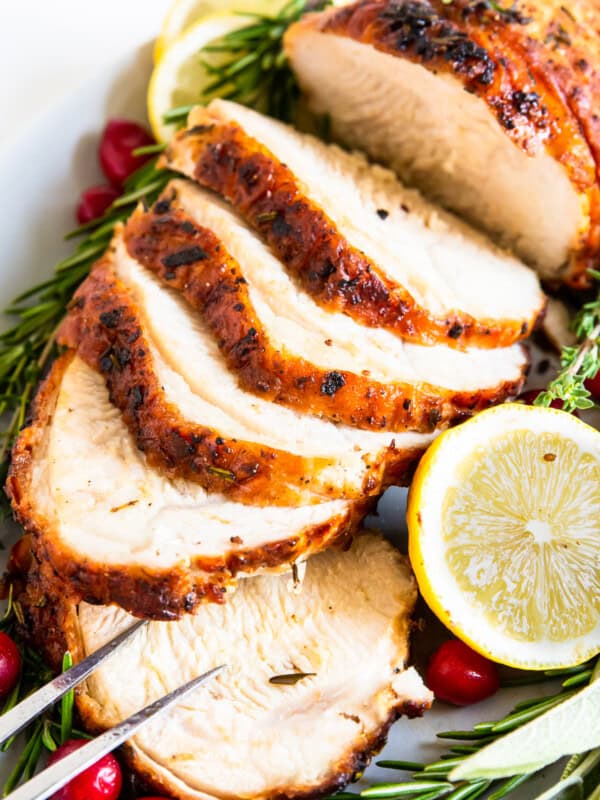
Rest and slice : Remove the fried turkey breast from the oil and let it rest for 5 minutes before slicing into ½-inch pieces.
Turkey Carving Tips
- Let it rest first. Always let the turkey breast rest for at least 5 minutes after frying. This keeps the juices from running out and helps the meat stay moist.
- Use a sharp carving knife. A long, sharp carving knife or slicing knife will give you clean, even cuts without tearing the meat.
- Stabilize with a fork. Hold the turkey steady with a carving fork (or tongs) so it doesn’t slip while cutting.
- Cut against the grain. Slice across the grain of the meat, not with it. This shortens the fibers and gives you tender, easy-to-chew slices.
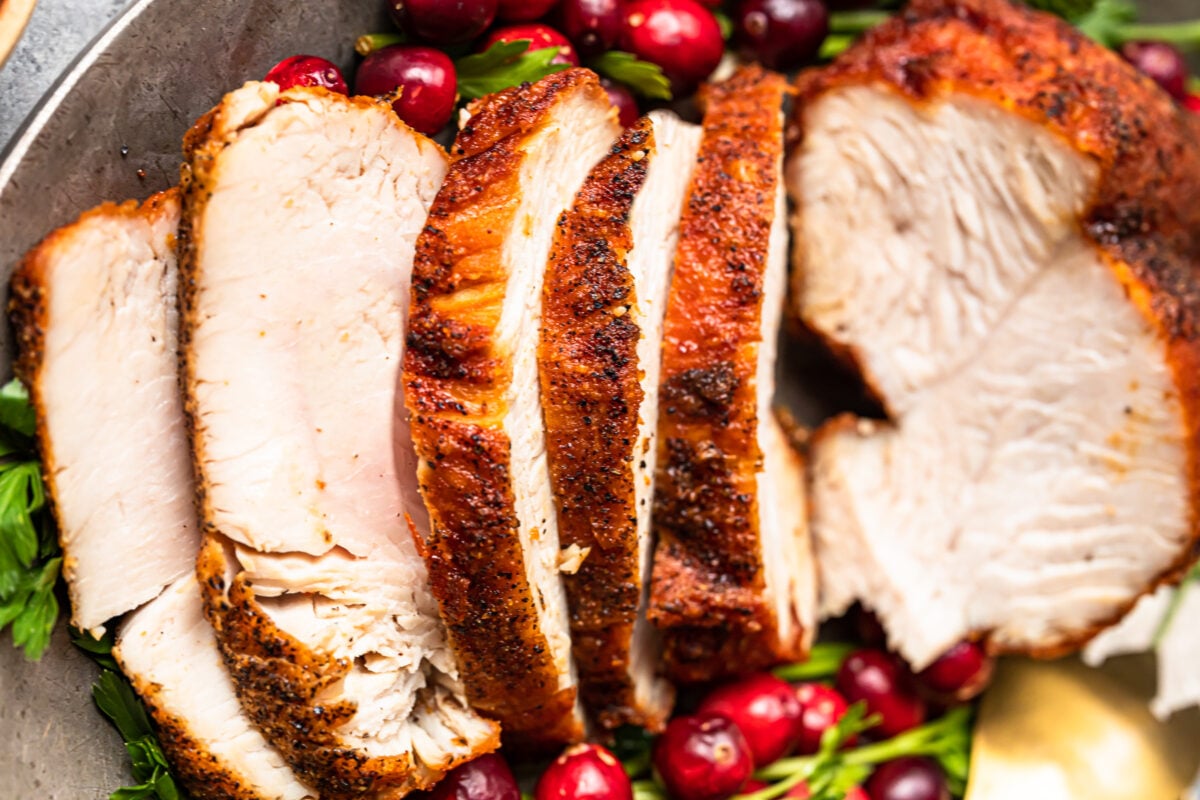
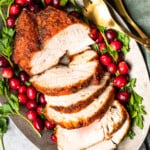
- Aim for even slices. Cut the turkey breast into ½-inch thick slices. This size is perfect for serving on a holiday platter or making sandwiches with leftovers.
- Arrange neatly for presentation. Fan out the slices on a platter and garnish with herbs, citrus, or cranberries for a festive look.
Variations on Fried Turkey Breast
I love this turkey breast simply seasoned, but you can add more seasonings if you’d like. Try my favorite t u rkey rub ! You can also try some of these:
- Creole seasoning : Rub the turkey breast generously with Creole seasoning before frying for that signature savory, slightly spicy Louisiana flavor.
- Italian Herb Turkey Breast : Season with a mix of Italian seasoning , garlic powder, and a little olive oil before frying for a Mediterranean twist.
- Garlic Herb Butter Turkey Breast : Inject melted butter mixed with garlic powder, parsley, and thyme into the turkey breast before frying for extra juiciness and rich flavor.
- Smoky Paprika & Chili : Add smoked paprika and a pinch of chili powder to the salt and pepper for a smoky, slightly spicy crust.
How to Store and Reheat
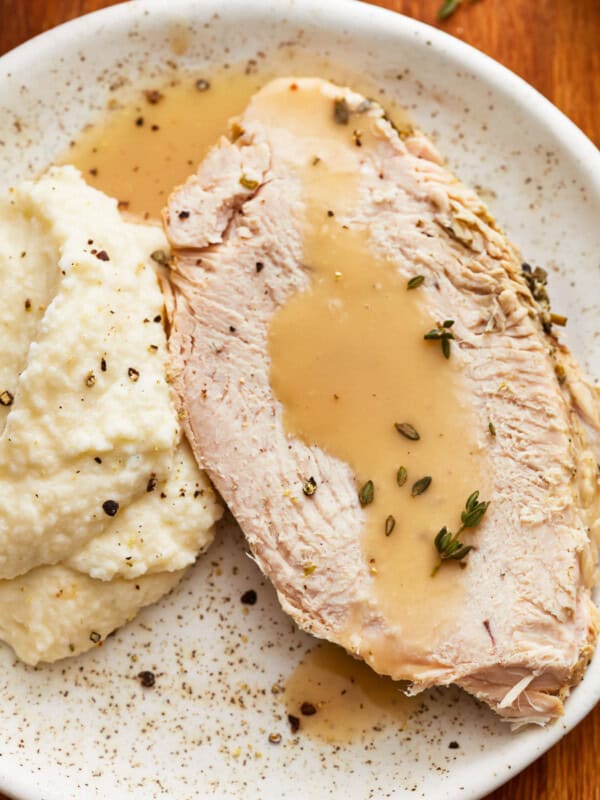
Store leftover deep-fried turkey breast in an airtight container in the refrigerator for up to 3 days. Reheat in a 350°F oven or in the microwave in 30-second increments until warmed through.
Freeze fried turkey breast in an airtight container or Ziplock bag for up to 3 months. Let thaw overnight in the refrigerator before reheating.
Serving Suggestions
I love serving this crispy, juicy deep fried turkey breast with all my favorite Thanksgiving sides to make it a real feast. Fluffy, buttery Hawaiian rolls are perfect for soaking up extra juices, while my loaded green bean casserole adds a creamy, crunchy bite. I like to balance out the richness with some sautéed Brussels sprouts , which bring a fresh, savory flavor to the table. And for a touch of sweetness, brown sugar glazed carrots always round out the plate beautifully.
More turkey breast recipes we love
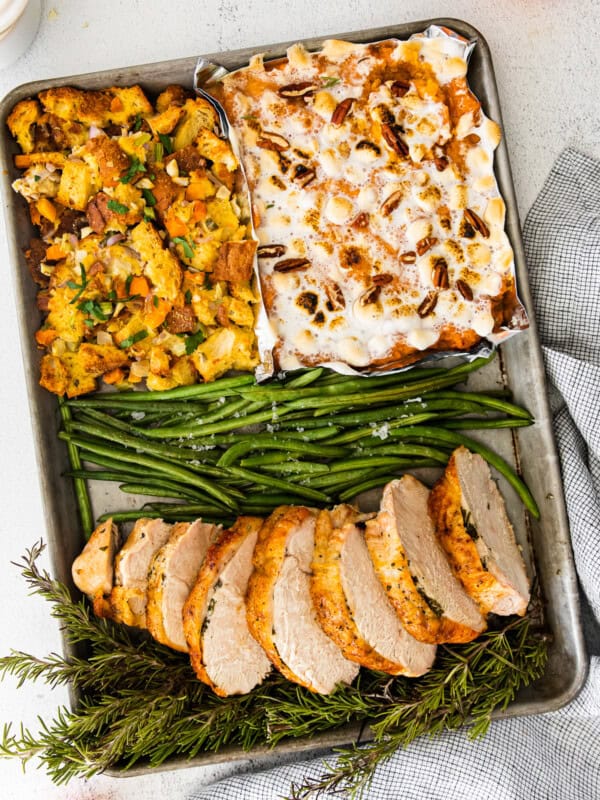
Sheet Pan Turkey Breast (One Pan Thanksgiving Dinner)
Air Fryer Turkey Breast

Smoked Turkey Breast
Instant Pot Turkey Breast
Deep Fried Turkey Breast Recipe
Equipment
- Instant Read Meat Thermometer
Ingredients
- 1½-2 gallons canola oil or peanut oil
- 3 lb boneless, skinless turkey breast
- 2¼ tsp kosher salt
- freshly ground black pepper to taste
Instructions
- To determine the amount of oil needed to deep fry the turkey breast, place the breast in a large, deep stock pot and cover with water by 3 inches. Mark the water level and remove the breast—this is the amount of oil needed to fry your turkey breast. Note: The pot should be large enough that the water/oil comes no more than halfway up the sides of the pot. 1½-2 gallons canola oil
- Pat the turkey breast dry with paper towels and liberally season with kosher salt and ground black pepper. Leave at room temperature for 1 hour (or refrigerate, uncovered, 1 to 24 hours). 2¼ tsp kosher salt, freshly ground black pepper, 3 lb boneless, skinless turkey breast
- While the breast air dries, dry the pot and add the measured amount of oil. Heat the oil until it registers 350°F on a deep-frying thermometer. 1½-2 gallons canola oil
- Very slowly and carefully (protecting yourself from splatters) lower the turkey breast into the hot oil and fry until golden brown, turning it over once. The breast is done when the internal temperature (at the thickest part) registers 165°F on an instant read thermometer. Be sure to check the oil temperature often to maintain the oil at 350°F.
- The cook time will depend how large the breast is, but a rough rule of thumb is about 3-4 minutes per pound plus 5 minutes. (About 15-20 minutes total for a 2½-3 pound breast.)
- Remove the breast and allow it to rest 5 minutes before cutting into ½-inch slices.
Video
Nutrition
By Becky Hardin
Published Jul 12, 2017


This Essential Grocery List is an absolute life saver for my family on the busy weeks. When I started this journey to learn how to cook, I quickly realized that the first step in cooking is having staple ingredients on hand. I want to avoid having to run out to the grocery store every single time I prepare a new recipe. Having a well-stocked pantry has made my life in the kitchen so much simpler, because when it’s time to cook, I have what I need.

Essential Grocery List
It’s so helpful to have a basic grocery list to help me remember which foods to buy at the store. This food shopping list is my go-to!
It’s better to stock up on things like grains, seasonings and spices, baking essentials, oils, condiments, canned and frozen foods, etc. so I can just grab them when I need them. These things have a long shelf life , so I keep them in my kitchen for convenience.
However, I do have to go to the supermarket sometimes, and there’s a way to make that trip easy and hassle-free: I keep a grocery list! If I go in blindly, I’ll leave with things I don’t need, and nothing that actually helps me prepare a good meal.
In the list below, I’ve compiled everything I always have on my stock-up grocery list.
I’ve got you covered! I created an easy grocery list filled with all of the essentials. Plus there’s a free printable version that you can take with you to the grocery store. It has everything you need to stock your pantry, your freezer, and your refrigerator.

Click to get my Free Printable Grocery List
What to Buy at the Grocery Store
This is the perfect grocery list filled with all the basics and essentials. It should help get you going if you’re new to cooking, or if you’re just left staring helplessly at an empty pantry and don’t know how to fill it.
When I first started cooking, things could seem overwhelming. I quickly realized that they more prepared I could be, the more confident I felt. If you already have the basics in your kitchen, then you can shop stress-free.
So print out our easy grocery list, stock up your pantry and fridge, and you’ll be cooking in no time!
Click to get my Free Printable Grocery List for the perfectly stocked pantry and freezer!
Fresh Produce
- Apples
- Bananas
- Strawberries
- Avocados
- Bell Peppers
- Carrots
- Broccoli
- Garlic
- Lemons/Limes
- Onion
- Parsley
- Cilantro
- Basil
- Potatoes
- Spinach
- Tomatoes
GRAINS
- Breadcrumbs
- Pasta
- Quinoa
- Rice
- Sandwich Bread
- Tortillas
MEAT/PROTEIN
- Chicken
- Eggs
- Ground Beef
- Sliced Turkey
- Lunch Meat
DAIRY
- Butter
- Sliced Cheese
- Shredded Cheese
- Milk
- Sour Cream
- Greek Yogurt
BAKING GOODS
- Baking powder
- Baking Soda
- Granulated Sugar
- Brown Sugar
- Flour
- Honey
- Vanilla Extract
- Dry Yeast
- Chocolate Chips
- Cocoa Powder
- Powdered Sugar
FREEZER
- Fruit and Berries
- Frozen Veggies (Corn, Peas, Broccoli, etc)
- Juice Concentrate
- Pizza or Other Convenience Meals
- Pie Crust
- Cookie Dough
CANNED/DRIED GOODS
- Chicken stock/broth
- Salsa
- Diced Tomatoes
- Jam/Jelly
- Peanut Butter
- Pasta Sauce
- Beans (Black Beans, Chickpeas, Baked Beans, etc)
- Soups
- Tuna
- Green Chiles
- Canned Veggies
- Coffee or Tea
Get more details on the best non-perishable and pantry foods
CONDIMENTS/SPICES
- Black Pepper
- Chili Powder
- Cinnamon
- Crushed Red Pepper
- Cumin
- Garlic Powder
- Ketchup
- Mustard
- Mayo
- Nutmeg
- Paprika
- Salt (Course Sea Salt and Kosher Salt)
- Soy Sauce
- Steak Sauce
- Hot Sauce/ Buffalo Sauce
- Salad Dressings
OILS/VINEGARS
- Apple cider vinegar
- Balsamic vinegar
- Coconut Oil
- Olive Oil
- Vegetable/Canola Oil
- Red Wine Vinegar
- White Vinegar
- Cooking Wine
- White Wine Vinegar
SNACKS
- Crackers
- Nuts
- Quick Oats
- Popcorn
- Tortilla Chips
- Cereal
Click to get my Free Printable Grocery List for the perfectly stocked pantry and freezer!

Click ☝🏻 for my FREE Grocery List Printable!
I hope this essential grocery list can help you buy what you need and make your home cooking so much easier!
Stock Your Kitchen
Find more ideas for your grocery list, stock up your kitchen, and print more cooking guides and charts to keep handy!

Non-Perishable Foods to Stock Up On

Frozen Vegetables to Stock Up On (and Recipes to Make)

Ultimate List of Cooking Herbs for Your Kitchen

Ultimate List of Cooking Spices for Your Kitchen

Cooking Oil 101: Types of Cooking Oils to Use

26 Types of Pasta and When to Use Them

What Fruits and Vegetables are in Season?

Meat Temperature Chart (Free Printable)

How to Meal Prep (Guide for Beginners)

Basic Cooking Measurements & Kitchen Conversion Chart

