
By Becky Hardin
Updated Feb 18, 2025
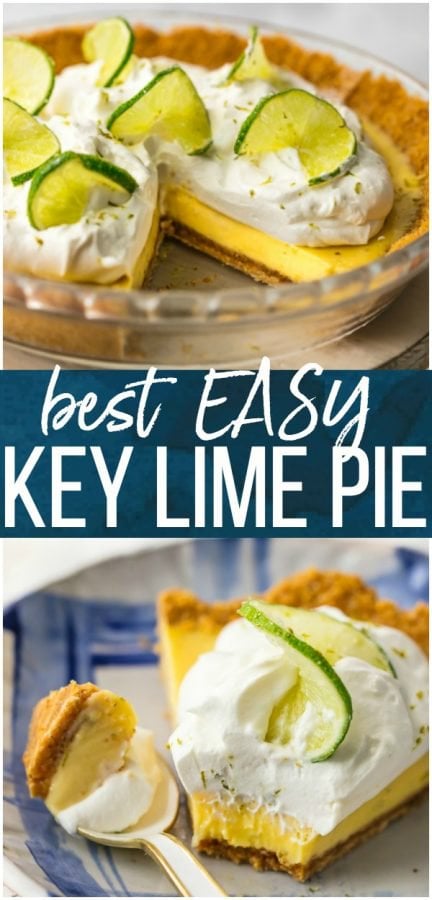
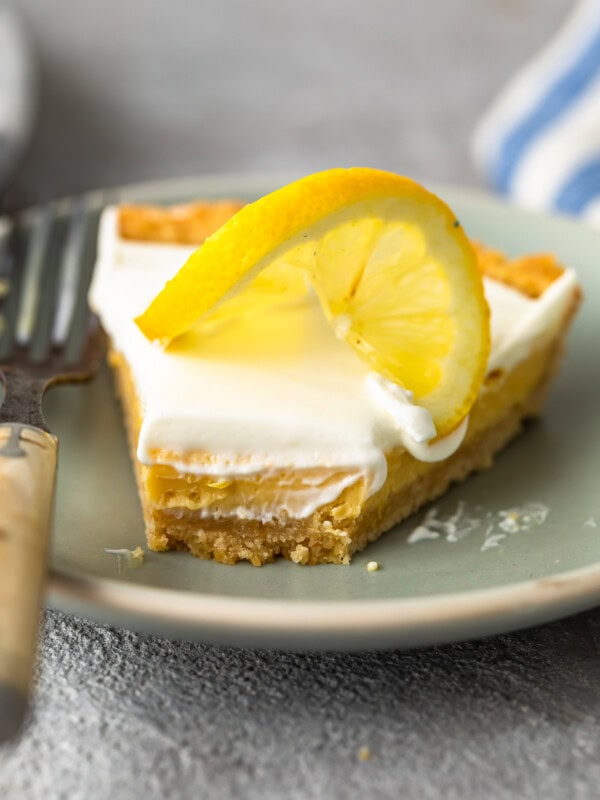
Key lime pie is the best summer dessert with its refreshing flavors! Today I’m sharing a quick version of traditional key lime pie with few shortcuts and minimal preparation. It is part creamy, part tart, and all-the-way yummy. No outdoor BBQ or family celebration is complete without this perfect pie!
Key Lime Pie Recipe
My homemade key lime pie recipe has fresh key lime juice, eggs, condensed milk, and a delicious graham cracker crust. With the buttery crust this soft, creamy, tart filling is everything, just perfect for a summer party!
Key Lime Pie is the type of recipe that takes a Summer party from good to great. I don’t think any bbq or family get together is complete without a slice of this creamy, tart, and delicious pie. You’ll be the star of the show when you show up with this delicious dessert! I love to use top it with my homemade whipped cream or cool whip!
Tips for Beginners
- Allow the pie filling to cool and thicken on the counter while your graham cracker crust bakes.
- Cool your crust completely before adding in the filling.
Ingredients1x2x3x
For the Graham Cracker Crust
- ▢ 1½ cups graham cracker crumbs 213 grams (about 12 cracker sheets)
- ▢ 6 tablespoons unsalted butter 85 grams, melted (¾ stick)
- ▢ ⅓ cup granulated sugar 67 grams
- ▢ ¼ teaspoon sea salt optional
For the Pie
- ▢ 4 teaspoons grated lime zest 8 grams, from 2 Persian limes
- ▢ 4 large egg yolks 56 grams
- ▢ 14 ounces sweetened condensed milk 396 grams (1 can)
- ▢ ½ cup freshly squeezed lime juice 114 grams, from 10-12 key limes or 4 Persian limes
For Topping
- ▢ stabilized Whipped Cream (or cool whip)-click for recipe
- ▢ lime slices/wheels
Instructions
For the Graham Cracker Crust
- Preheat oven to 350°F.
- In a medium bowl, mix the graham cracker crumbs, melted butter, sugar and salt until well combined. The mixture will resemble wet sand. 1½ cups graham cracker crumbs, 6 tablespoons unsalted butter, ⅓ cup granulated sugar, ¼ teaspoon sea salt
- Press the crust mixture evenly and firmly into the bottom and (almost all of the way) up the sides of the pie dish. (Do NOT cover the pans lip with crumbs.) Use the bottom of a measuring cup or of a flat-bottomed glass to press the crumbs into a crust, if desired.
- Bake the crust for 9 minutes. Transfer the cooked crust to a cooling rack and cool it completely before adding the pie filling.
For the Pie
- In a medium-sized mixing bowl, whisk together the zest and yolks for 2 minutes. Whisk in the condensed milk and then add the juice and beat well. While the crust cooks and cools, set the lime pie filling aside at room temperature to thicken. 4 teaspoons grated lime zest, 4 large egg yolks, 14 ounces sweetened condensed milk, ½ cup freshly squeezed lime juice
- Pour the filling into the cooled crust and bake until the center is just set, but it still a little wiggly, 15-17 minutes.
- Transfer the pie to a cooling rack and let cool completely.
- Cover the pie, tightly, with plastic wrap and refrigerate at least 3 hours and up to 24 hours, before serving.
For Topping
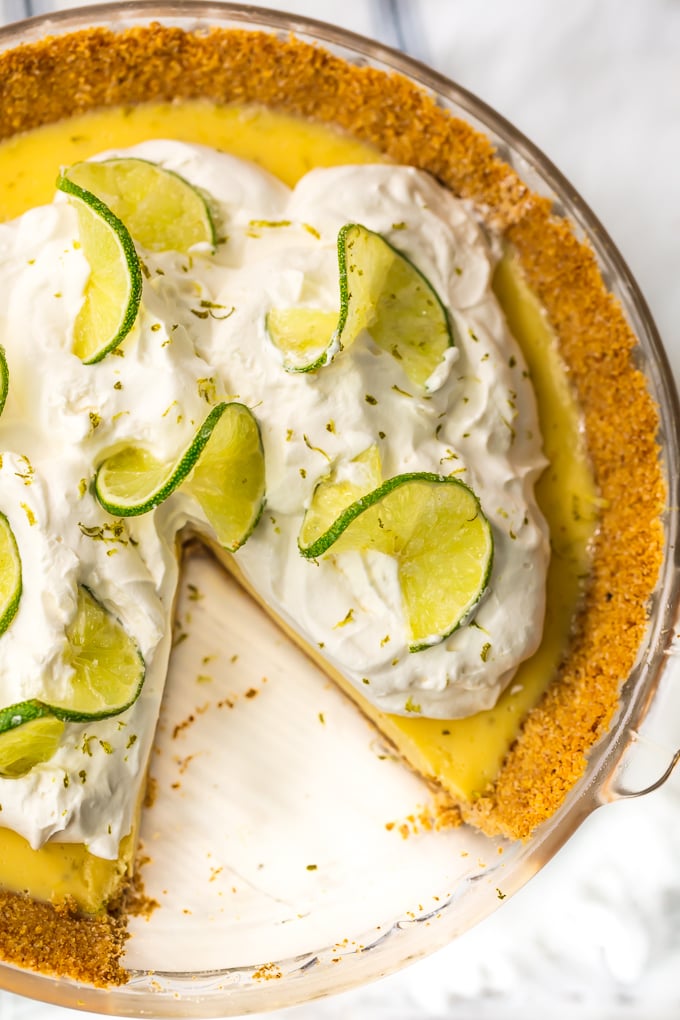
- Up to 2 hours before serving, top the pie with sweetened, freshly whipped cream. Garnish with twisted lime wheels or thin lime slices. lime slices/wheels, stabilized Whipped Cream
Equipment
- Kitchen Scale (optional)
- Pie Pan
- Stand Mixer
Becky’s Tips
- I use a 9-inch pie pan for this pie, but an 8-inch pie pan or a 9-inch tart pan work just as well.
- If your crust seems to be sticking to the pie plate when you’re ready to serve, one trick that works like a charm is filling a large bowl with warm water and dipping the bottom of the pie plate into the water for a bit to loosen the crust. Do not submerge the pie, you’re just putting the bottom of the pie plate in the water to add some heat; release the crust.
- You can also use store bought graham crust.
- Nutritional information does not include toppings.
Nutrition information is automatically calculated, so should only be used as an approximation.
What is the difference between Key Limes and Regular Limes?
Key Limes, often called Mexican or West Indian Limes, used to be commercially grown in Key West, hence their name. Key Limes are more aromatic than a regular lime and typically have a more floral and tarter flavor. They are smaller and more yellow than a regular lime.
Although they are less common in the USA. You REALLY can taste the difference between typical lime juice and key lime juice, so find them if you can!
Key Limes are in season in the US from June through August, but you should be able to get them year round, especially at stores like Whole Foods.
How to Store
Leftovers stay good for 3-5 days. Wrap the leftover key lime pie with the plastic wrap sheet and refrigerate. Don’t let it sit on the kitchen counter for more than two hours.
This pie also freezes beautifully. Wrap it with plastic wrap and freeze as long as you like. Thaw for a few hours in the fridge and serve.
More fruity pie recipes you’ll love
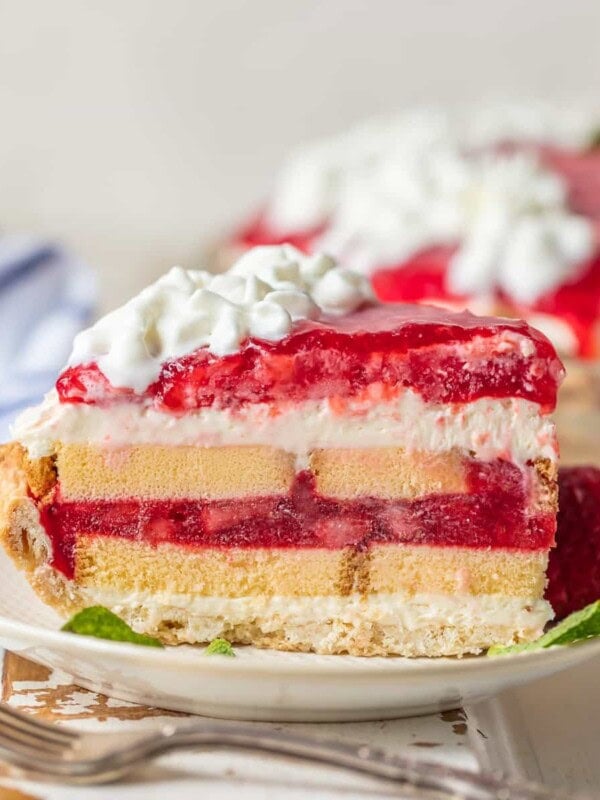
Easy Strawberry Shortcake Pie Recipe
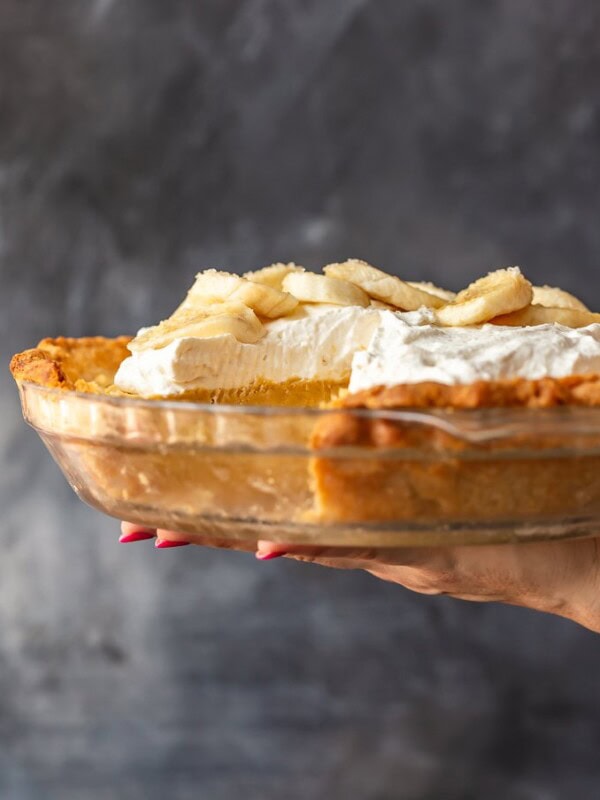
Easy Banana Cream Pie Recipe
Sour Cream Lemon Pie Recipe with Saltine Cracker Crust
Homemade Cherry Pie Recipe

Key Lime Pie Recipe
Equipment
- Kitchen Scale (optional)
- Pie Pan
- Stand Mixer
Ingredients
For the Graham Cracker Crust
- 1½ cups graham cracker crumbs 213 grams (about 12 cracker sheets)
- 6 tablespoons unsalted butter 85 grams, melted (¾ stick)
- ⅓ cup granulated sugar 67 grams
- ¼ teaspoon sea salt optional
For the Pie
- 4 teaspoons grated lime zest 8 grams, from 2 Persian limes
- 4 large egg yolks 56 grams
- 14 ounces sweetened condensed milk 396 grams (1 can)
- ½ cup freshly squeezed lime juice 114 grams, from 10-12 key limes or 4 Persian limes
For Topping
- stabilized Whipped Cream (or cool whip)-click for recipe
- lime slices/wheels
Instructions
For the Graham Cracker Crust
- Preheat oven to 350°F.
- In a medium bowl, mix the graham cracker crumbs, melted butter, sugar and salt until well combined. The mixture will resemble wet sand. 1½ cups graham cracker crumbs, 6 tablespoons unsalted butter, ⅓ cup granulated sugar, ¼ teaspoon sea salt
- Press the crust mixture evenly and firmly into the bottom and (almost all of the way) up the sides of the pie dish. (Do NOT cover the pans lip with crumbs.) Use the bottom of a measuring cup or of a flat-bottomed glass to press the crumbs into a crust, if desired.
- Bake the crust for 9 minutes. Transfer the cooked crust to a cooling rack and cool it completely before adding the pie filling.
For the Pie
- In a medium-sized mixing bowl, whisk together the zest and yolks for 2 minutes. Whisk in the condensed milk and then add the juice and beat well. While the crust cooks and cools, set the lime pie filling aside at room temperature to thicken. 4 teaspoons grated lime zest, 4 large egg yolks, 14 ounces sweetened condensed milk, ½ cup freshly squeezed lime juice
- Pour the filling into the cooled crust and bake until the center is just set, but it still a little wiggly, 15-17 minutes.
- Transfer the pie to a cooling rack and let cool completely.
- Cover the pie, tightly, with plastic wrap and refrigerate at least 3 hours and up to 24 hours, before serving.
For Topping
- Up to 2 hours before serving, top the pie with sweetened, freshly whipped cream. Garnish with twisted lime wheels or thin lime slices. lime slices/wheels, stabilized Whipped Cream
Notes
- I use a 9-inch pie pan for this pie, but an 8-inch pie pan or a 9-inch tart pan work just as well.
- If your crust seems to be sticking to the pie plate when you’re ready to serve, one trick that works like a charm is filling a large bowl with warm water and dipping the bottom of the pie plate into the water for a bit to loosen the crust. Do not submerge the pie, you’re just putting the bottom of the pie plate in the water to add some heat; release the crust.
- You can also use store bought graham crust.
- Nutritional information does not include toppings.
Nutrition
By Becky Hardin
Published Jul 12, 2017


This Essential Grocery List is an absolute life saver for my family on the busy weeks. When I started this journey to learn how to cook, I quickly realized that the first step in cooking is having staple ingredients on hand. I want to avoid having to run out to the grocery store every single time I prepare a new recipe. Having a well-stocked pantry has made my life in the kitchen so much simpler, because when it’s time to cook, I have what I need.

Essential Grocery List
It’s so helpful to have a basic grocery list to help me remember which foods to buy at the store. This food shopping list is my go-to!
It’s better to stock up on things like grains, seasonings and spices, baking essentials, oils, condiments, canned and frozen foods, etc. so I can just grab them when I need them. These things have a long shelf life , so I keep them in my kitchen for convenience.
However, I do have to go to the supermarket sometimes, and there’s a way to make that trip easy and hassle-free: I keep a grocery list! If I go in blindly, I’ll leave with things I don’t need, and nothing that actually helps me prepare a good meal.
In the list below, I’ve compiled everything I always have on my stock-up grocery list.
I’ve got you covered! I created an easy grocery list filled with all of the essentials. Plus there’s a free printable version that you can take with you to the grocery store. It has everything you need to stock your pantry, your freezer, and your refrigerator.

Click to get my Free Printable Grocery List
What to Buy at the Grocery Store
This is the perfect grocery list filled with all the basics and essentials. It should help get you going if you’re new to cooking, or if you’re just left staring helplessly at an empty pantry and don’t know how to fill it.
When I first started cooking, things could seem overwhelming. I quickly realized that they more prepared I could be, the more confident I felt. If you already have the basics in your kitchen, then you can shop stress-free.
So print out our easy grocery list, stock up your pantry and fridge, and you’ll be cooking in no time!
Click to get my Free Printable Grocery List for the perfectly stocked pantry and freezer!
Fresh Produce
- Apples
- Bananas
- Strawberries
- Avocados
- Bell Peppers
- Carrots
- Broccoli
- Garlic
- Lemons/Limes
- Onion
- Parsley
- Cilantro
- Basil
- Potatoes
- Spinach
- Tomatoes
GRAINS
- Breadcrumbs
- Pasta
- Quinoa
- Rice
- Sandwich Bread
- Tortillas
MEAT/PROTEIN
- Chicken
- Eggs
- Ground Beef
- Sliced Turkey
- Lunch Meat
DAIRY
- Butter
- Sliced Cheese
- Shredded Cheese
- Milk
- Sour Cream
- Greek Yogurt
BAKING GOODS
- Baking powder
- Baking Soda
- Granulated Sugar
- Brown Sugar
- Flour
- Honey
- Vanilla Extract
- Dry Yeast
- Chocolate Chips
- Cocoa Powder
- Powdered Sugar
FREEZER
- Fruit and Berries
- Frozen Veggies (Corn, Peas, Broccoli, etc)
- Juice Concentrate
- Pizza or Other Convenience Meals
- Pie Crust
- Cookie Dough
CANNED/DRIED GOODS
- Chicken stock/broth
- Salsa
- Diced Tomatoes
- Jam/Jelly
- Peanut Butter
- Pasta Sauce
- Beans (Black Beans, Chickpeas, Baked Beans, etc)
- Soups
- Tuna
- Green Chiles
- Canned Veggies
- Coffee or Tea
Get more details on the best non-perishable and pantry foods
CONDIMENTS/SPICES
- Black Pepper
- Chili Powder
- Cinnamon
- Crushed Red Pepper
- Cumin
- Garlic Powder
- Ketchup
- Mustard
- Mayo
- Nutmeg
- Paprika
- Salt (Course Sea Salt and Kosher Salt)
- Soy Sauce
- Steak Sauce
- Hot Sauce/ Buffalo Sauce
- Salad Dressings
OILS/VINEGARS
- Apple cider vinegar
- Balsamic vinegar
- Coconut Oil
- Olive Oil
- Vegetable/Canola Oil
- Red Wine Vinegar
- White Vinegar
- Cooking Wine
- White Wine Vinegar
SNACKS
- Crackers
- Nuts
- Quick Oats
- Popcorn
- Tortilla Chips
- Cereal
Click to get my Free Printable Grocery List for the perfectly stocked pantry and freezer!

Click ☝🏻 for my FREE Grocery List Printable!
I hope this essential grocery list can help you buy what you need and make your home cooking so much easier!
Stock Your Kitchen
Find more ideas for your grocery list, stock up your kitchen, and print more cooking guides and charts to keep handy!

Non-Perishable Foods to Stock Up On

Frozen Vegetables to Stock Up On (and Recipes to Make)

Ultimate List of Cooking Herbs for Your Kitchen

Ultimate List of Cooking Spices for Your Kitchen

Cooking Oil 101: Types of Cooking Oils to Use

26 Types of Pasta and When to Use Them

What Fruits and Vegetables are in Season?

Meat Temperature Chart (Free Printable)

How to Meal Prep (Guide for Beginners)

Basic Cooking Measurements & Kitchen Conversion Chart

