
By Becky Hardin
Updated May 17, 2025
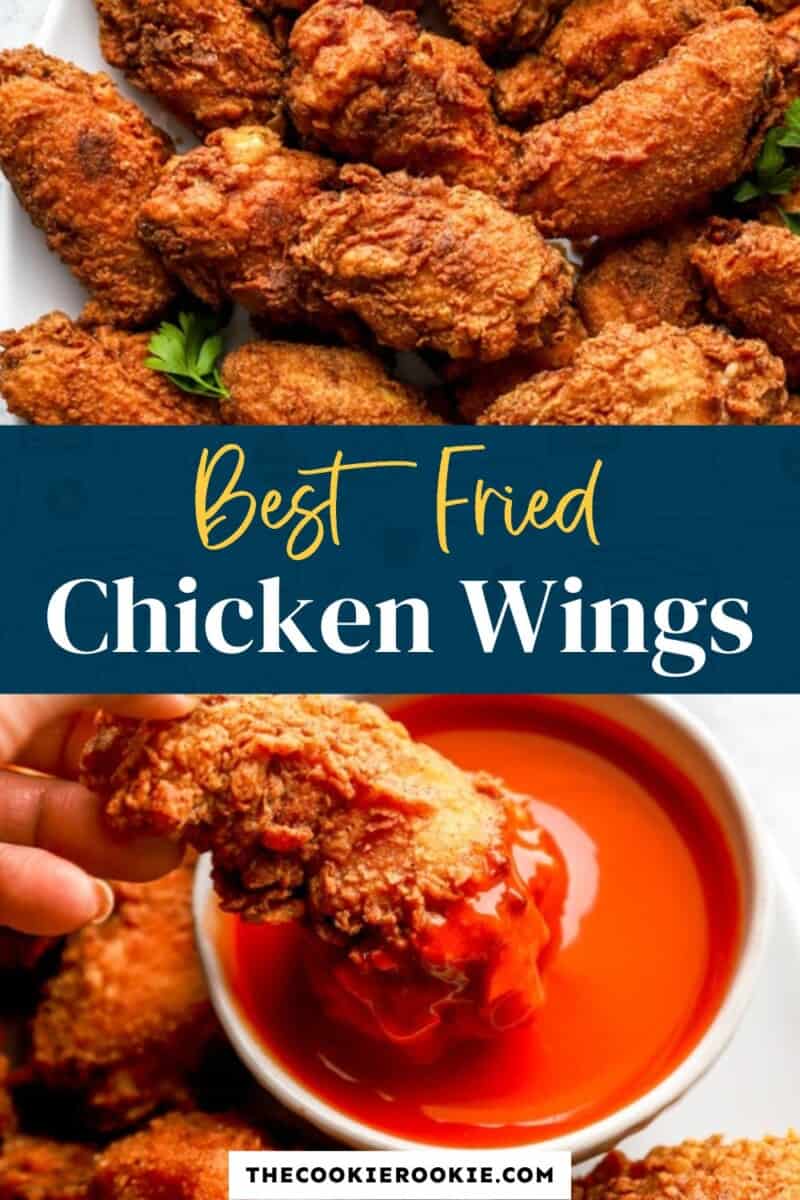
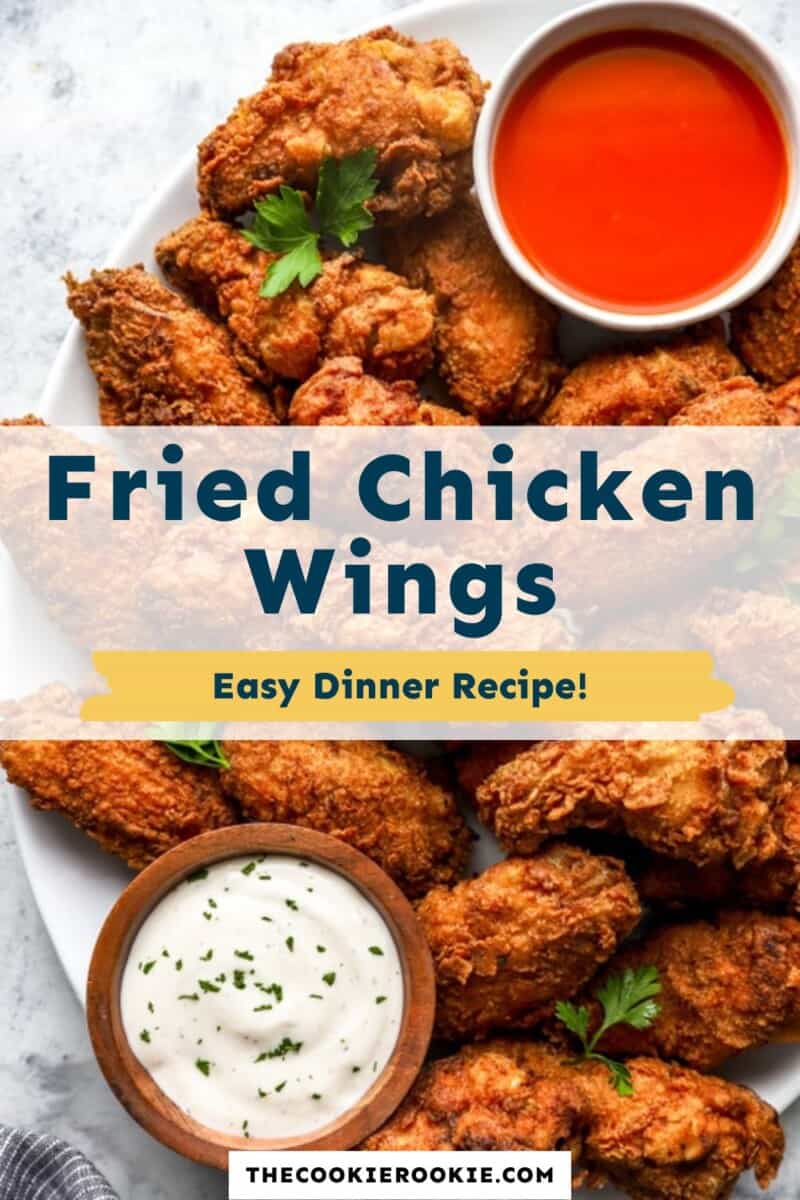
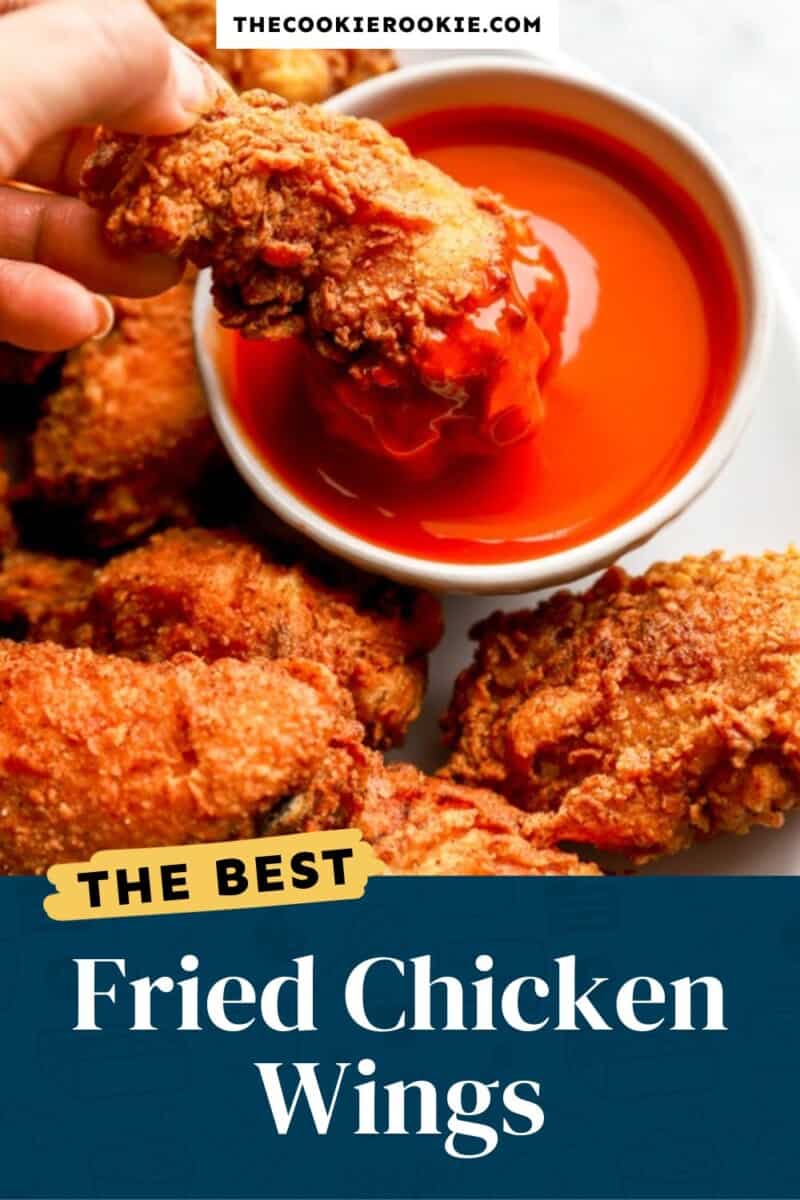
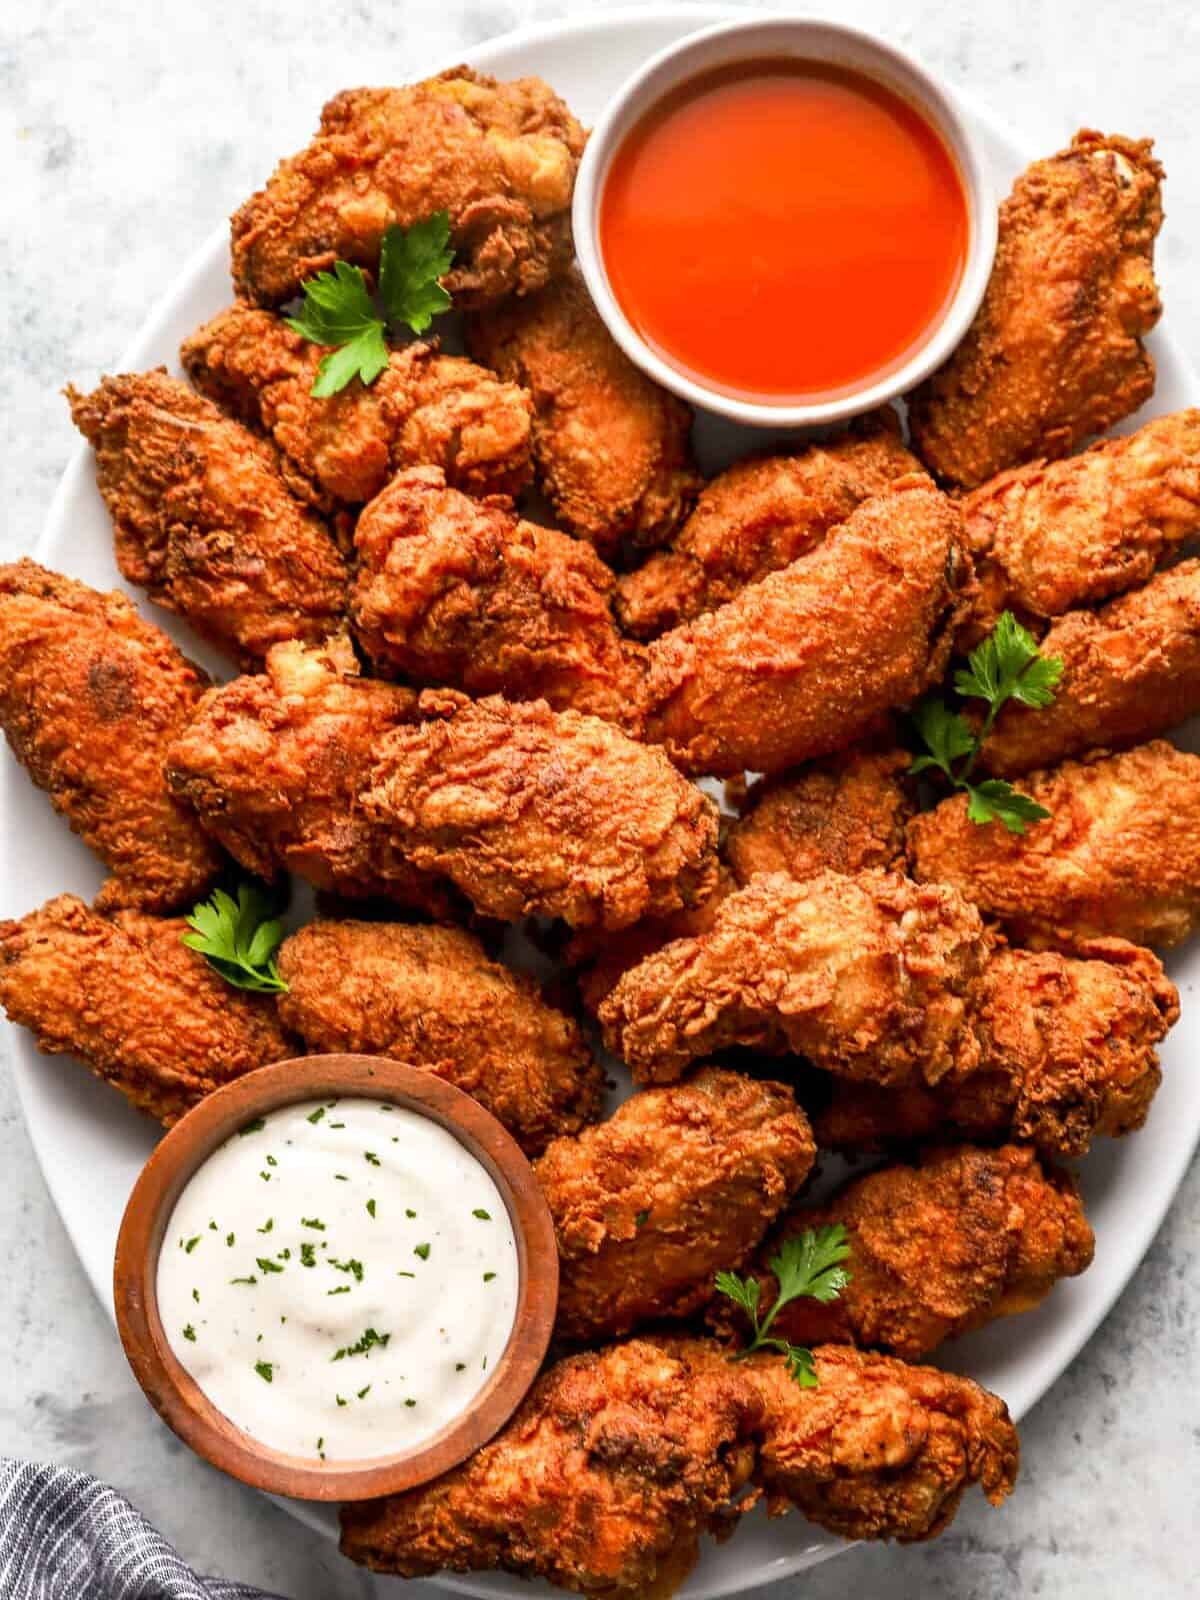
If you’re looking for the ultimate game day snack, look no further than a plate of crispy and delicious Fried Chicken Wings. The secret to these wings lies in the tangy buttermilk marinade that infuses the meat with flavor and tenderness, and the well-seasoned flour coating that creates a satisfyingly crunchy texture.
Fried Chicken Wings
One of the best things about this classic fried chicken recipe is its simplicity and versatility. With just a few ingredients and some basic cooking techniques, you can whip up a plate of wings that will be a hit with everyone.
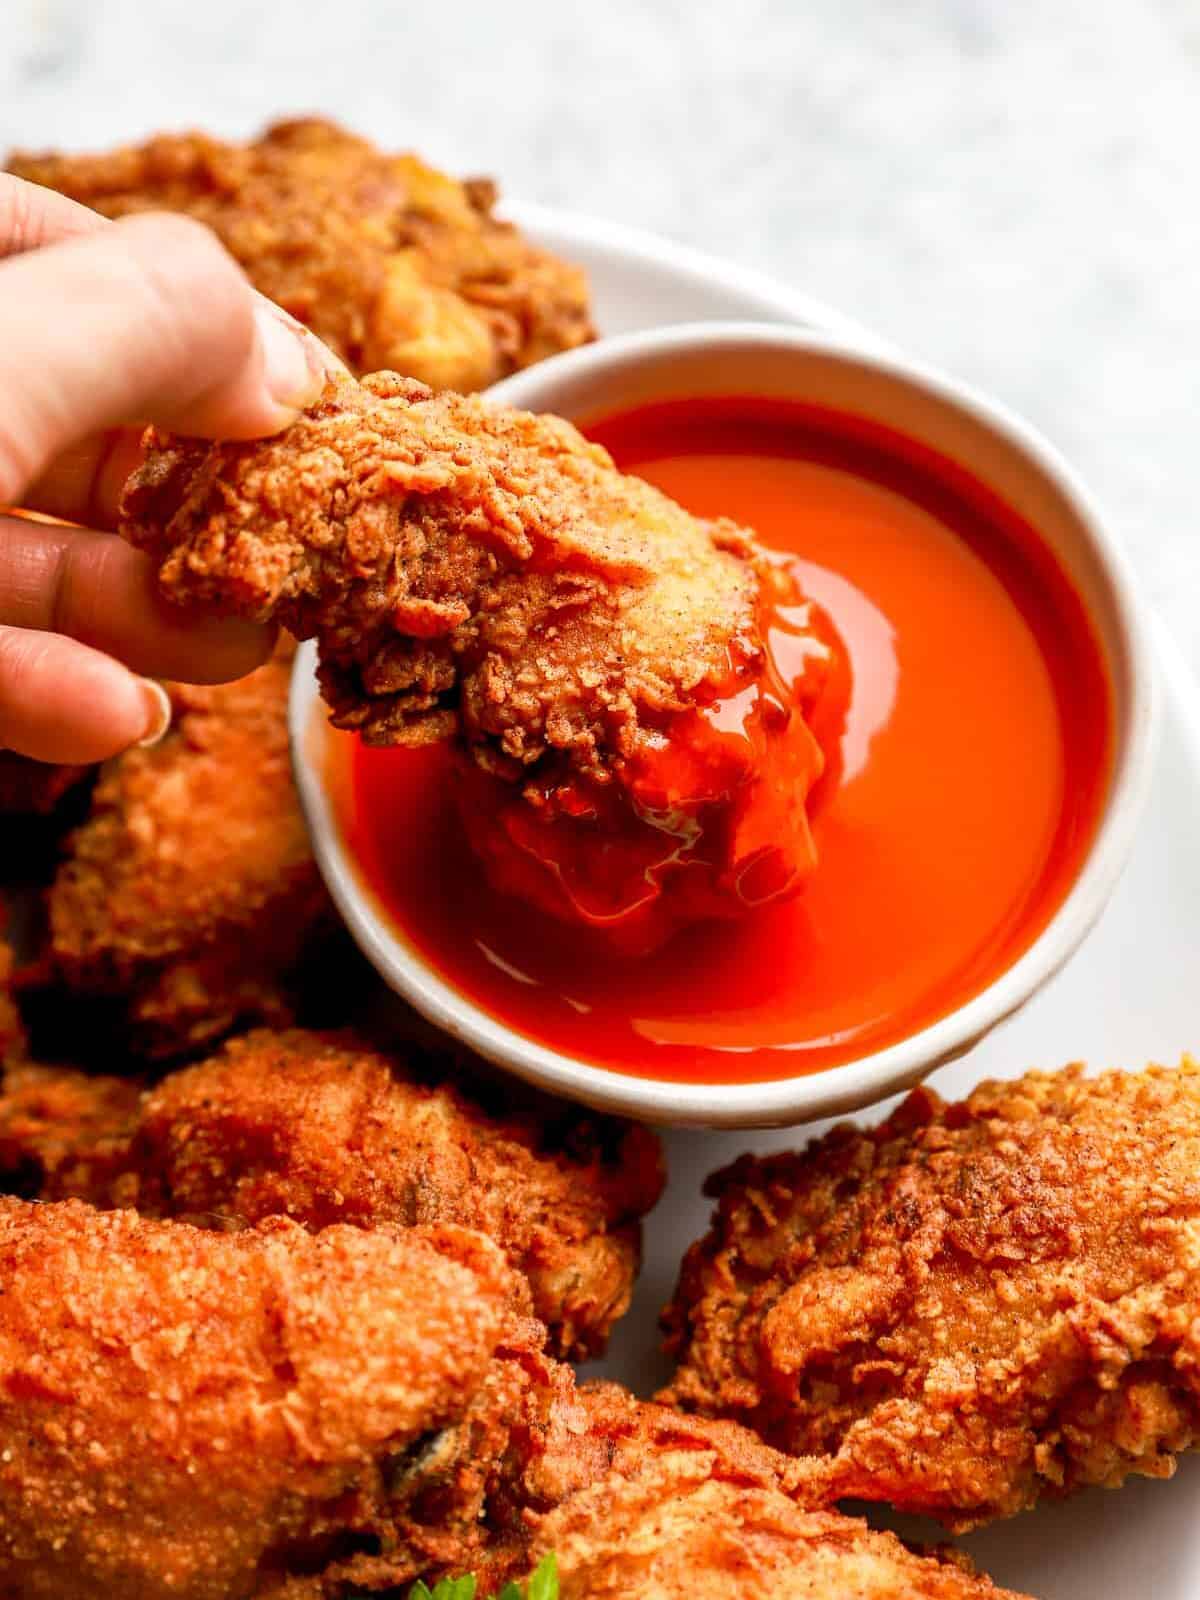
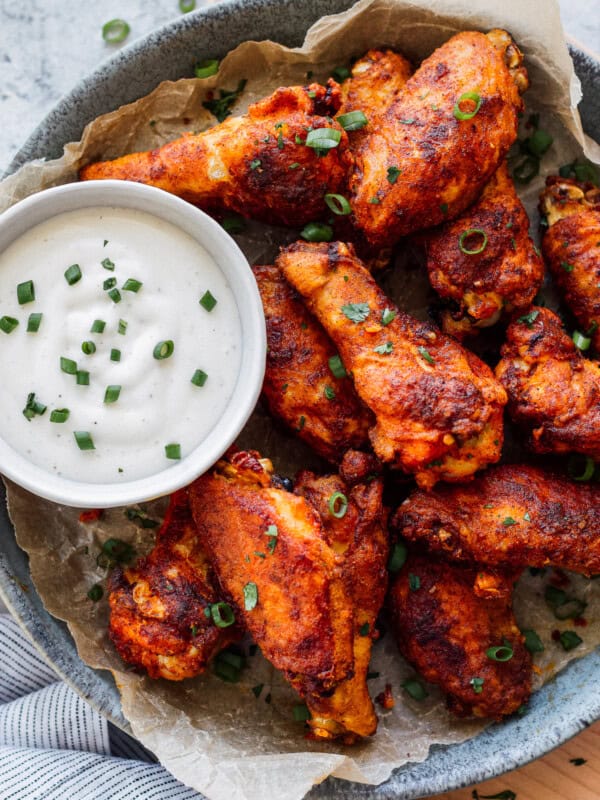
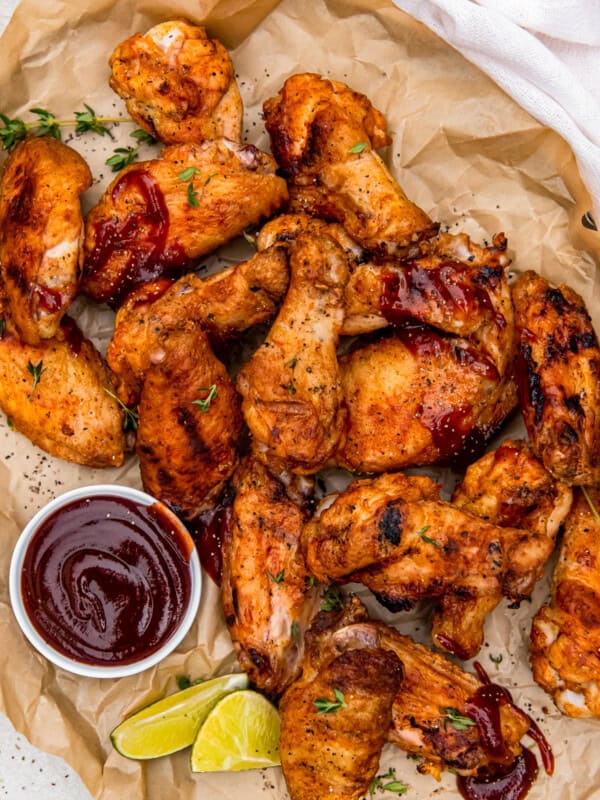
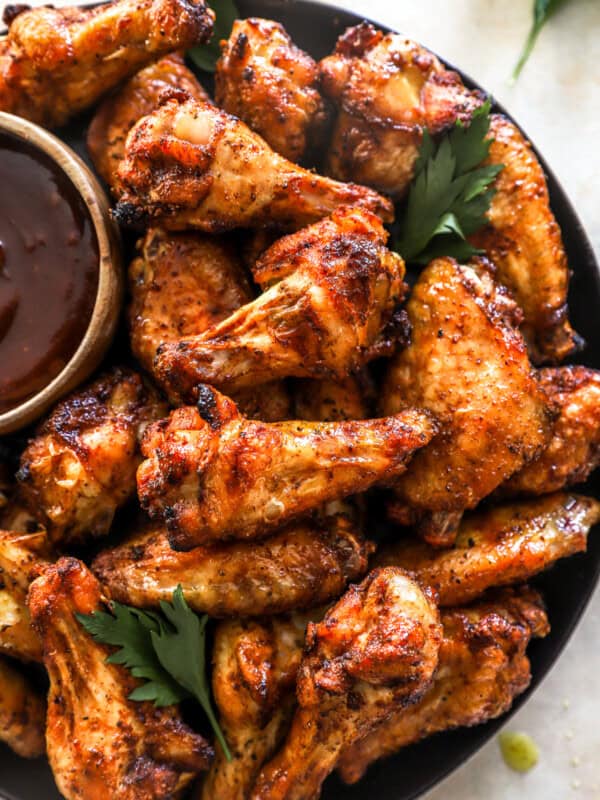
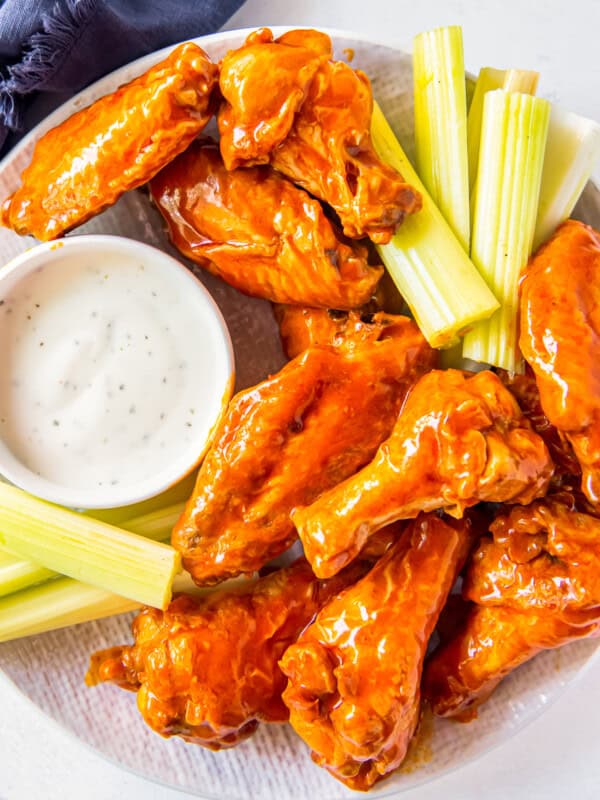
There are so many ways to customize these wings. For spicy fried wings, add a few dashes of hot sauce to the buttermilk or a pinch of cayenne pepper to the flour. You could also toss the fried wings in Buffalo sauce .Drizzle honey or hot honey over the freshly fried wings for a sweet kick. For Korean fried wings, toss them with gochujang sauce , or for barbecue wings, toss them with barbecue sauce . The taste options are endless!
Ingredients1x2x3x
- ▢ 2 cups buttermilk (see note)
- ▢ 4 pounds bone-in, skin-on chicken wings thawed if frozen (about 16-20 wings), patted dry for crispy wings
- ▢ 2 cups all-purpose flour
- ▢ 2 tablespoons ground paprika
- ▢ 1½ tablespoons seasoned salt
- ▢ 1 teaspoon garlic powder
- ▢ 1 teaspoon onion powder
- ▢ vegetable oil for frying, you can also use any neutral oil with a high smoke point, like canola, peanut, or avocado.
Video
Instructions
- Pour the buttermilk in a large bowl. 2 cups buttermilk
- Add in the chicken wings, cover the bowl with plastic wrap, and marinate for at least 1 hour or up to overnight. The longer they marinate, the more tender they will be. 4 pounds bone-in, skin-on chicken wings
- Combine the flour and seasonings in a shallow dish. 2 cups all-purpose flour, 2 tablespoons ground paprika, 1½ tablespoons seasoned salt, 1 teaspoon garlic powder, 1 teaspoon onion powder
- Heat about 3 inches of oil to 350°F in a Dutch oven, or fill a deep fryer with oil and set the temperature to 350°F. vegetable oil
- Remove 5-6 chicken wings from the buttermilk. Let the excess liquid drip off.
- Dredge the wings in the flour, pressing the wings firmly into the dish to ensure they are fully coated.
- Gently drop the wings into the oil and fry for 5-7 minutes until golden brown.
- Transfer the wings to a plate or sheet pan lined with paper towels. Repeat the dredging and frying steps for the remaining chicken wings.
- To keep the wings warm, arrange them in a single layer on a wire rack set over a rimmed baking sheet, leaving space between each wing, and place them in a 200°F oven until ready to serve.
- Serve with your favorite dipping sauce and enjoy.
Equipment
- Deep Fryer OR
- Dutch Oven AND
- Deep Frying Thermometer
- Baking Sheet
Becky’s Tips
- To make your own buttermilk, measure 2 cups of milk, remove 2 tablespoons, and mix in 2 tablespoons of lemon juice or white vinegar. Let this mixture sit for 5 minutes before using it in the recipe.
- Don’t try to fry too much chicken at once. Frying more than 4-5 wings at a time will drop the temperature of the oil too much, leading to greasy chicken.
- I never recommend deep frying anything in olive oil, as it will burn.
Nutrition information is automatically calculated, so should only be used as an approximation.
How to Make Fried Chicken Wings Step by Step
Prepare the buttermilk : Pour 2 cups of buttermilk into a large bowl.

Add the wings : Add 4 pounds chicken wings, cover the bowl with plastic wrap, and marinate for at least 1 hour or up to overnight. The longer they marinate, the more tender they will be.
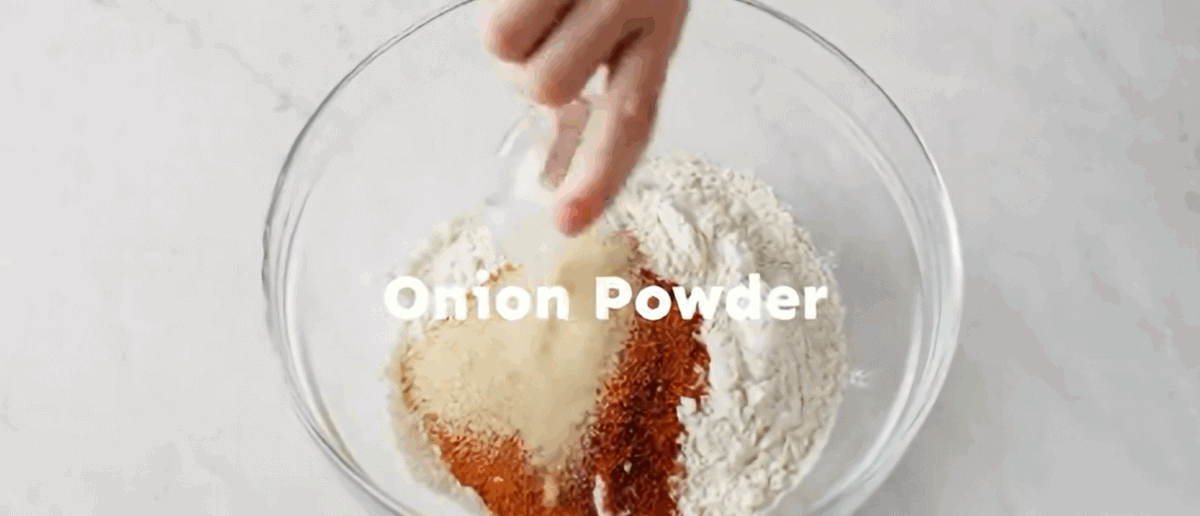
Prepare the breading: Combine the 2 cups all-purpose flour with 2 tablespoons ground paprika, 1½ tablespoons seasoned salt, 1 teaspoon garlic powder, and 1 teaspoon onion powder.
Get the oil going: Heat about 3 inches of oil to 350°F in a Dutch oven, or fill a deep fryer with oil and set the temperature to 350°F.
Drain the wings: Remove 5-6 chicken wings from the buttermilk. Let the excess liquid drip off.
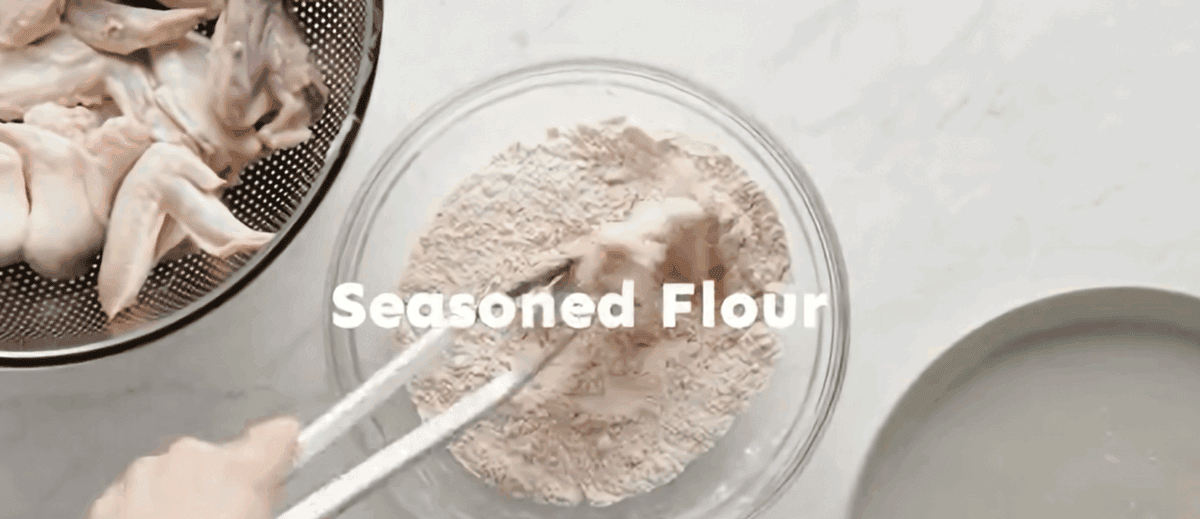
Coat the wings: Dredge the wings in the flour, pressing the wings firmly into the dish to ensure they are fully coated.
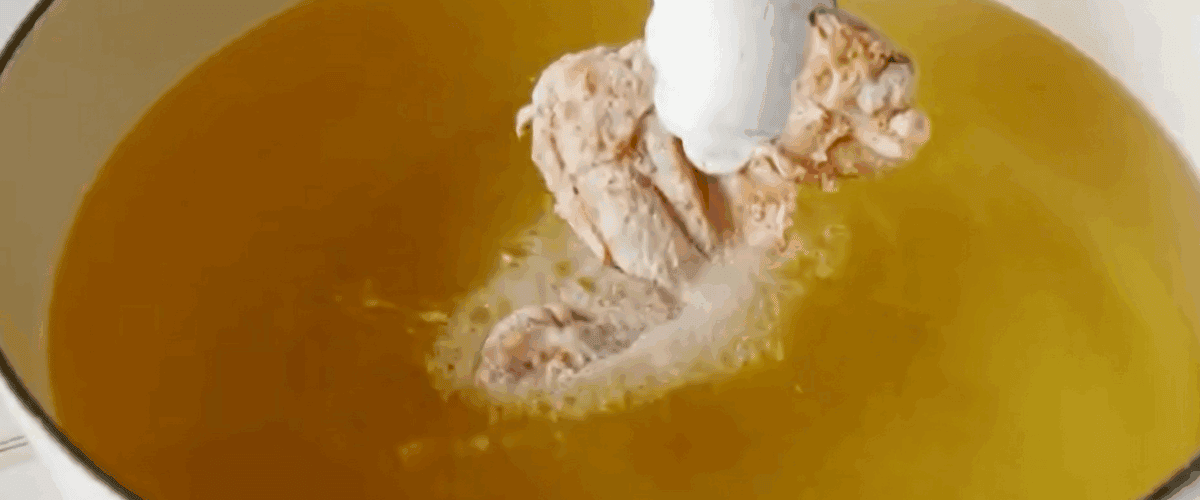
Fry the wings: Gently drop the wings into the oil and fry for 5-7 minutes until golden brown.
Blot the wings : Transfer the wings to a plate or sheet pan lined with paper towels. Repeat the dredging and frying steps for the remaining chicken wings.
Keep the wings warm : To keep the wings warm, arrange them in a single layer on a wire rack set over a rimmed baking sheet, leaving space between each wing, and place them in a 200°F oven until ready to serve.
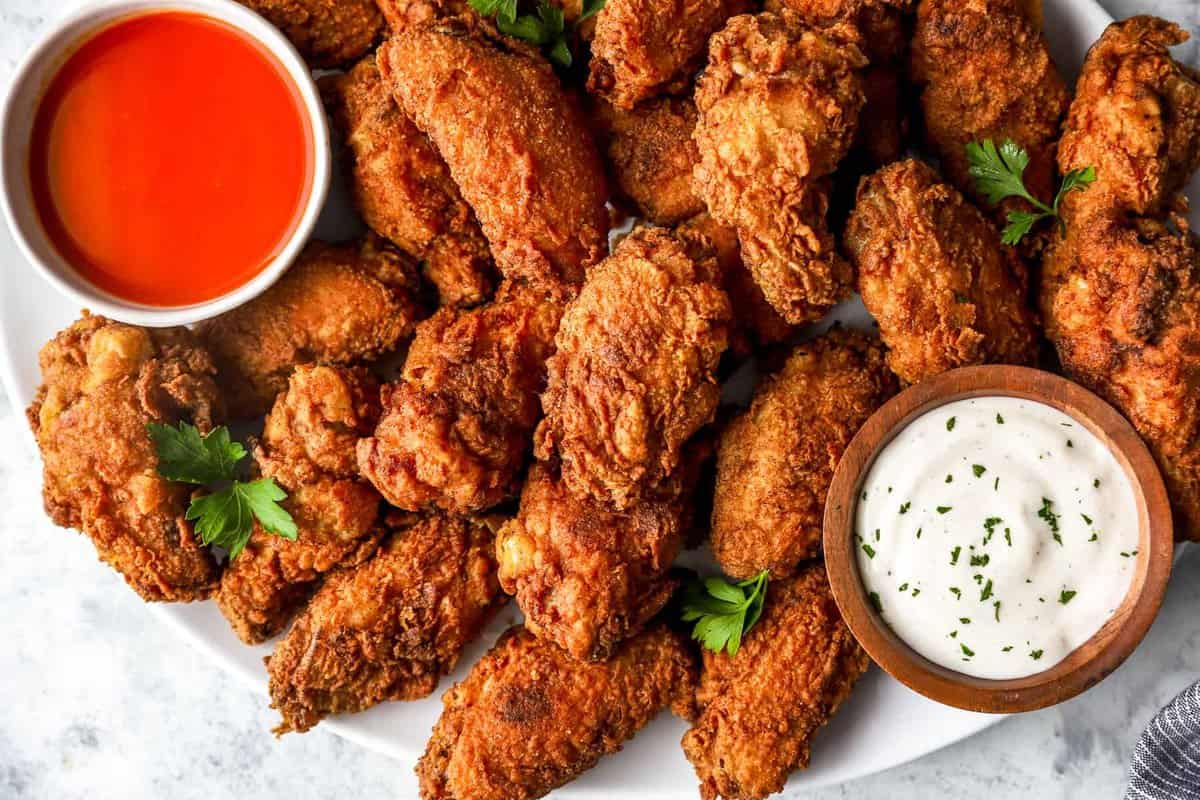
Serve and enjoy : Serve the wings with your favorite dipping sauce and enjoy.
How to Store
Store leftover fried chicken wings in an airtight container in the refrigerator for up to 3 days. Reheat in a 350°F oven on a wire rack set in a baking sheet for 15 minutes, or until heated through. Freeze in an airtight container for up to 3 months. Let thaw overnight in the refrigerator before reheating.
Serving Suggestions
No plate of wings is complete without our favorite dipping sauces to add even more flavor. Try with my homemade BBQ sauce , sweet and savory Honey Mustard , or a cool Ranch Dressing .
If you want to turn the wings into a meal or use this recipe with chicken breasts or chicken thighs, serve them with Crockpot Mashed Potatoes , a side of Green Beans and Bacon Recipe , and a Corn Casserole .
more chicken wing recipes we love
Baked Chicken Wings
Grilled Chicken Wings
Smoked Chicken Wings
Air Fryer Chicken Wings

Fried Chicken Wings Recipe
Equipment
- Deep Fryer OR
- Dutch Oven AND
- Deep Frying Thermometer
- Baking Sheet
Ingredients
- 2 cups buttermilk (see note)
- 4 pounds bone-in, skin-on chicken wings thawed if frozen (about 16-20 wings), patted dry for crispy wings
- 2 cups all-purpose flour
- 2 tablespoons ground paprika
- 1½ tablespoons seasoned salt
- 1 teaspoon garlic powder
- 1 teaspoon onion powder
- vegetable oil for frying, you can also use any neutral oil with a high smoke point, like canola, peanut, or avocado.
Instructions
- Pour the buttermilk in a large bowl. 2 cups buttermilk
- Add in the chicken wings, cover the bowl with plastic wrap, and marinate for at least 1 hour or up to overnight. The longer they marinate, the more tender they will be. 4 pounds bone-in, skin-on chicken wings
- Combine the flour and seasonings in a shallow dish. 2 cups all-purpose flour, 2 tablespoons ground paprika, 1½ tablespoons seasoned salt, 1 teaspoon garlic powder, 1 teaspoon onion powder
- Heat about 3 inches of oil to 350°F in a Dutch oven, or fill a deep fryer with oil and set the temperature to 350°F. vegetable oil
- Remove 5-6 chicken wings from the buttermilk. Let the excess liquid drip off.
- Dredge the wings in the flour, pressing the wings firmly into the dish to ensure they are fully coated.
- Gently drop the wings into the oil and fry for 5-7 minutes until golden brown.
- Transfer the wings to a plate or sheet pan lined with paper towels. Repeat the dredging and frying steps for the remaining chicken wings.
- To keep the wings warm, arrange them in a single layer on a wire rack set over a rimmed baking sheet, leaving space between each wing, and place them in a 200°F oven until ready to serve.
- Serve with your favorite dipping sauce and enjoy.
Video
Notes
- To make your own buttermilk, measure 2 cups of milk, remove 2 tablespoons, and mix in 2 tablespoons of lemon juice or white vinegar. Let this mixture sit for 5 minutes before using it in the recipe.
- Don’t try to fry too much chicken at once. Frying more than 4-5 wings at a time will drop the temperature of the oil too much, leading to greasy chicken.
- I never recommend deep frying anything in olive oil, as it will burn.
Nutrition
By Becky Hardin
Published Jul 12, 2017


This Essential Grocery List is an absolute life saver for my family on the busy weeks. When I started this journey to learn how to cook, I quickly realized that the first step in cooking is having staple ingredients on hand. I want to avoid having to run out to the grocery store every single time I prepare a new recipe. Having a well-stocked pantry has made my life in the kitchen so much simpler, because when it’s time to cook, I have what I need.

Essential Grocery List
It’s so helpful to have a basic grocery list to help me remember which foods to buy at the store. This food shopping list is my go-to!
It’s better to stock up on things like grains, seasonings and spices, baking essentials, oils, condiments, canned and frozen foods, etc. so I can just grab them when I need them. These things have a long shelf life , so I keep them in my kitchen for convenience.
However, I do have to go to the supermarket sometimes, and there’s a way to make that trip easy and hassle-free: I keep a grocery list! If I go in blindly, I’ll leave with things I don’t need, and nothing that actually helps me prepare a good meal.
In the list below, I’ve compiled everything I always have on my stock-up grocery list.
I’ve got you covered! I created an easy grocery list filled with all of the essentials. Plus there’s a free printable version that you can take with you to the grocery store. It has everything you need to stock your pantry, your freezer, and your refrigerator.

Click to get my Free Printable Grocery List
What to Buy at the Grocery Store
This is the perfect grocery list filled with all the basics and essentials. It should help get you going if you’re new to cooking, or if you’re just left staring helplessly at an empty pantry and don’t know how to fill it.
When I first started cooking, things could seem overwhelming. I quickly realized that they more prepared I could be, the more confident I felt. If you already have the basics in your kitchen, then you can shop stress-free.
So print out our easy grocery list, stock up your pantry and fridge, and you’ll be cooking in no time!
Click to get my Free Printable Grocery List for the perfectly stocked pantry and freezer!
Fresh Produce
- Apples
- Bananas
- Strawberries
- Avocados
- Bell Peppers
- Carrots
- Broccoli
- Garlic
- Lemons/Limes
- Onion
- Parsley
- Cilantro
- Basil
- Potatoes
- Spinach
- Tomatoes
GRAINS
- Breadcrumbs
- Pasta
- Quinoa
- Rice
- Sandwich Bread
- Tortillas
MEAT/PROTEIN
- Chicken
- Eggs
- Ground Beef
- Sliced Turkey
- Lunch Meat
DAIRY
- Butter
- Sliced Cheese
- Shredded Cheese
- Milk
- Sour Cream
- Greek Yogurt
BAKING GOODS
- Baking powder
- Baking Soda
- Granulated Sugar
- Brown Sugar
- Flour
- Honey
- Vanilla Extract
- Dry Yeast
- Chocolate Chips
- Cocoa Powder
- Powdered Sugar
FREEZER
- Fruit and Berries
- Frozen Veggies (Corn, Peas, Broccoli, etc)
- Juice Concentrate
- Pizza or Other Convenience Meals
- Pie Crust
- Cookie Dough
CANNED/DRIED GOODS
- Chicken stock/broth
- Salsa
- Diced Tomatoes
- Jam/Jelly
- Peanut Butter
- Pasta Sauce
- Beans (Black Beans, Chickpeas, Baked Beans, etc)
- Soups
- Tuna
- Green Chiles
- Canned Veggies
- Coffee or Tea
Get more details on the best non-perishable and pantry foods
CONDIMENTS/SPICES
- Black Pepper
- Chili Powder
- Cinnamon
- Crushed Red Pepper
- Cumin
- Garlic Powder
- Ketchup
- Mustard
- Mayo
- Nutmeg
- Paprika
- Salt (Course Sea Salt and Kosher Salt)
- Soy Sauce
- Steak Sauce
- Hot Sauce/ Buffalo Sauce
- Salad Dressings
OILS/VINEGARS
- Apple cider vinegar
- Balsamic vinegar
- Coconut Oil
- Olive Oil
- Vegetable/Canola Oil
- Red Wine Vinegar
- White Vinegar
- Cooking Wine
- White Wine Vinegar
SNACKS
- Crackers
- Nuts
- Quick Oats
- Popcorn
- Tortilla Chips
- Cereal
Click to get my Free Printable Grocery List for the perfectly stocked pantry and freezer!

Click ☝🏻 for my FREE Grocery List Printable!
I hope this essential grocery list can help you buy what you need and make your home cooking so much easier!
Stock Your Kitchen
Find more ideas for your grocery list, stock up your kitchen, and print more cooking guides and charts to keep handy!

Non-Perishable Foods to Stock Up On

Frozen Vegetables to Stock Up On (and Recipes to Make)

Ultimate List of Cooking Herbs for Your Kitchen

Ultimate List of Cooking Spices for Your Kitchen

Cooking Oil 101: Types of Cooking Oils to Use

26 Types of Pasta and When to Use Them

What Fruits and Vegetables are in Season?

Meat Temperature Chart (Free Printable)

How to Meal Prep (Guide for Beginners)

Basic Cooking Measurements & Kitchen Conversion Chart

