
By Becky Hardin
Published Jun 4, 2025


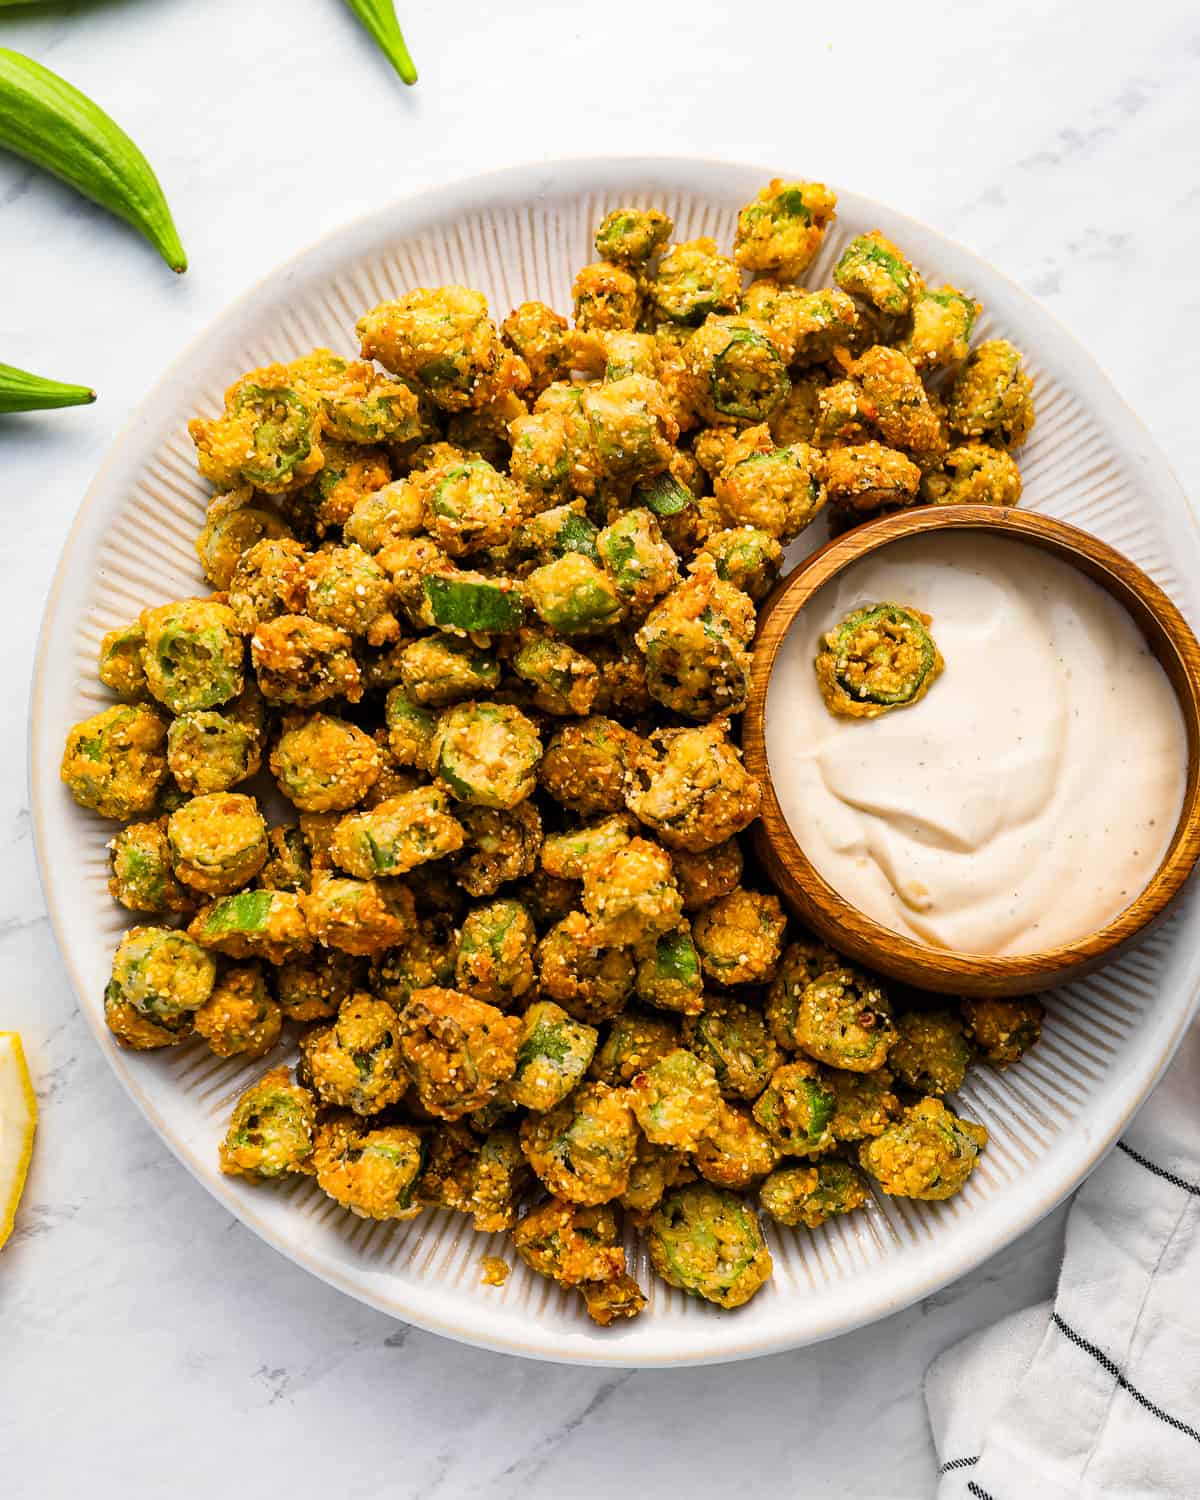
I can’t get enough of fried okra coated in crispy breading. It’s such a tasty snack or side dish, and it’s super easy to make too! The whole process takes just 30 minutes, and the okra is so unbelievably crispy on the outside and tender—never slimy—on the inside.
Pin this recipe for later!
The first time I tasted fried okra, I immediately understood the hype. It has such a unique flavor and texture! I knew I had to recreate this tasty dish at home. It’s easy to make and makes a great snack or side dish.
Tips for Success
- Make sure each pod is evenly coated. You can do this by shaking the okra with the flour mixture in a resealable bag or using a bowl. Ensure there are no wet spots left.
- Keep an eye on the oil. It will increase in temperature slowly at first and then rapidly as it nears 375°F.
Ingredients1x2x3x
- ▢ 1 pound okra* caps cut off and sliced
- ▢ 1 large egg
- ▢ ¼ cup buttermilk
- ▢ Vegetable oil for frying
- ▢ ½ cup all-purpose flour
- ▢ ½ cup cornmeal**
- ▢ ½ teaspoon kosher salt
- ▢ ¼ teaspoon ground black pepper
Video
Instructions
- In a shallow bowl, whisk together the egg and buttermilk. Add the okra to the bowl and toss to coat. Set aside for 10 minutes. 1 large egg, ¼ cup buttermilk, 1 pound okra*
- In a Dutch oven, heat 1 inch of oil to 375°F. Line a plate with paper towels. Vegetable oil
- While the oil is heating, whisk the flour, cornmeal, salt, and pepper in another shallow bowl. ½ cup all-purpose flour, ½ cup cornmeal**, ½ teaspoon kosher salt, ¼ teaspoon ground black pepper
- Remove the okra from the egg mixture using a slotted spoon or tongs, letting any excess drain off. Place it into the flour/cornmeal mixture and toss to coat. After coating, shake off any excess flour. This helps to prevent the formation of a thick, doughy crust.
- Fry the okra in batches until golden on all sides, about 2-3 minutes. Make sure not to overcrowd the pan. Overcrowding can cause the oil temperature to drop, resulting in soggy okra.
- Place the okra on the paper towel-lined plate to drain excess oil and maintain its crispy texture. Season with another pinch of salt.
- Fried okra is best served right after frying when it’s still hot and crispy. If you need to keep it warm, place it in a 200°F oven.
Equipment
- Dutch Oven
Becky’s Tips
Nutrition information is automatically calculated, so should only be used as an approximation.
How to Make Fried Okra Step by Step
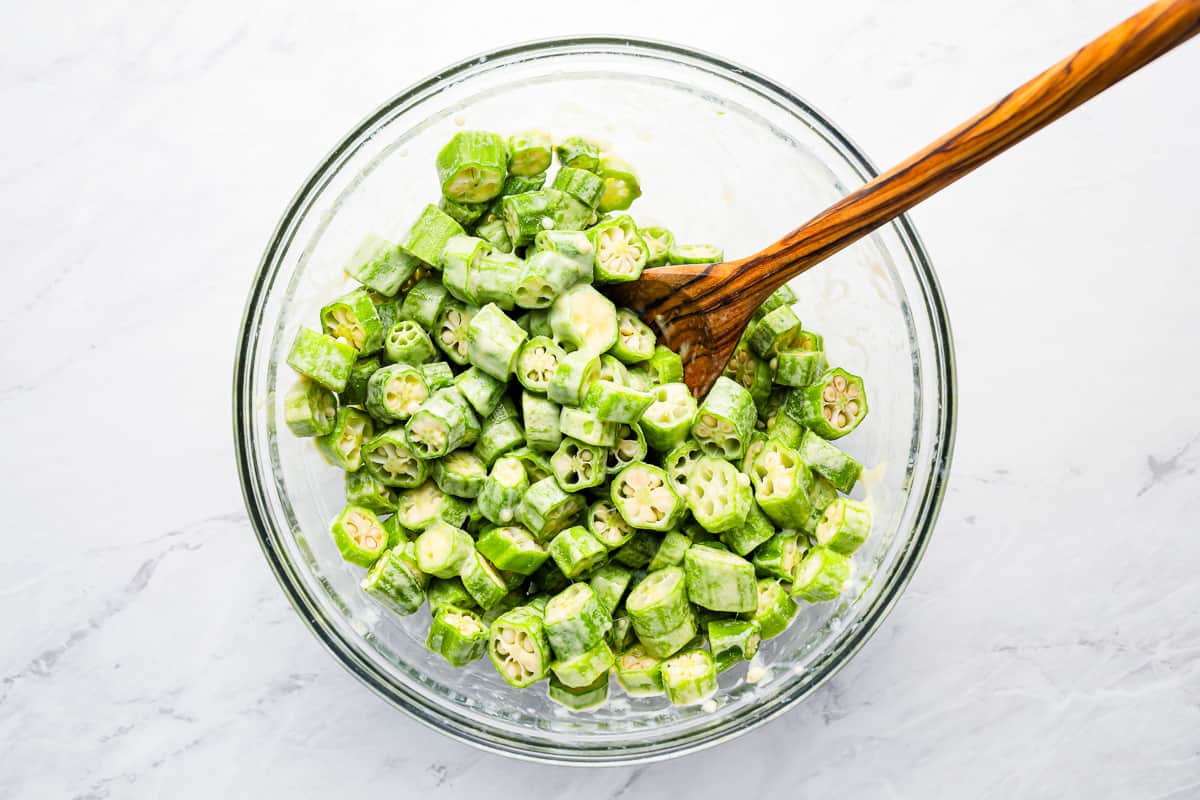
Marinate the Okra: In a shallow bowl, whisk together 1m large egg and ¼ cup of buttermilk. Add 1 pound of sliced okra to the bowl and toss to coat. Set aside for 10 minutes. In a Dutch oven, heat 1 inch of vegetable oil to 375°F. Line a plate with paper towels.

Make the Coating: While the oil is heating, whisk ½ cup of all-purpose flour, ½ cup of cornmeal, ½ teaspoon of kosher salt, and ¼ teaspoon of ground black pepper in another shallow bowl.
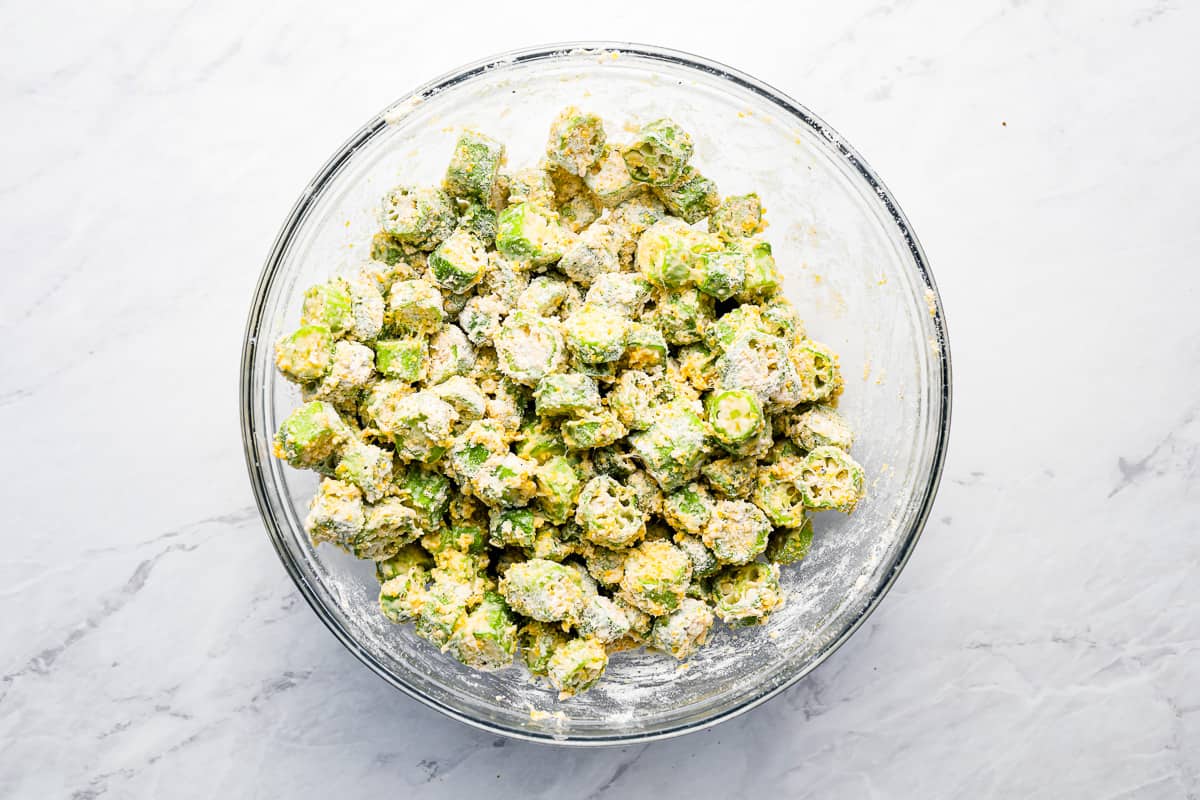
Coat the Okra: Remove the okra from the egg mixture using a slotted spoon or tongs, letting any excess drain off. Place it into the flour/cornmeal mixture and toss to coat. Remove the okra from the egg mixture using a slotted spoon or tongs, letting any excess drain off. Place it into the flour/cornmeal mixture and toss to coat. After coating, shake off any excess flour. This helps to prevent the formation of a thick, doughy crust.
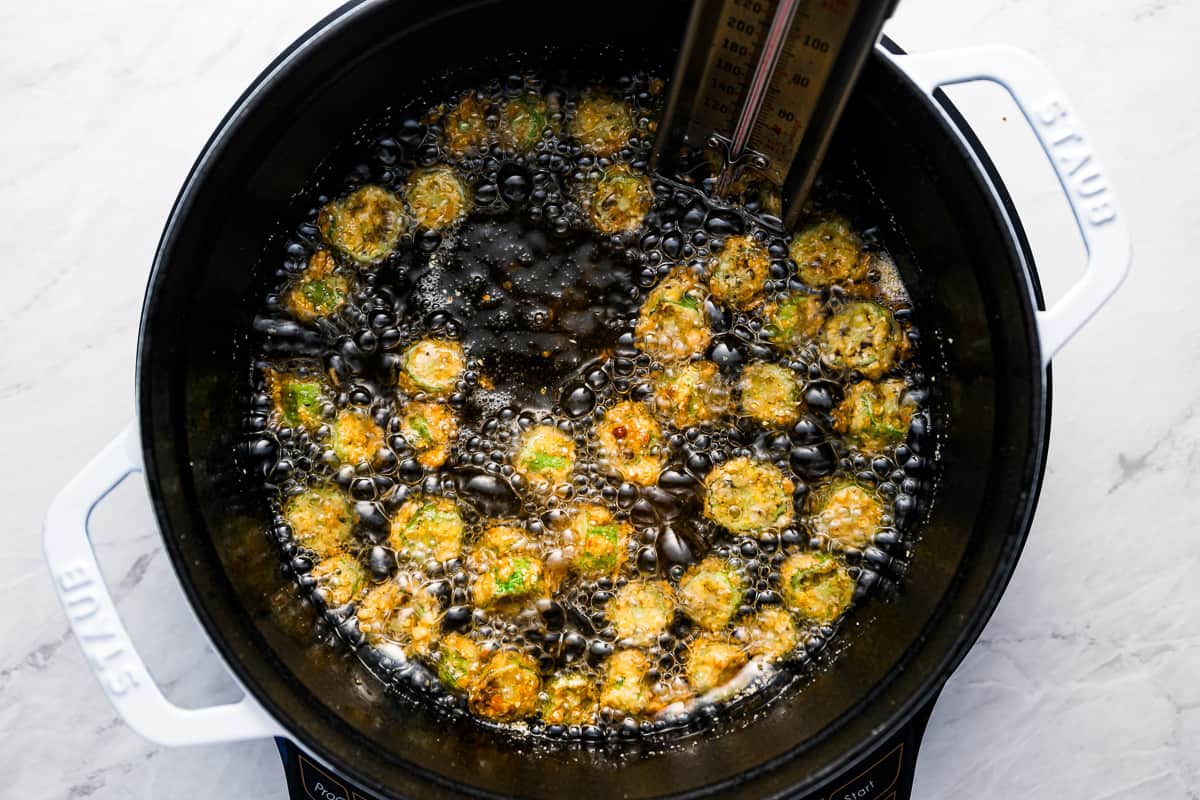
Fry the Okra: Fry the okra in batches until golden on all sides, about 2-3 minutes. Make sure not to overcrowd the pan. Overcrowding can cause the oil temperature to drop, resulting in soggy okra.
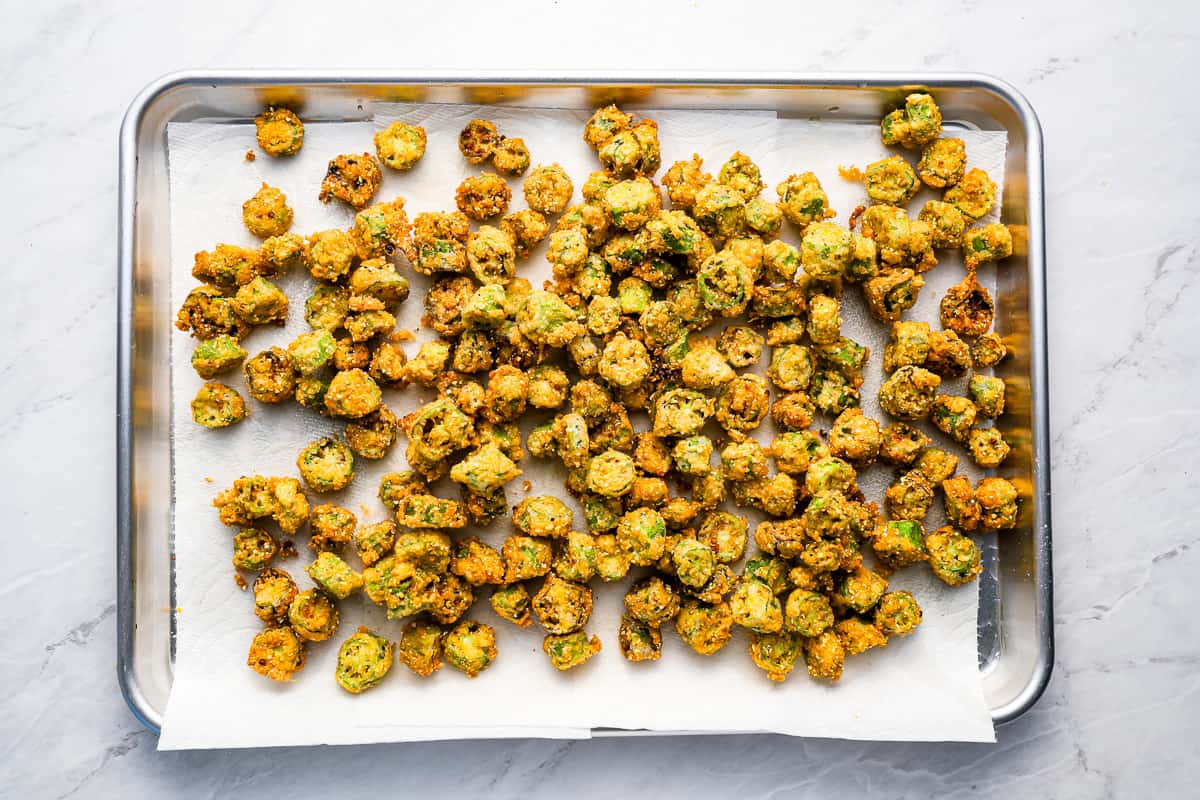
Drain the Okra: Place the okra on the paper towel-lined plate to drain excess oil and maintain its crispy texture. Season with another pinch of salt.
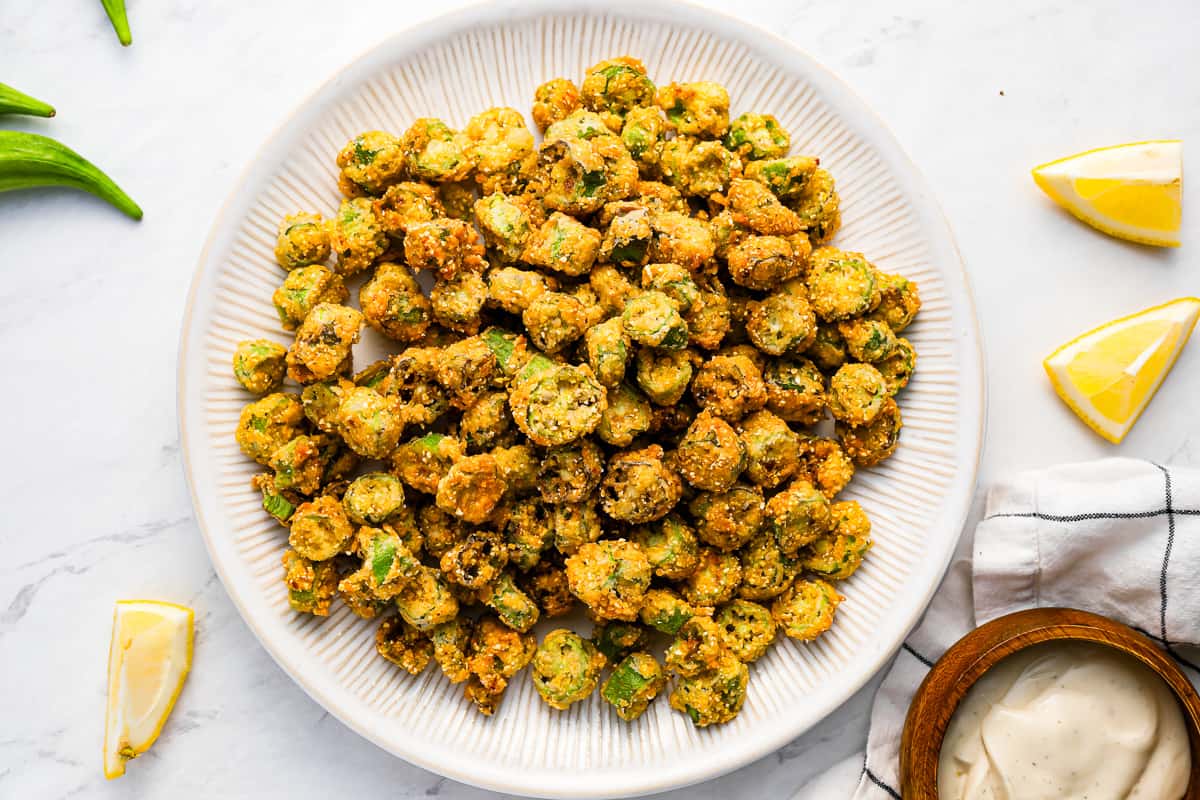
Serve and enjoy: Fried okra is best served right after frying when it’s still hot and crispy. If you need to keep it warm, place it in a 200°F oven.
How to Store and Reheat
Store leftover fried okra in an airtight container or Ziplock bag in the refrigerator for up to 5 days. Reheat in a 350°F oven for 8-10 minutes, or until warmed through and crispy.
Freeze breaded fried okra in a single layer on a lined baking sheet until solid, about 1-2 hours. Transfer to an airtight container or Ziplock bag to store for up to 3 months. Reheat directly from frozen for 15-20 minutes.
Serving Suggestions
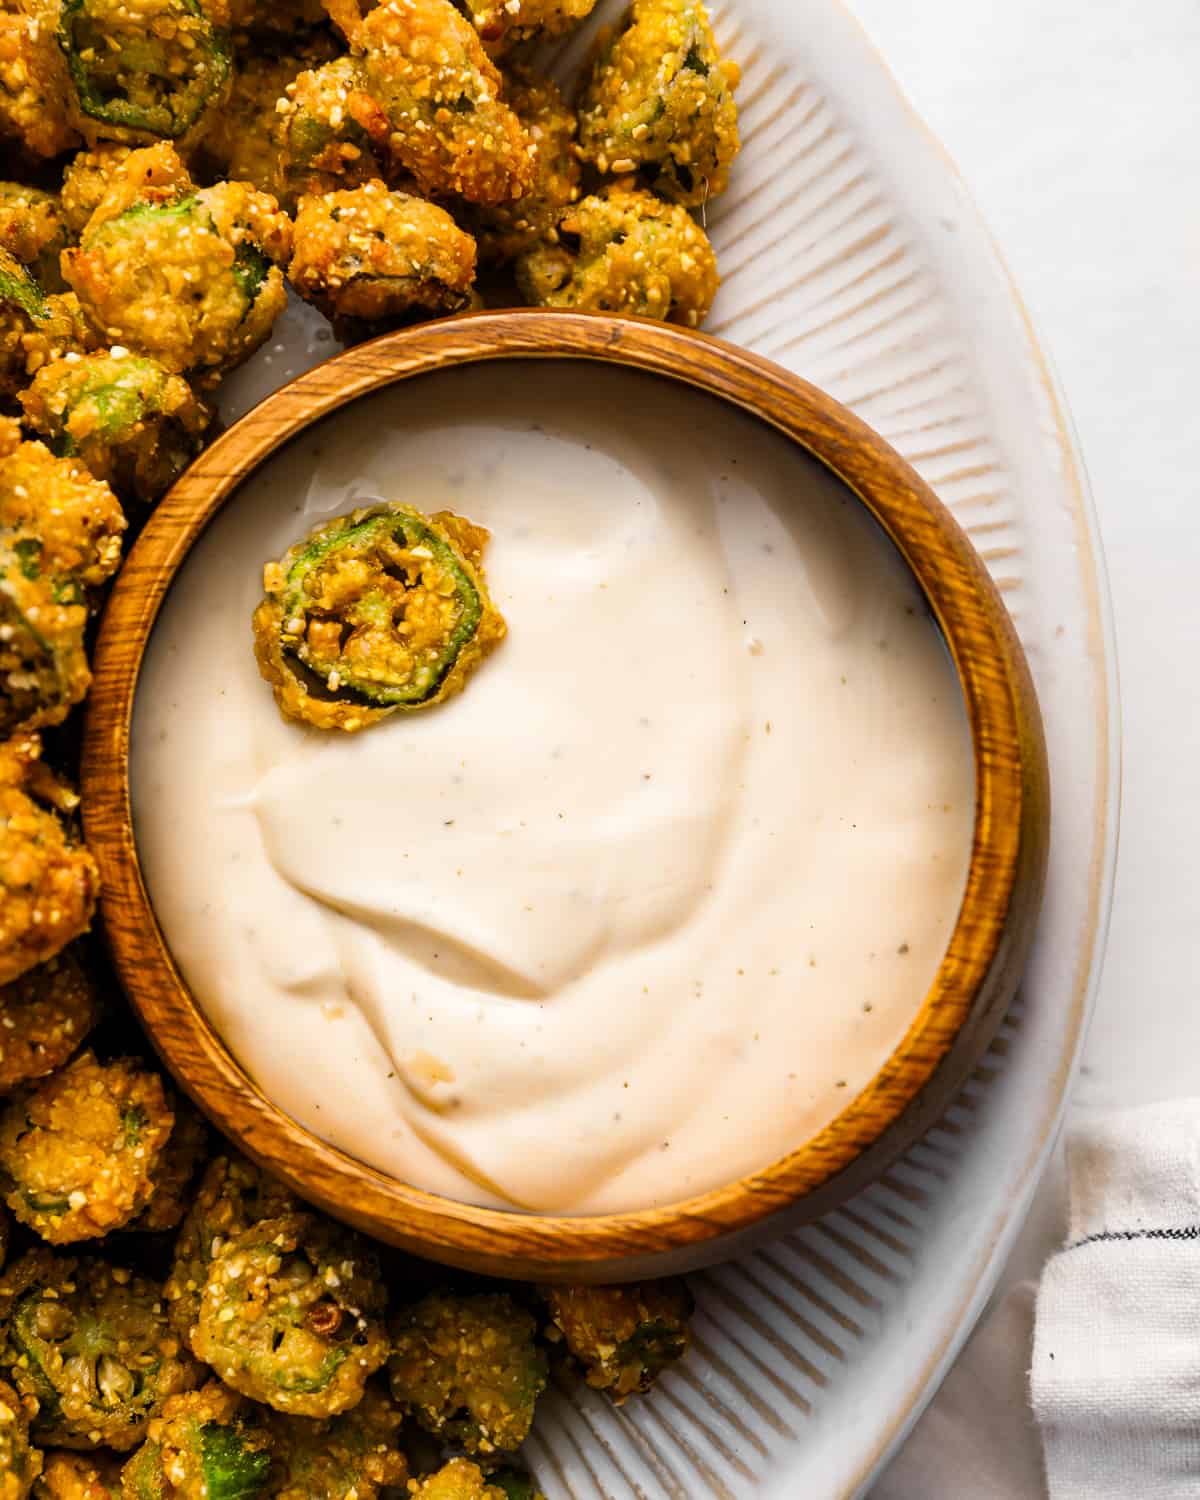
This crispy, savory okra pairs so well with a rich and creamy dipping sauce, like ranch dressing , honey mustard , or garlic aioli . It’s also great with the classic sweet and tangy ketchup.
It’s the perfect side to serve with comfort food classics like smothered pork chops , gumbo , or mac and cheese casserole . The crispy texture and mild flavor goes with just about anything.
more breaded vegetables to try
Fried Pickles (Ranch Pickles)

Avocado Fries (Baked Fried Avocado Fries Recipe)

Baked Zucchini Fries

Fried Blue Cheese Stuffed Olives (with Garlic Aioli Dip)

Fried Okra Recipe
Equipment
- Dutch Oven
Ingredients
- 1 pound okra* caps cut off and sliced
- 1 large egg
- ¼ cup buttermilk
- Vegetable oil for frying
- ½ cup all-purpose flour
- ½ cup cornmeal**
- ½ teaspoon kosher salt
- ¼ teaspoon ground black pepper
Instructions
- In a shallow bowl, whisk together the egg and buttermilk. Add the okra to the bowl and toss to coat. Set aside for 10 minutes. 1 large egg, ¼ cup buttermilk, 1 pound okra*
- In a Dutch oven, heat 1 inch of oil to 375°F. Line a plate with paper towels. Vegetable oil
- While the oil is heating, whisk the flour, cornmeal, salt, and pepper in another shallow bowl. ½ cup all-purpose flour, ½ cup cornmeal**, ½ teaspoon kosher salt, ¼ teaspoon ground black pepper
- Remove the okra from the egg mixture using a slotted spoon or tongs, letting any excess drain off. Place it into the flour/cornmeal mixture and toss to coat. After coating, shake off any excess flour. This helps to prevent the formation of a thick, doughy crust.
- Fry the okra in batches until golden on all sides, about 2-3 minutes. Make sure not to overcrowd the pan. Overcrowding can cause the oil temperature to drop, resulting in soggy okra.
- Place the okra on the paper towel-lined plate to drain excess oil and maintain its crispy texture. Season with another pinch of salt.
- Fried okra is best served right after frying when it’s still hot and crispy. If you need to keep it warm, place it in a 200°F oven.
Video
Notes
Nutrition
By Becky Hardin
Published Jul 12, 2017


This Essential Grocery List is an absolute life saver for my family on the busy weeks. When I started this journey to learn how to cook, I quickly realized that the first step in cooking is having staple ingredients on hand. I want to avoid having to run out to the grocery store every single time I prepare a new recipe. Having a well-stocked pantry has made my life in the kitchen so much simpler, because when it’s time to cook, I have what I need.

Essential Grocery List
It’s so helpful to have a basic grocery list to help me remember which foods to buy at the store. This food shopping list is my go-to!
It’s better to stock up on things like grains, seasonings and spices, baking essentials, oils, condiments, canned and frozen foods, etc. so I can just grab them when I need them. These things have a long shelf life , so I keep them in my kitchen for convenience.
However, I do have to go to the supermarket sometimes, and there’s a way to make that trip easy and hassle-free: I keep a grocery list! If I go in blindly, I’ll leave with things I don’t need, and nothing that actually helps me prepare a good meal.
In the list below, I’ve compiled everything I always have on my stock-up grocery list.
I’ve got you covered! I created an easy grocery list filled with all of the essentials. Plus there’s a free printable version that you can take with you to the grocery store. It has everything you need to stock your pantry, your freezer, and your refrigerator.

Click to get my Free Printable Grocery List
What to Buy at the Grocery Store
This is the perfect grocery list filled with all the basics and essentials. It should help get you going if you’re new to cooking, or if you’re just left staring helplessly at an empty pantry and don’t know how to fill it.
When I first started cooking, things could seem overwhelming. I quickly realized that they more prepared I could be, the more confident I felt. If you already have the basics in your kitchen, then you can shop stress-free.
So print out our easy grocery list, stock up your pantry and fridge, and you’ll be cooking in no time!
Click to get my Free Printable Grocery List for the perfectly stocked pantry and freezer!
Fresh Produce
- Apples
- Bananas
- Strawberries
- Avocados
- Bell Peppers
- Carrots
- Broccoli
- Garlic
- Lemons/Limes
- Onion
- Parsley
- Cilantro
- Basil
- Potatoes
- Spinach
- Tomatoes
GRAINS
- Breadcrumbs
- Pasta
- Quinoa
- Rice
- Sandwich Bread
- Tortillas
MEAT/PROTEIN
- Chicken
- Eggs
- Ground Beef
- Sliced Turkey
- Lunch Meat
DAIRY
- Butter
- Sliced Cheese
- Shredded Cheese
- Milk
- Sour Cream
- Greek Yogurt
BAKING GOODS
- Baking powder
- Baking Soda
- Granulated Sugar
- Brown Sugar
- Flour
- Honey
- Vanilla Extract
- Dry Yeast
- Chocolate Chips
- Cocoa Powder
- Powdered Sugar
FREEZER
- Fruit and Berries
- Frozen Veggies (Corn, Peas, Broccoli, etc)
- Juice Concentrate
- Pizza or Other Convenience Meals
- Pie Crust
- Cookie Dough
CANNED/DRIED GOODS
- Chicken stock/broth
- Salsa
- Diced Tomatoes
- Jam/Jelly
- Peanut Butter
- Pasta Sauce
- Beans (Black Beans, Chickpeas, Baked Beans, etc)
- Soups
- Tuna
- Green Chiles
- Canned Veggies
- Coffee or Tea
Get more details on the best non-perishable and pantry foods
CONDIMENTS/SPICES
- Black Pepper
- Chili Powder
- Cinnamon
- Crushed Red Pepper
- Cumin
- Garlic Powder
- Ketchup
- Mustard
- Mayo
- Nutmeg
- Paprika
- Salt (Course Sea Salt and Kosher Salt)
- Soy Sauce
- Steak Sauce
- Hot Sauce/ Buffalo Sauce
- Salad Dressings
OILS/VINEGARS
- Apple cider vinegar
- Balsamic vinegar
- Coconut Oil
- Olive Oil
- Vegetable/Canola Oil
- Red Wine Vinegar
- White Vinegar
- Cooking Wine
- White Wine Vinegar
SNACKS
- Crackers
- Nuts
- Quick Oats
- Popcorn
- Tortilla Chips
- Cereal
Click to get my Free Printable Grocery List for the perfectly stocked pantry and freezer!

Click ☝🏻 for my FREE Grocery List Printable!
I hope this essential grocery list can help you buy what you need and make your home cooking so much easier!
Stock Your Kitchen
Find more ideas for your grocery list, stock up your kitchen, and print more cooking guides and charts to keep handy!

Non-Perishable Foods to Stock Up On

Frozen Vegetables to Stock Up On (and Recipes to Make)

Ultimate List of Cooking Herbs for Your Kitchen

Ultimate List of Cooking Spices for Your Kitchen

Cooking Oil 101: Types of Cooking Oils to Use

26 Types of Pasta and When to Use Them

What Fruits and Vegetables are in Season?

Meat Temperature Chart (Free Printable)

How to Meal Prep (Guide for Beginners)

Basic Cooking Measurements & Kitchen Conversion Chart

