
By Becky Hardin
Updated Feb 20, 2025
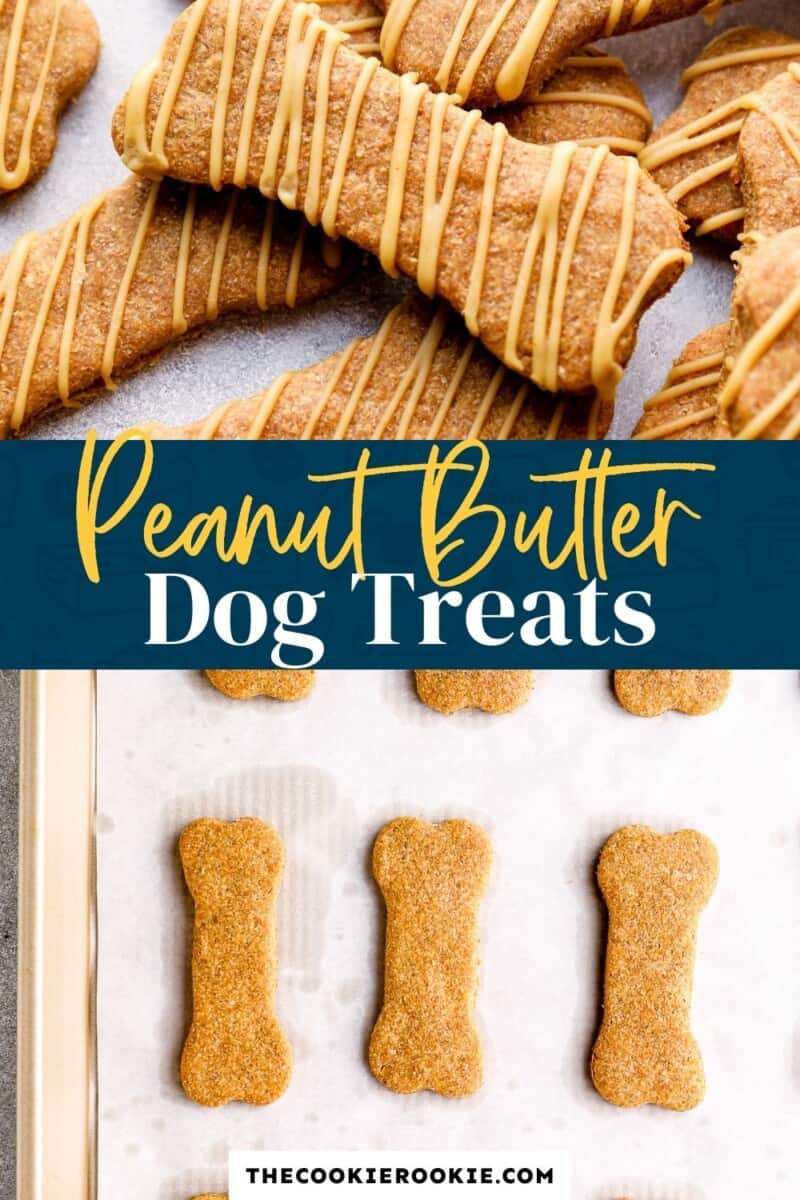
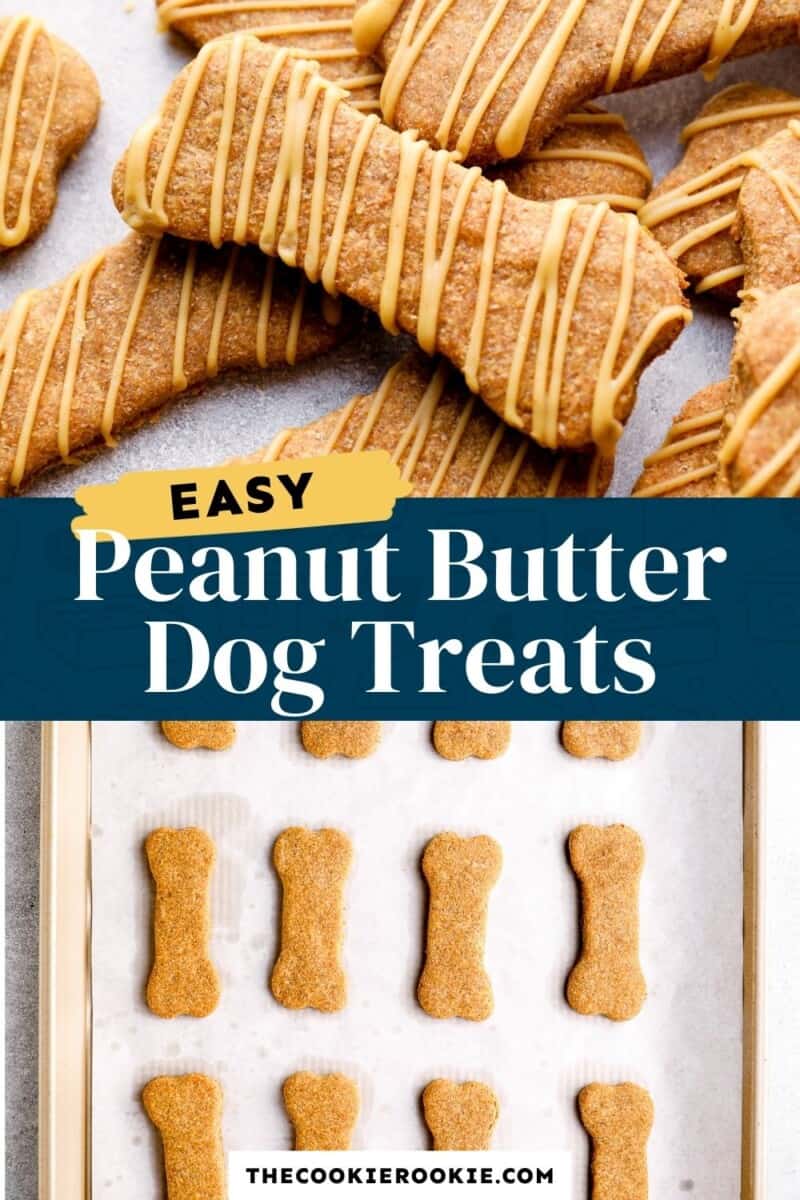
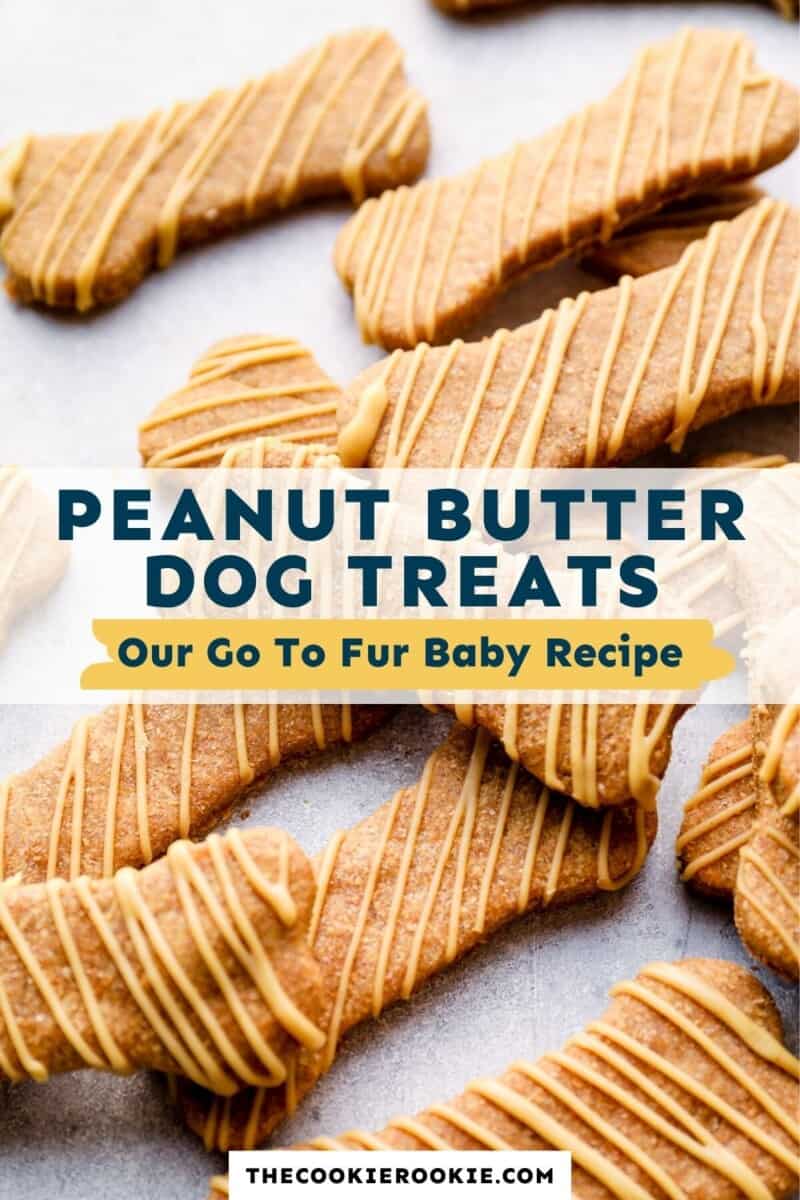
Homemade Dog Treats are my favorite way to show my pets that we love them like family! This homemade peanut butter dog treats recipe is an easy dog biscuit that I believe our pups would request every week if they could. I made this recipe in 2013 for my dog Scout, my first baby. I make them now for our two labs, Mabel and Daisy. Every pet deserves the love of a homemade treat and this is just the recipe to give them.
5-Star Review
“My husband and I wanted to bond over something, so we decided to make these for our two dogs. They go crazy over these. Cannot control themselves. I took a nibble too, and they’re not bad for humans either. They stayed nice and chewy sitting in a tupperware on the counter. Our smallest dog (8lbs) doesn’t like crunchy things, so the fact these are chewy was perfect. We even gifted some to the German Shepherd next door. We will be making these again!” – Sarah
Best Dog Treat Recipe
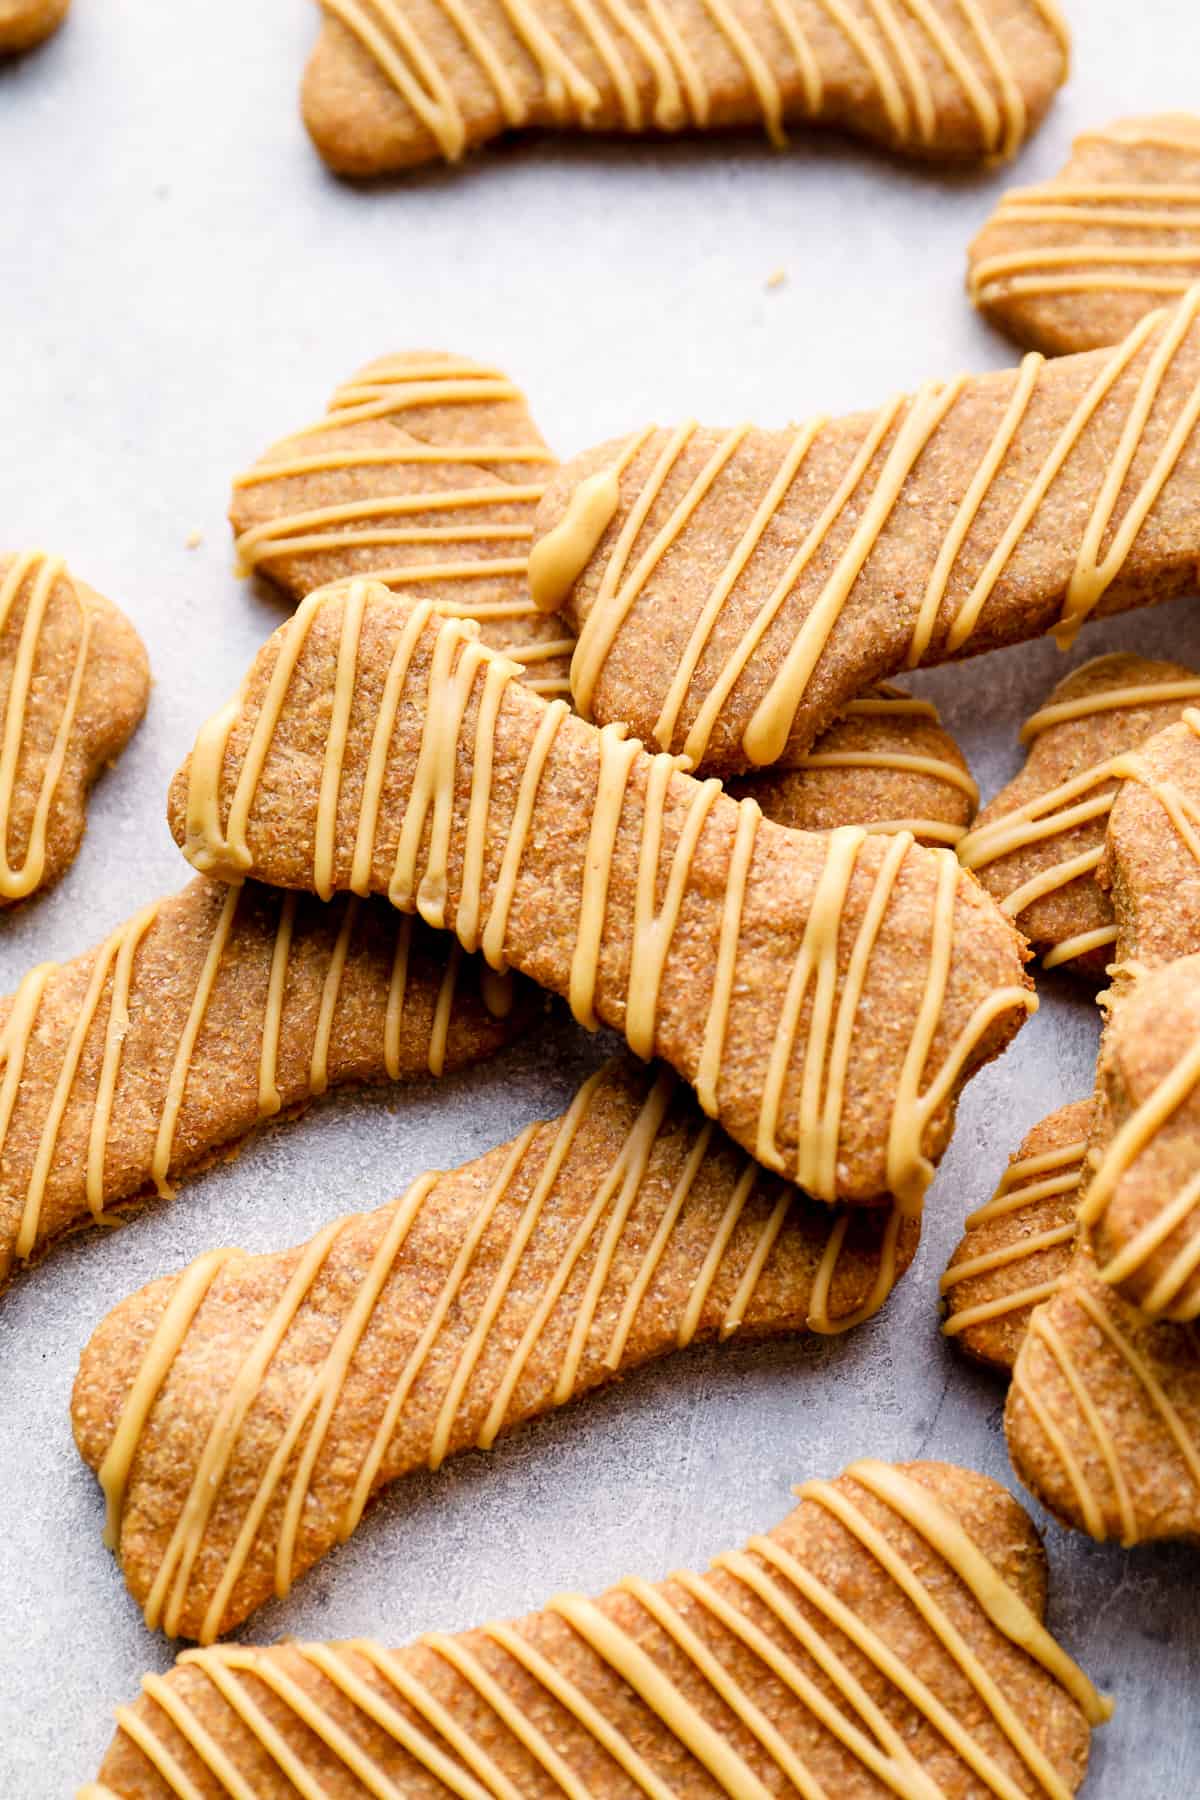
I love making homemade peanut butter dog treats because they’re so easy and use just a few simple ingredients. This recipe comes together in no time—just mix, roll, cut, and bake.
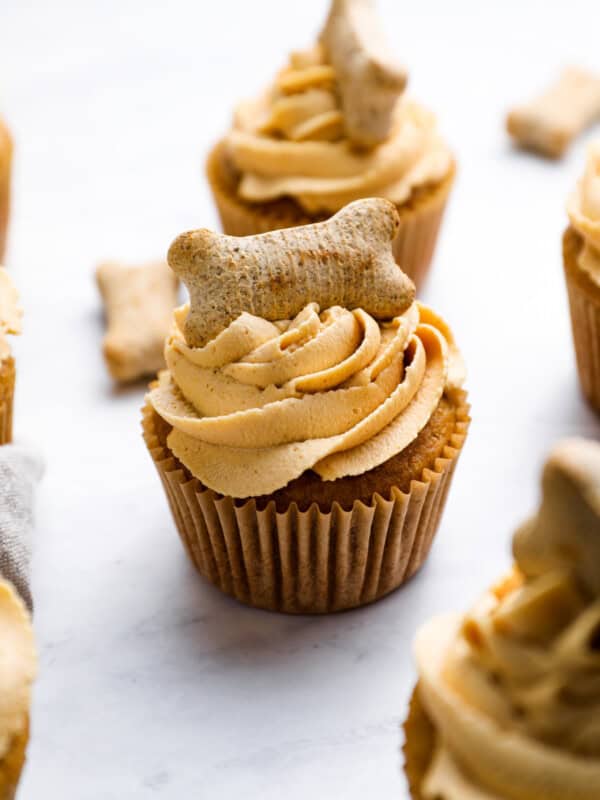
The dough is super easy to work with, and the treats come out soft and chewy, perfect for pups of all sizes. Plus, I add a little peanut butter frosting on top to make them extra special. If you want a fun, quick way to spoil your dog with a homemade treat, this is the perfect recipe.
Note: Dogs can have allergies, just like people, so while these ingredients are all safe for dogs in general, make sure you know what your furry friend can and cannot eat. I recommend giving them a small bite to test these treats out before you start using them regularly.
Ingredients1x2x3x
For the Dog Treats
- ▢ 2½ cups whole wheat flour 300 grams (see note)
- ▢ 1 large egg 50 grams
- ▢ 1 cup peanut butter 270 grams (see note)
- ▢ 1 cup water 227 grams
- ▢ 2 tablespoons honey 43 grams (see note)
For the Frosting
- ▢ 2 tablespoons peanut butter 34 grams
- ▢ 1 tablespoon honey 21 grams
- ▢ ⅓ cup cornstarch 37 grams (can also use potato starch or arrowroot powder)
- ▢ 3-4 tablespoons hot water 43-57 grams
Video
Instructions
- Preheat oven to 350°F. Line a baking sheet with parchment paper. Set aside.
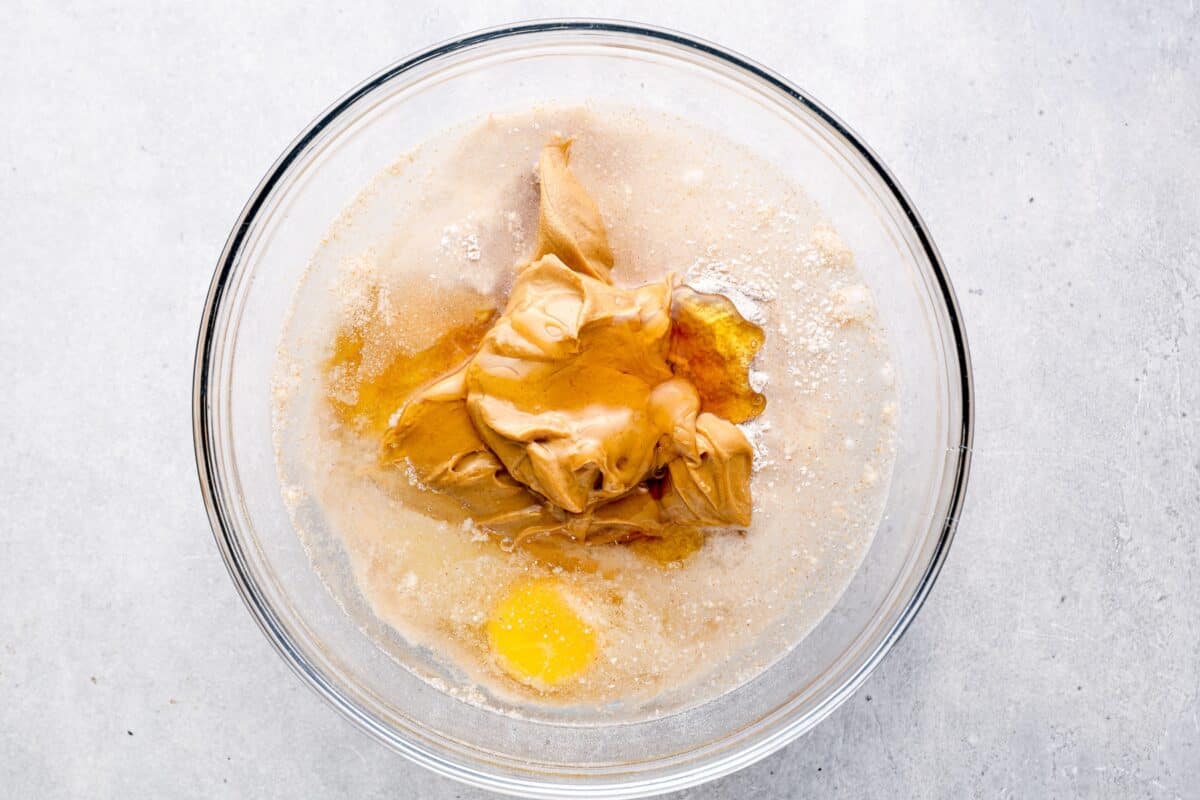
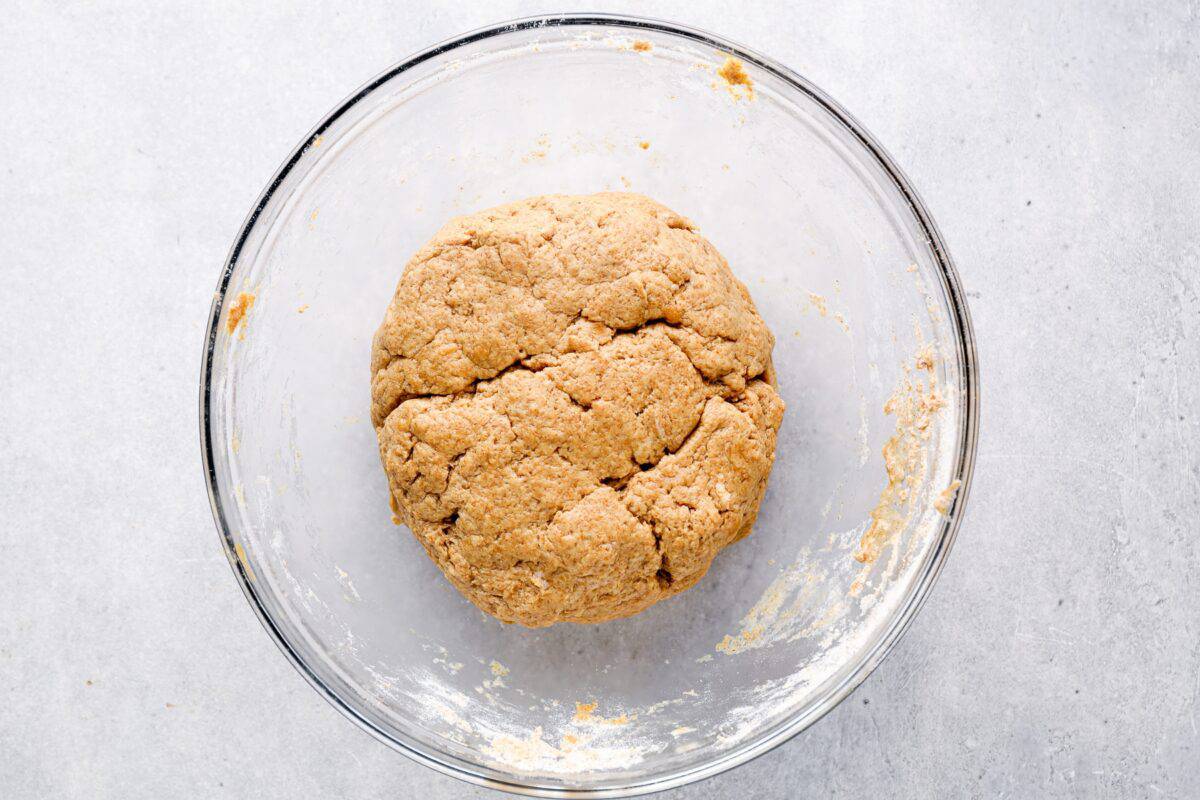
- In a large bowl, combine flour and the egg. Add the peanut butter, water, and honey, and stir until you have a stiff dough. The dough becomes very firm and sticky. You may need to use your hands, or the paddle attachment on your mixer. 2½ cups whole wheat flour, 1 large egg, 1 cup peanut butter, 1 cup water, 2 tablespoons honey
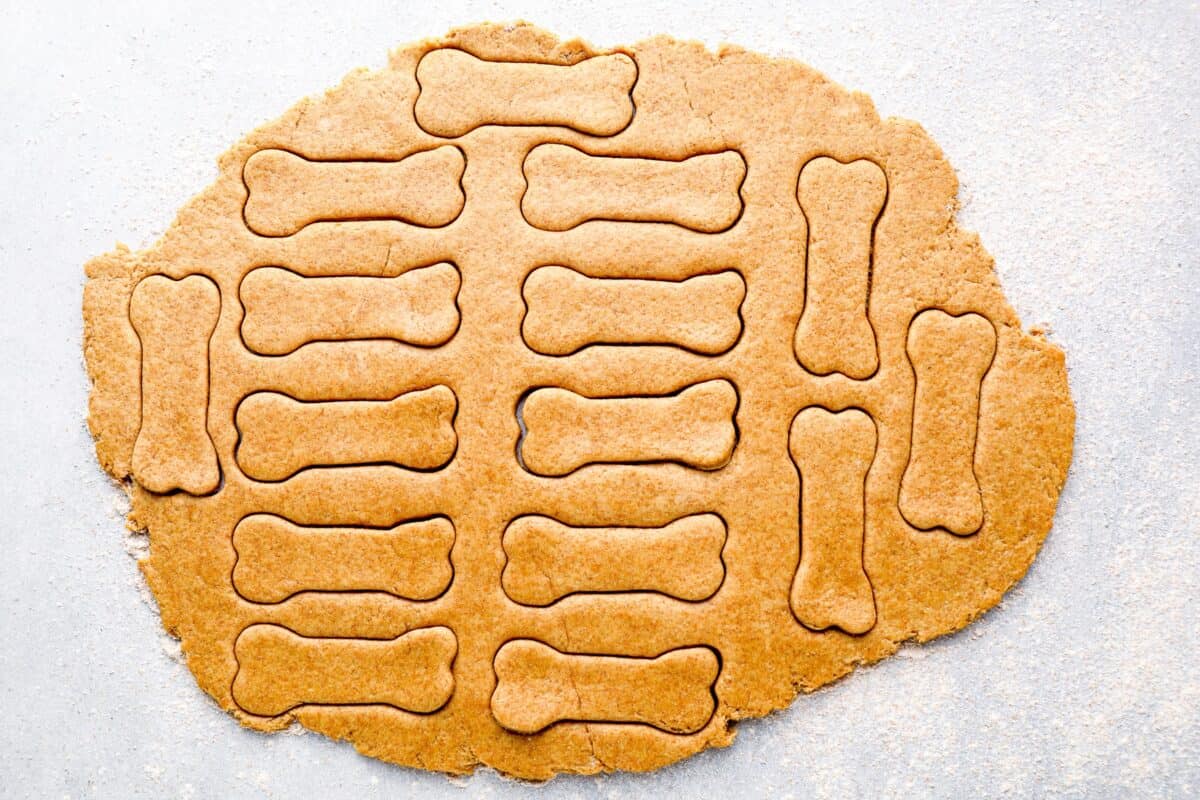
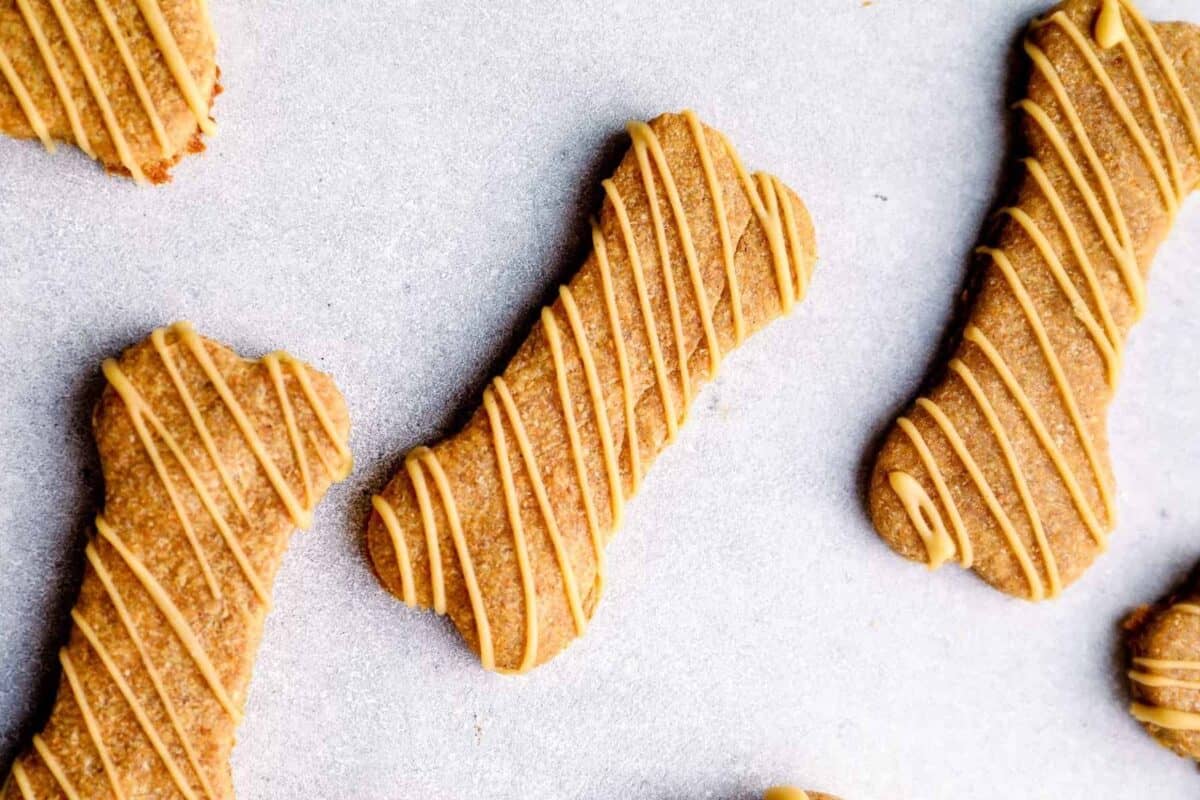
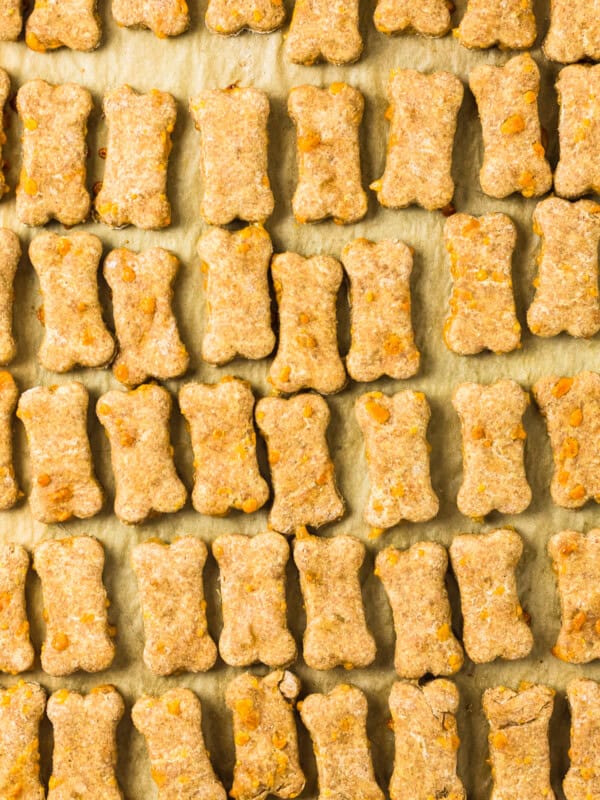
- On a lightly floured surface, roll out the dough about ½-inch thick and use a cookie cutter to make fun shapes. The treats barely spread and rise, so get creative with your shapes.
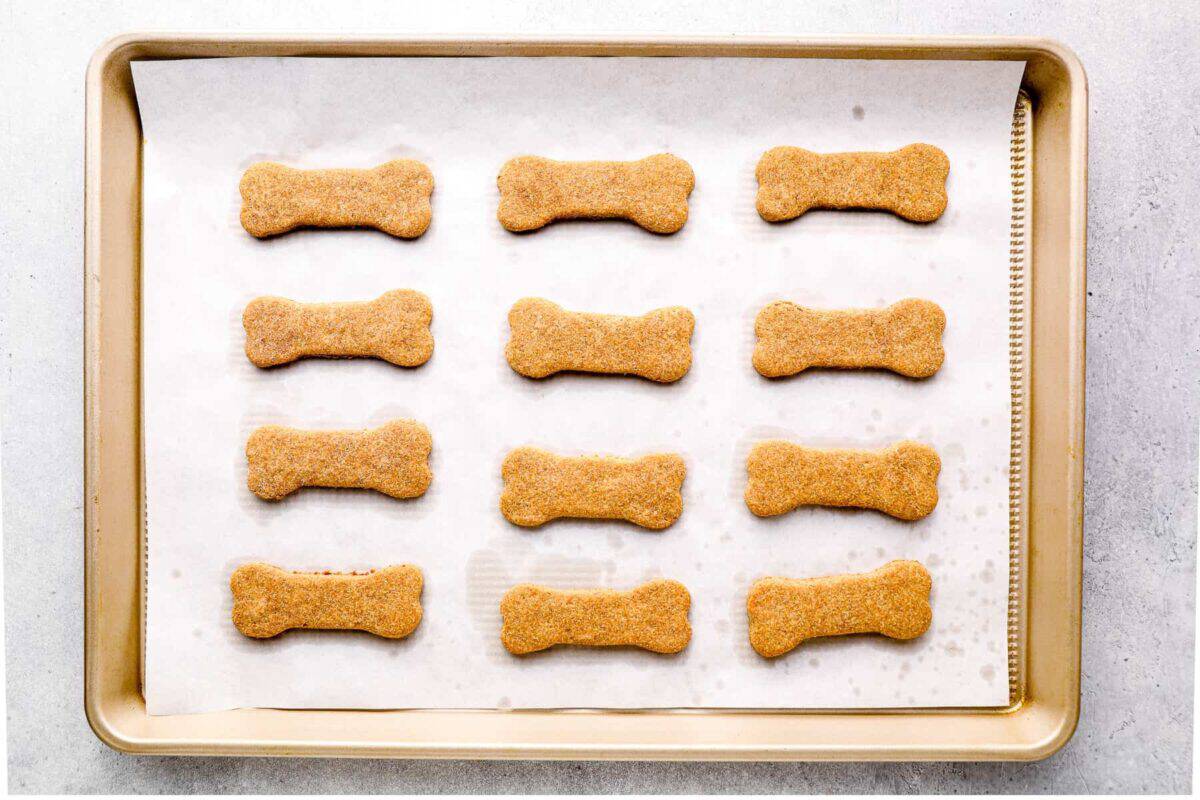
- Bake for 18-20 minutes, until golden. Once done, set aside to cool. (If you have smaller cookies, use less time, otherwise the bottom might burn.)
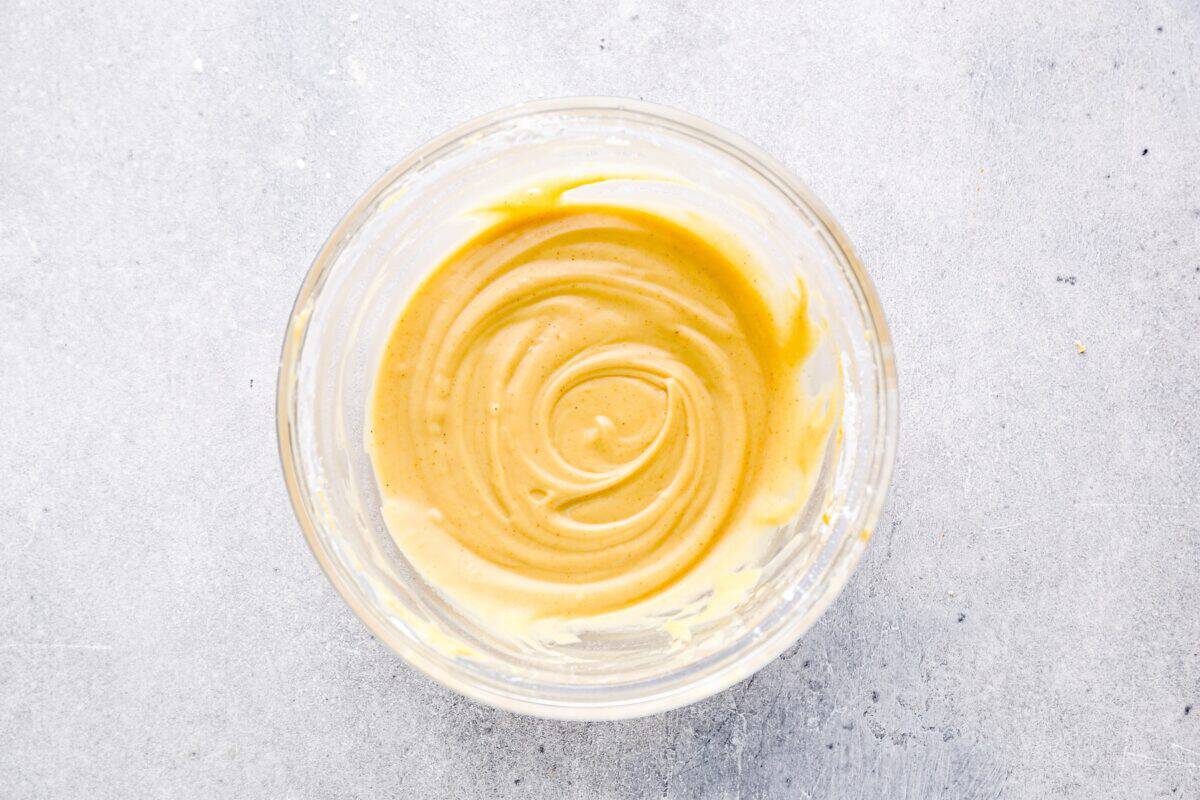
- To make the frosting, combine the peanut butter and honey in a microwavable bowl, and heat in the microwave in 15 second increments, stirring in between, until melted. 2 tablespoons peanut butter, 1 tablespoon honey
- Add the melted peanut butter mixture to the cornstarch and stir until just combined. ⅓ cup cornstarch
- Slowly add in the water 1 tablespoon at a time until you have reached the consistency that you would like. For a thinner frosting, add more water. 3-4 tablespoons hot water
- Add the frosting to a piping bag and pipe designs on top of each dog treat.
- Frost the treats with the peanut butter/honey mixture for an even more tempting cookie.
Equipment
- Kitchen Scale (optional)
- Baking Sheet
- Rolling Pin
- Piping Tip Set
Becky’s Tips
- Flour Alternatives: Some dogs are allergic to wheat. For a wheat-free option, use rice flour or coconut flour , though this may slightly alter the texture.
- Peanut Butter Warning: Avoid peanut butter containing xylitol , as it is toxic to dogs. Stick to natural peanut butter or substitute with nut butter, pumpkin purée, or mashed sweet potato . Adjust the dough consistency as needed.
- Honey Caution: Do not give honey to immunocompromised dogs or puppies under 1 year old .
- Frosting Consistency: For decorative frosting, use a thicker mixture (2–3 Tbsp water) to outline designs and let it dry for 10 minutes. Use a thinner mixture (3–4 Tbsp water) to fill in the design, smoothing with your finger.
- Crunchier Treat Option: For a crispier biscuit , roll the dough thinner or bake at 200°F for a longer time to dry them out.
Nutrition information is automatically calculated, so should only be used as an approximation.
How to Make Homemade Dog Treats Step by Step
Mix the Dough: Preheat the oven to 350°F. Line a baking sheet with parchment paper and set it aside. In a large mixing bowl, combine 2 ½ cups whole wheat flour and 1 large egg. Add 1 cup peanut butter, 1 cup water, and 2 tbsp honey.
Form the Dough: Stir until the mixture forms a stiff dough. The dough will be firm and sticky, so you may need to use your hands or a stand mixer with a paddle attachment.
Roll and Cut the Dough: Lightly flour a work surface and roll out the dough to about ½ inch thick. Use a cookie cutter to cut the dough into fun shapes. Since the treats will not spread or rise significantly, you can make them any shape you like.
Bake the Treats: Place the shaped treats onto the prepared baking sheet and bake for 18–20 minutes, or until they turn golden brown. If making smaller treats, check them a few minutes earlier to prevent burning. Once baked, remove them from the oven and let them cool completely before adding the frosting.
Prepare the Frosting: In a microwave-safe bowl, combine 2 tbsp peanut butter and 1 tbsp honey. Microwave in 15-second increments, stirring after each, until the mixture is smooth and fully melted.
Mix the Frosting: Add the melted peanut butter and honey mixture to ⅓ cup cornstarch and stir until just combined. Slowly add 3–4 tbsp hot water, 1 tbsp at a time, mixing well until the frosting reaches the desired consistency. If you prefer a thinner frosting, add more water as needed.
Frost and Decorate: Transfer the frosting to a piping bag and pipe designs onto the cooled dog treats. Allow the frosting to set before serving them to your pup.
How to Store
Once fully cooled, I store homemade peanut butter dog biscuits in an airtight container (very important) in the refrigerator, for up to 1 month. This recipe makes 24 medium dog cookies, so you’ll have plenty to share whenever your dog needs a healthy treat.
How to Freeze
This easy recipe for homemade dog treats can be stored in the freezer for up to 8 months. I recommend placing a pan of them in the freezer for about an hour, then transferring them to a freezer-safe bag or container. This will prevent them from sticking together, so you can grab as many as you need, and keep the rest in storage. Move them to the fridge to thaw.
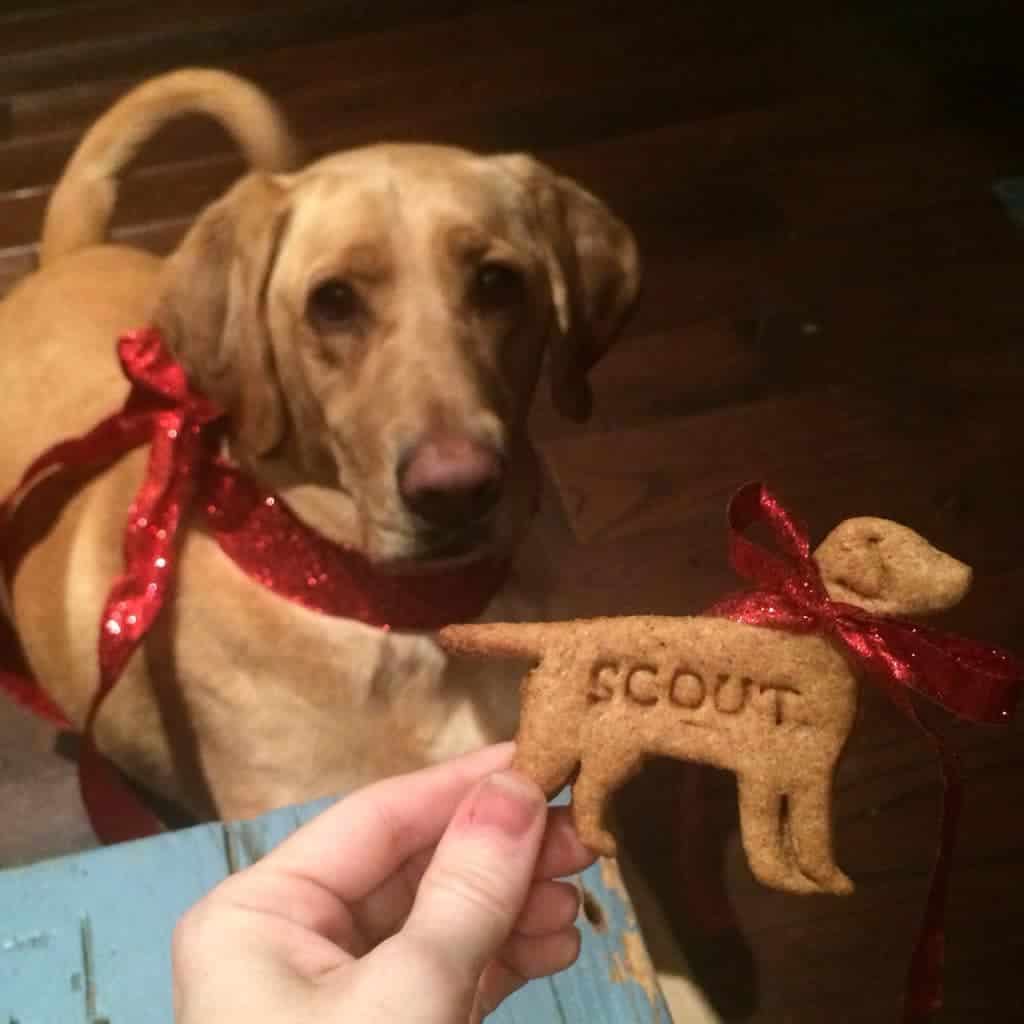
The original lover of my homemade dog treats, Scout, in 2013
More Pet treat recipes we love
Dog Ice Cream
Dog Cupcakes
Cheese Dog Treats
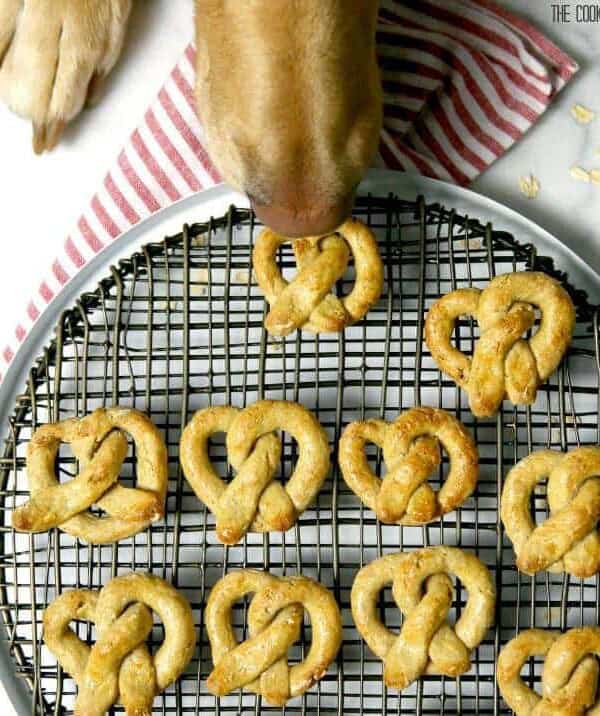
Oat and Apple Dog Pretzels

Homemade Peanut Butter Dog Treats Recipe
Equipment
- Kitchen Scale (optional)
- Baking Sheet
- Rolling Pin
- Piping Tip Set
Ingredients
For the Dog Treats
- 2½ cups whole wheat flour 300 grams (see note)
- 1 large egg 50 grams
- 1 cup peanut butter 270 grams (see note)
- 1 cup water 227 grams
- 2 tablespoons honey 43 grams (see note)
For the Frosting
- 2 tablespoons peanut butter 34 grams
- 1 tablespoon honey 21 grams
- ⅓ cup cornstarch 37 grams (can also use potato starch or arrowroot powder)
- 3-4 tablespoons hot water 43-57 grams
Instructions
- Preheat oven to 350°F. Line a baking sheet with parchment paper. Set aside.
- In a large bowl, combine flour and the egg. Add the peanut butter, water, and honey, and stir until you have a stiff dough. The dough becomes very firm and sticky. You may need to use your hands, or the paddle attachment on your mixer. 2½ cups whole wheat flour, 1 large egg, 1 cup peanut butter, 1 cup water, 2 tablespoons honey
- On a lightly floured surface, roll out the dough about ½-inch thick and use a cookie cutter to make fun shapes. The treats barely spread and rise, so get creative with your shapes.
- Bake for 18-20 minutes, until golden. Once done, set aside to cool. (If you have smaller cookies, use less time, otherwise the bottom might burn.)
- To make the frosting, combine the peanut butter and honey in a microwavable bowl, and heat in the microwave in 15 second increments, stirring in between, until melted. 2 tablespoons peanut butter, 1 tablespoon honey
- Add the melted peanut butter mixture to the cornstarch and stir until just combined. ⅓ cup cornstarch
- Slowly add in the water 1 tablespoon at a time until you have reached the consistency that you would like. For a thinner frosting, add more water. 3-4 tablespoons hot water
- Add the frosting to a piping bag and pipe designs on top of each dog treat.
- Frost the treats with the peanut butter/honey mixture for an even more tempting cookie.
Video
Notes
- Flour Alternatives: Some dogs are allergic to wheat. For a wheat-free option, use rice flour or coconut flour , though this may slightly alter the texture.
- Peanut Butter Warning: Avoid peanut butter containing xylitol , as it is toxic to dogs. Stick to natural peanut butter or substitute with nut butter, pumpkin purée, or mashed sweet potato . Adjust the dough consistency as needed.
- Honey Caution: Do not give honey to immunocompromised dogs or puppies under 1 year old .
- Frosting Consistency: For decorative frosting, use a thicker mixture (2–3 Tbsp water) to outline designs and let it dry for 10 minutes. Use a thinner mixture (3–4 Tbsp water) to fill in the design, smoothing with your finger.
- Crunchier Treat Option: For a crispier biscuit , roll the dough thinner or bake at 200°F for a longer time to dry them out.
Nutrition
By Becky Hardin
Published Jul 12, 2017


This Essential Grocery List is an absolute life saver for my family on the busy weeks. When I started this journey to learn how to cook, I quickly realized that the first step in cooking is having staple ingredients on hand. I want to avoid having to run out to the grocery store every single time I prepare a new recipe. Having a well-stocked pantry has made my life in the kitchen so much simpler, because when it’s time to cook, I have what I need.

Essential Grocery List
It’s so helpful to have a basic grocery list to help me remember which foods to buy at the store. This food shopping list is my go-to!
It’s better to stock up on things like grains, seasonings and spices, baking essentials, oils, condiments, canned and frozen foods, etc. so I can just grab them when I need them. These things have a long shelf life , so I keep them in my kitchen for convenience.
However, I do have to go to the supermarket sometimes, and there’s a way to make that trip easy and hassle-free: I keep a grocery list! If I go in blindly, I’ll leave with things I don’t need, and nothing that actually helps me prepare a good meal.
In the list below, I’ve compiled everything I always have on my stock-up grocery list.
I’ve got you covered! I created an easy grocery list filled with all of the essentials. Plus there’s a free printable version that you can take with you to the grocery store. It has everything you need to stock your pantry, your freezer, and your refrigerator.

Click to get my Free Printable Grocery List
What to Buy at the Grocery Store
This is the perfect grocery list filled with all the basics and essentials. It should help get you going if you’re new to cooking, or if you’re just left staring helplessly at an empty pantry and don’t know how to fill it.
When I first started cooking, things could seem overwhelming. I quickly realized that they more prepared I could be, the more confident I felt. If you already have the basics in your kitchen, then you can shop stress-free.
So print out our easy grocery list, stock up your pantry and fridge, and you’ll be cooking in no time!
Click to get my Free Printable Grocery List for the perfectly stocked pantry and freezer!
Fresh Produce
- Apples
- Bananas
- Strawberries
- Avocados
- Bell Peppers
- Carrots
- Broccoli
- Garlic
- Lemons/Limes
- Onion
- Parsley
- Cilantro
- Basil
- Potatoes
- Spinach
- Tomatoes
GRAINS
- Breadcrumbs
- Pasta
- Quinoa
- Rice
- Sandwich Bread
- Tortillas
MEAT/PROTEIN
- Chicken
- Eggs
- Ground Beef
- Sliced Turkey
- Lunch Meat
DAIRY
- Butter
- Sliced Cheese
- Shredded Cheese
- Milk
- Sour Cream
- Greek Yogurt
BAKING GOODS
- Baking powder
- Baking Soda
- Granulated Sugar
- Brown Sugar
- Flour
- Honey
- Vanilla Extract
- Dry Yeast
- Chocolate Chips
- Cocoa Powder
- Powdered Sugar
FREEZER
- Fruit and Berries
- Frozen Veggies (Corn, Peas, Broccoli, etc)
- Juice Concentrate
- Pizza or Other Convenience Meals
- Pie Crust
- Cookie Dough
CANNED/DRIED GOODS
- Chicken stock/broth
- Salsa
- Diced Tomatoes
- Jam/Jelly
- Peanut Butter
- Pasta Sauce
- Beans (Black Beans, Chickpeas, Baked Beans, etc)
- Soups
- Tuna
- Green Chiles
- Canned Veggies
- Coffee or Tea
Get more details on the best non-perishable and pantry foods
CONDIMENTS/SPICES
- Black Pepper
- Chili Powder
- Cinnamon
- Crushed Red Pepper
- Cumin
- Garlic Powder
- Ketchup
- Mustard
- Mayo
- Nutmeg
- Paprika
- Salt (Course Sea Salt and Kosher Salt)
- Soy Sauce
- Steak Sauce
- Hot Sauce/ Buffalo Sauce
- Salad Dressings
OILS/VINEGARS
- Apple cider vinegar
- Balsamic vinegar
- Coconut Oil
- Olive Oil
- Vegetable/Canola Oil
- Red Wine Vinegar
- White Vinegar
- Cooking Wine
- White Wine Vinegar
SNACKS
- Crackers
- Nuts
- Quick Oats
- Popcorn
- Tortilla Chips
- Cereal
Click to get my Free Printable Grocery List for the perfectly stocked pantry and freezer!

Click ☝🏻 for my FREE Grocery List Printable!
I hope this essential grocery list can help you buy what you need and make your home cooking so much easier!
Stock Your Kitchen
Find more ideas for your grocery list, stock up your kitchen, and print more cooking guides and charts to keep handy!

Non-Perishable Foods to Stock Up On

Frozen Vegetables to Stock Up On (and Recipes to Make)

Ultimate List of Cooking Herbs for Your Kitchen

Ultimate List of Cooking Spices for Your Kitchen

Cooking Oil 101: Types of Cooking Oils to Use

26 Types of Pasta and When to Use Them

What Fruits and Vegetables are in Season?

Meat Temperature Chart (Free Printable)

How to Meal Prep (Guide for Beginners)

Basic Cooking Measurements & Kitchen Conversion Chart

