
By Becky Hardin
Published Oct 17, 2023

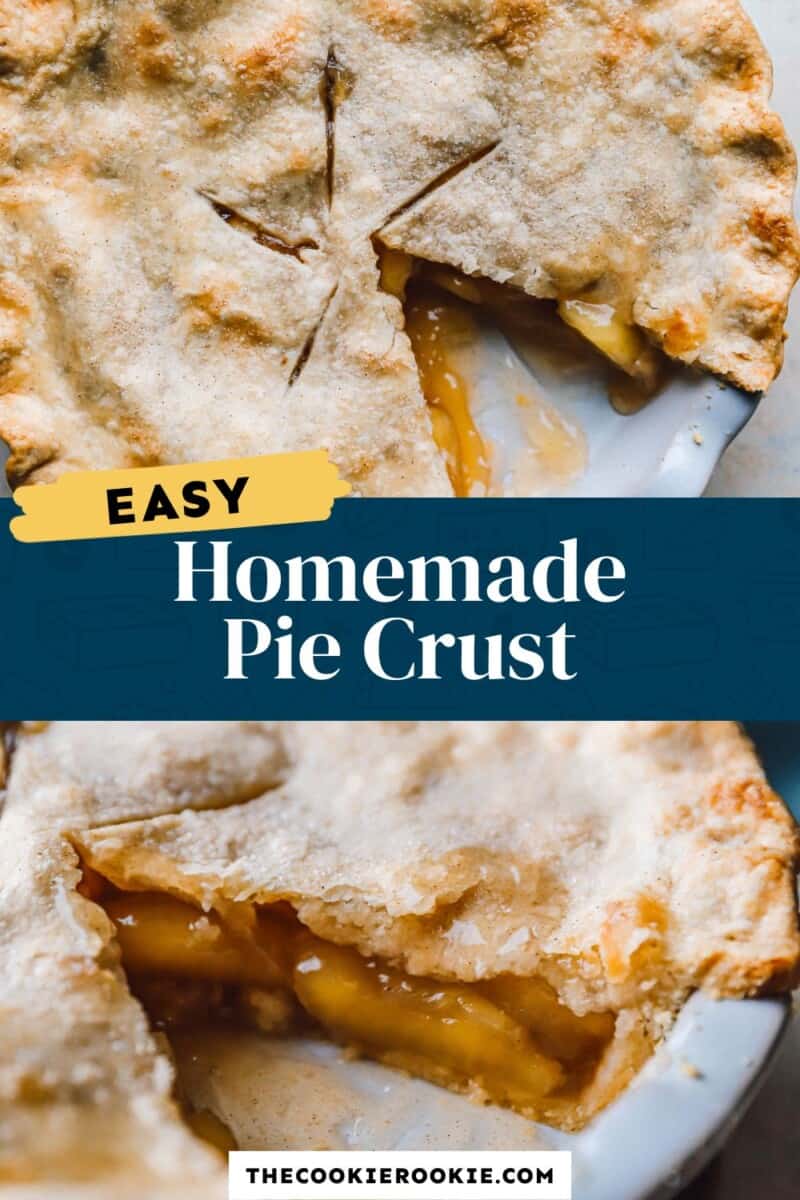
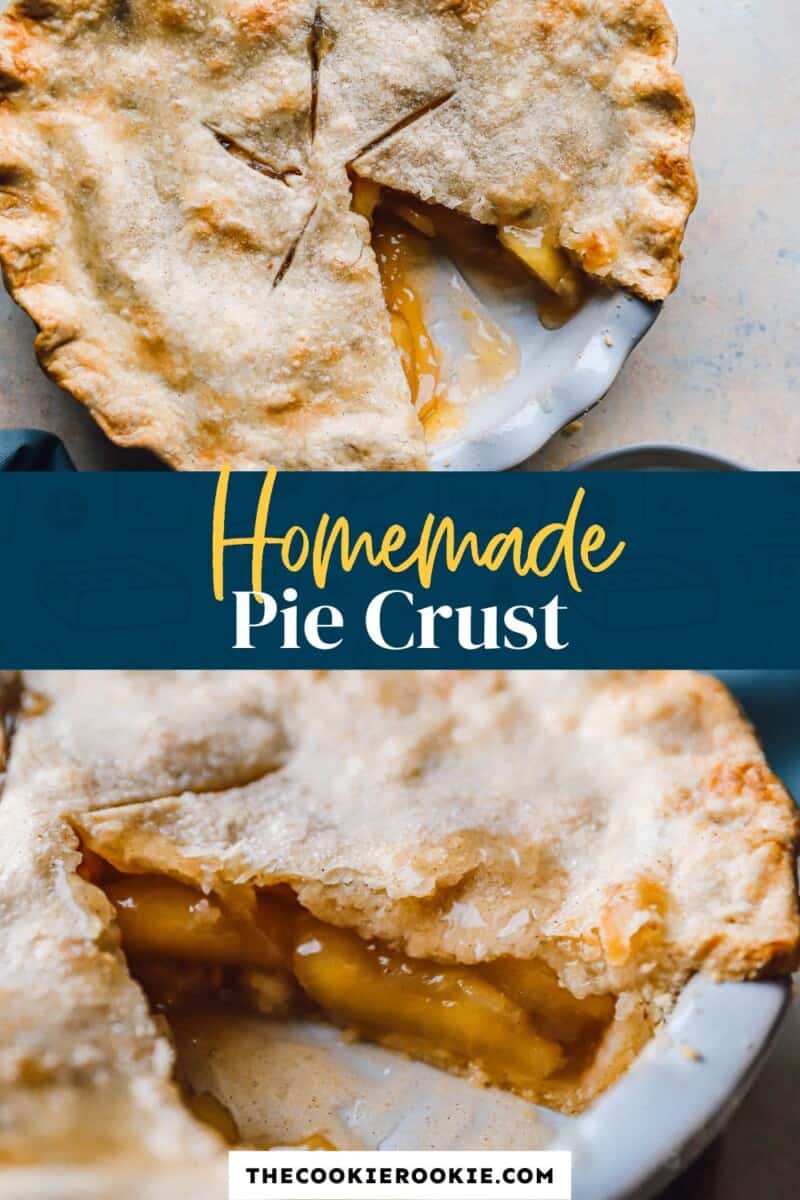
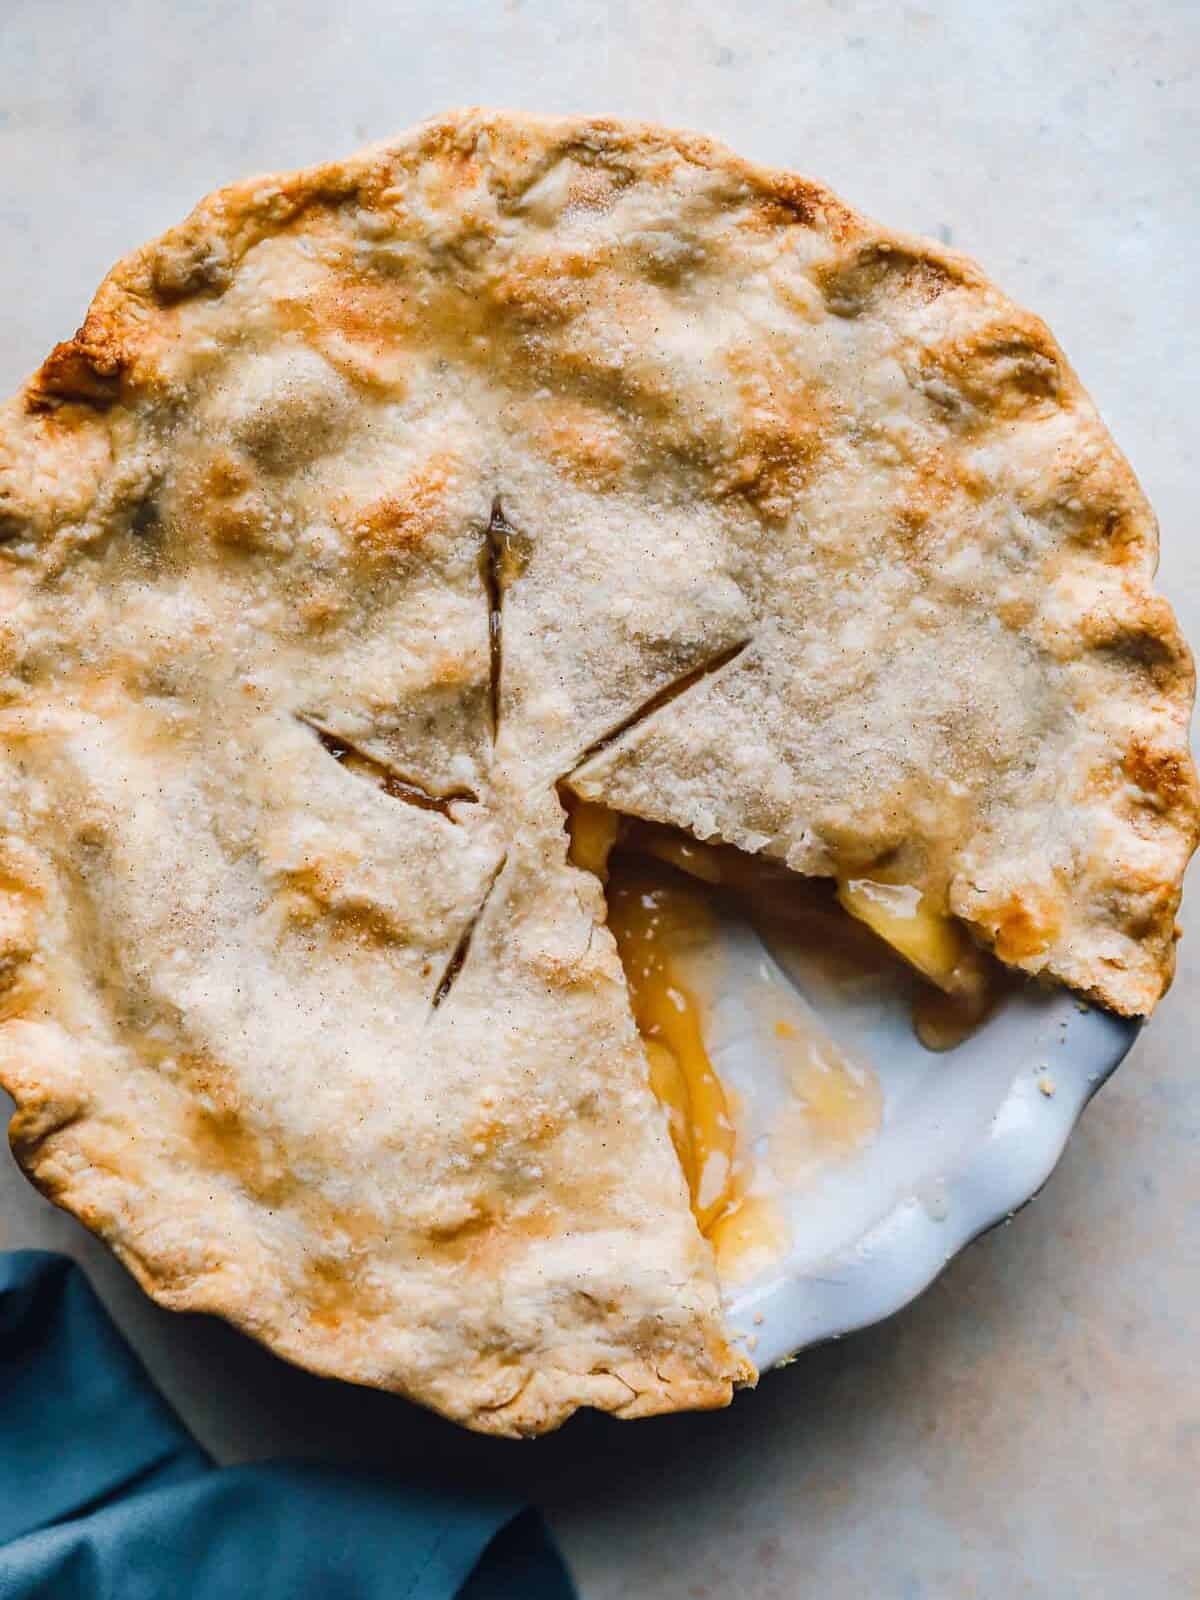
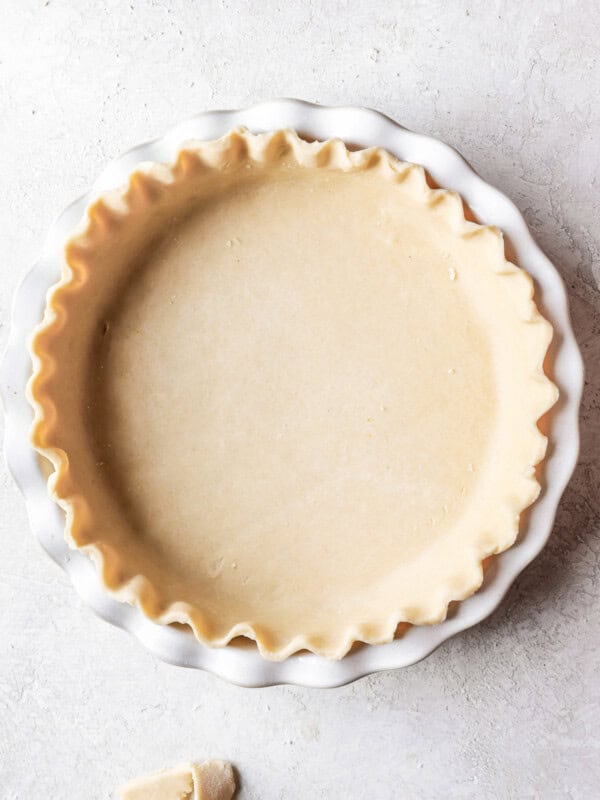
This easy Homemade Pie Crust recipe will take any pie up a notch or two! Learn how to make pie crust from scratch and see how simple it is. You’ll love this flaky, tender crust, and you can use it with any recipe you like.
What’s in this Homemade Pie Crust Recipe?
This homemade pie crust will make you feel like a professional baker right at home! Don’t let dessert-time intimidate you; you’ve got it covered. Bake up any pie you love with the freshest crust to make it perfect.
- Flour: Use all-purpose flour for this recipe.
- Shortening: I prefer shortening for my pie crust because it has a higher melting point than butter, which means it’s going to cook more evenly as it bakes, and it’s easier to roll out. It makes a really tender, moist, but still flaky crust, and it helps the crust to hold its shape.
- Water: Your water should be ice cold, not lukewarm. If it’s too warm, it’ll melt the shortening as you’re bringing the dough together.
- Salt: Just a little bit for flavor.
Pro Tip: The ingredients and dough should be kept cold/chilled through this whole process. If things start getting warm, put it in the fridge to chill before continuing.
Easy Homemade Pie Crust for a Double Crust Pie
If you want to make a double pie crust, increase the ingredient amounts slightly (as shown in the recipe card). You’ll set aside about ⅓ of the dough for the top.
When you’re ready to place it, cover the pie filling and press down around the edges to seal. Be sure to cut vents in the top to let air out, so the filling doesn’t ooze out as it bakes.
I like to brush the top with milk, an egg wash, or cinnamon sugar to finish it off.
How to Make Ahead and Store
You can make the dough, roll it into a disc covered in plastic wrap, and keep it in the refrigerator for up to 3 days. Then roll it out, shape it into the pie plate, and finish your pie recipe.
How to Freeze
If you want to make the pie crust further in advance, follow the same instructions above (make it, shape it, wrap it tightly), and store in the freezer up to 3 months.
When ready to use it, thaw it in the refrigerator overnight.
Serving Suggestions
Use this homemade pie crust in your next baking project to take it to the next level. It’s perfect for apple pie , fresh strawberry pie , french silk pie , banana cream pie , pumpkin pie , pecan pie , cherry pie , sweet potato pie , caramel pie , or lemon meringue pie .
It also works beautifully for savory applications, like quiche Lorraine , chicken salad pie , beef pot pie , chicken pot pie , or baked chicken empanadas .
Ingredients1x2x3x
For a Single Pie Crust
- ▢ 1½ cups all-purpose flour 180 grams
- ▢ ½ teaspoon kosher salt
- ▢ ½ cup vegetable shortening 92 grams (½ stick)
- ▢ 5 tablespoons ice water 71 grams, or as needed
For a Double Crust
- ▢ 2 cups all-purpose flour 240 grams
- ▢ 1 teaspoon kosher salt 3 grams
- ▢ ⅔ cup vegetable shortening 123 grams (⅔ stick)
- ▢ 7 tablespoons ice water 99 grams, or as needed
Video
Instructions
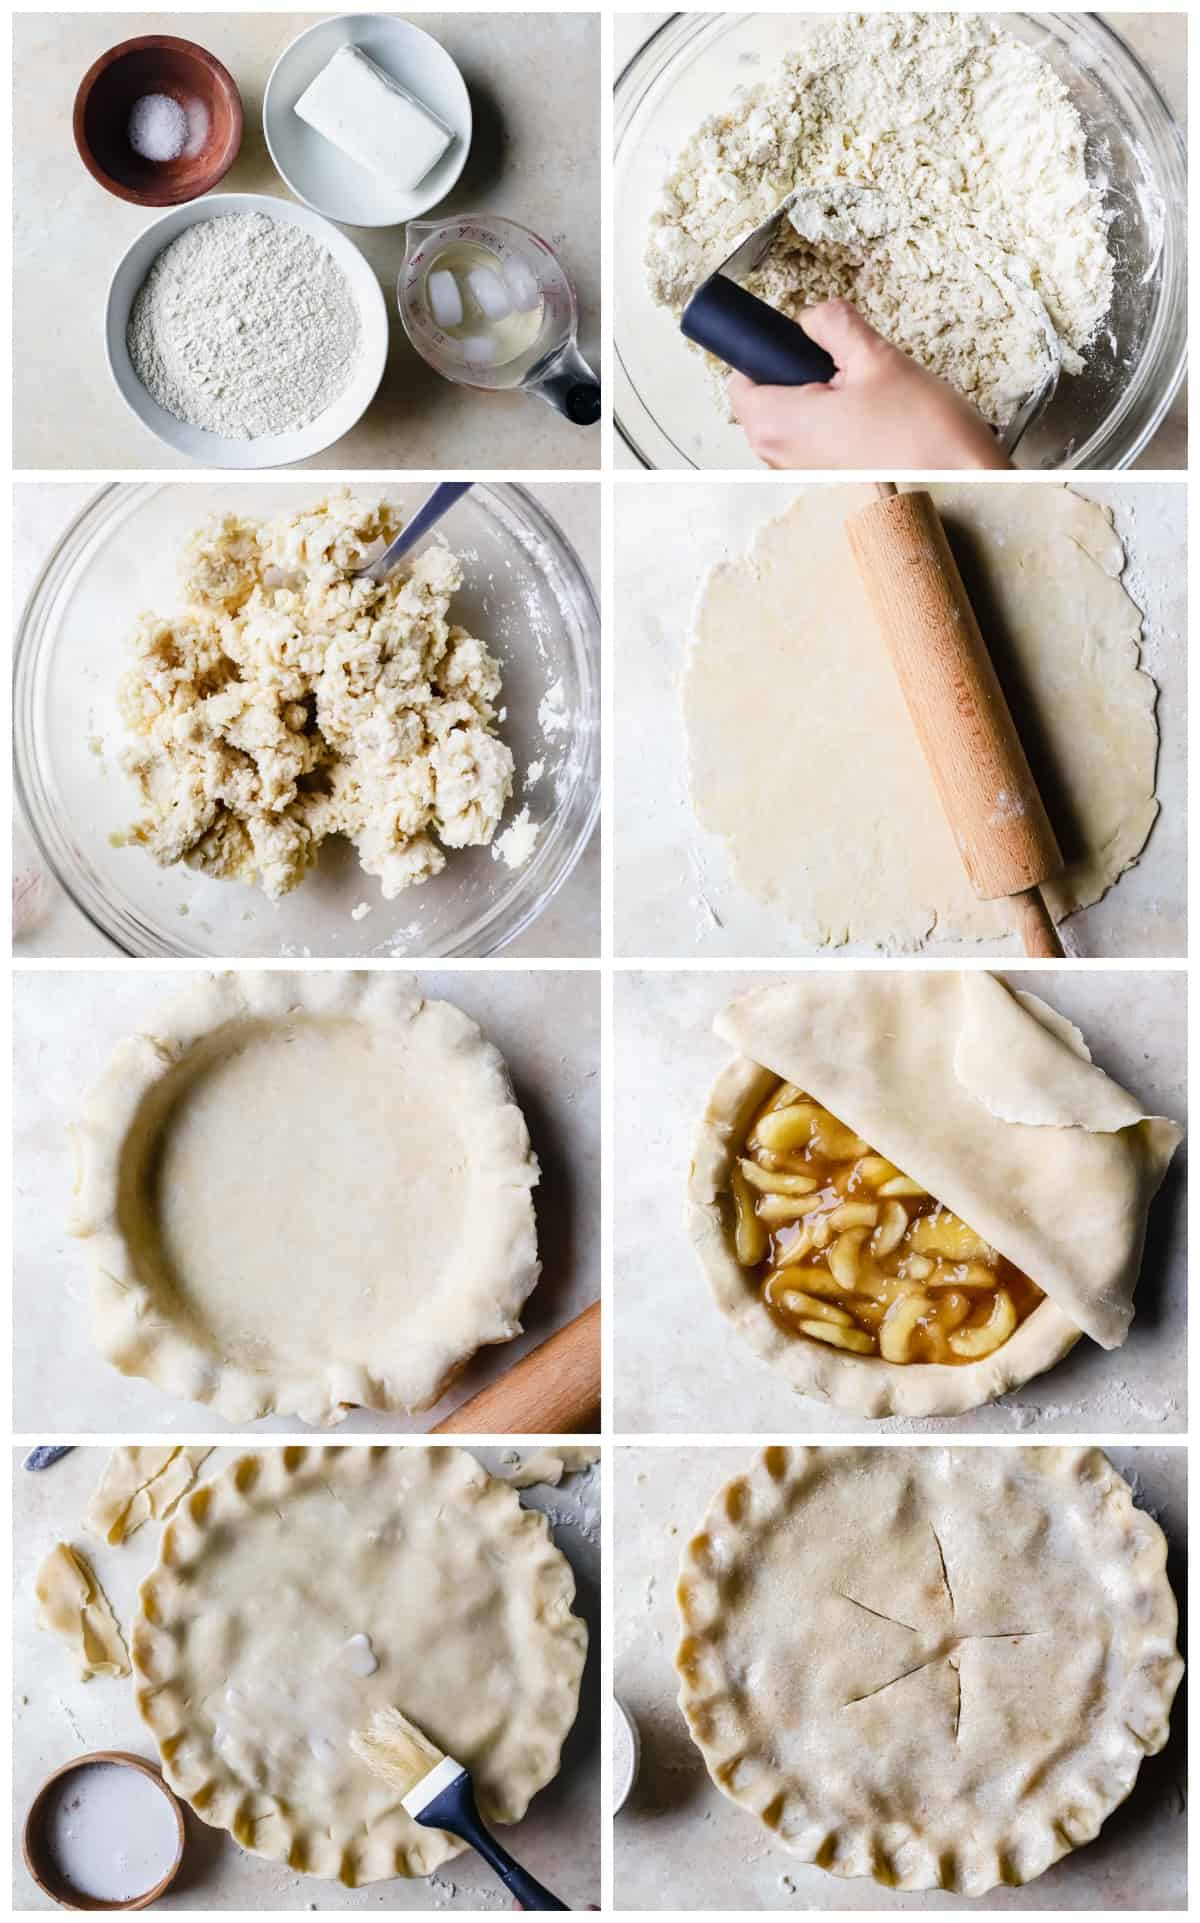
- Mix the flour and salt together, then add the shortening. *It is very important not to skimp on the shortening or else the crust will be harder to roll out. I use a handheld dough blender to mix the flour and shortening together so that it is in very tiny pieces. 1½ cups all-purpose flour, ½ teaspoon kosher salt, ½ cup vegetable shortening
- Sprinkle 1 tablespoon of ice water (make sure it is ice-cold and not warm) onto the flour mixture and gently toss with a fork. Repeat until all the flour mixture is moistened. (It usually takes me 7-8 tablespoons of ice water for a double crust.) 5 tablespoons ice water
- Sprinkle some flour on the counter; put a small amount of flour on top of the dough and also on the rolling pin.
- Use your hands to form the dough into a ball. If you are making a double pie crust, set aside one-third of the dough for the top crust.
- Roll out the dough starting from the center and working your way out to the edges. Once it is about half the size you want it, fold the dough over slightly to flip the dough to the other side, and then continue to roll from the center outward until it is large enough to fit into the pie plate. I flip it so that it isn’t stuck to the counter when you are trying to pick it up and place it into the pan.
- To pick up the dough and place it into the pie plate, fold it over a few times (like a burrito) and then unfold it once the dough is centered over the plate. Press the dough slightly in the corners of the plate. Cut off extra dough from the edges with a knife.
- For aesthetics and texture, I press my two thumbs together around the edges to make little ridges.
- If this is a double pie crust, roll the remaining third of the dough and repeat the steps of rolling out the dough starting with putting flour on the counter. 2 cups all-purpose flour, 1 teaspoon kosher salt, ⅔ cup vegetable shortening, 7 tablespoons ice water
- This dough will be placed on top of whatever filling you choose. Once you have placed it on top of the filling, press the two crust edges together and make ridges as described above.
- Then, dip a fork or pastry bush into milk and dab on the top layer of crust a few times.
- Sprinkle sugar or cinnamon-sugar on top of milk. (You could also use an egg wash for this step.)
- Cut a few vent holes and your pie ready to bake!
Baking Instructions
- If the filling you are putting in your pie is not cooked, bake it according to the recipe for whatever type of pie I’m making. (Do not prebake)
- If you are making a pie with filling that is already cooked, you should bake the crust before filling it (prebake). If prebaking: the crust needs to bake for 10 minutes at 450°F.
- When the pie is done baking, place it on a cooling rack until it has reached room temperature. Cutting slices will be easier if the pie has cooled completely.
Equipment
- Kitchen Scale (optional)
- Hand Mixer (optional)
- Rolling Pin
- Pie Pan
Becky’s Tips
- Don’t skimp when it comes to mixing in the shortening, or else it will be harder to roll out the dough. I use a handheld dough blender to really get in there and mix well. The shortening should be in very tiny pieces (pea size or smaller) by the time you’re done mixing.
- Place flour on a clean counter to create a dough-friendly workspace when rolling out the dough. I also put a bit of flour on my rolling pin, and a bit on top of the dough.
- To finish to edges: press your thumbs around the edges of the pie crust as an easy way to “crimp” it. You could also press a fork into the dough, or pinch the dough between your fingers.
- I use milk and cinnamon sugar to coat the top of my double pie crust. It gives it a nice browned look. You could also use an egg wash (egg + water).
- Ingredients and dough should be kept cold/chilled through this whole process. If things start getting warm, put it in the fridge to chill before continuing.
- You can make the dough, roll it into a disc covered in plastic wrap, and keep it in the refrigerator for up to 3 days. Then roll it out, shape it into the pie plate, and finish your pie recipe.
- Nutritional information is for ⅛ of a single pie crust.
Nutrition information is automatically calculated, so should only be used as an approximation.
The answer depends on what kind of pie you’re making. Just fill it and bake the entire pie according to the recipe you’re following. A general rule of thumb: If you’re using a filling that doesn’t need to be baked (or doesn’t need to be baked long), you’ll bake the crust before filling it. Otherwise, bake it after filling.
If your recipe calls for blind baking the crust, you can do so at 450°F for about 10 minutes, or until just beginning to turn golden.
While butter tends to create the flakiest crust, it is also way more finicky than shortening. For this easy pie crust recipe, we opted to use shortening to take away any stress! Shortening maintains the fat content but won’t melt out in the oven leaving you with a greasy mess.
Keep your ingredients cold for the flakiest crust! Warm ingredients will cause the crust to turn out greasy and dense.
The secret to keeping the dough from sticking is the flour. Dust the surface, dust the rolling pin, dust your hands, and dust the dough with flour as you proceed through the steps. Flour keeps the dough from sticking, but make sure not to overdo it or it’ll get too dry.
Roll out the dough to about ⅛ inch thickness. This makes it thick enough to hold up the filling, but not so thick that it overtakes every bite of pie.
There’s no need to do this unless you are blind baking the crust without any weights inside. I recommend filling the crust with pie weights, beans, or even sugar to weigh it down while blind baking, but you can dock it in a pinch to help prevent it from puffing up.
The best way to ensure a crispy crust is to use a metal or glass pie pan and bake the pie on a lower oven rack. Metal and glass conduct heat more quickly and efficiently than ceramic, and the lower rack helps the crust to brown more quickly. If you have a particularly wet filling, you can also brush the pie crust with egg whites to help seal out excess moisture.
If your crust falls apart after baking, it may have been too dry or overworked. It’s important to add water just until the dough is moistened, but you don’t want it to be dry and crumbly. It’s a delicate balance! You also need to mix the dough gently to avoid developing too much gluten, which could cause the same issue.
More Baking Basics we Love
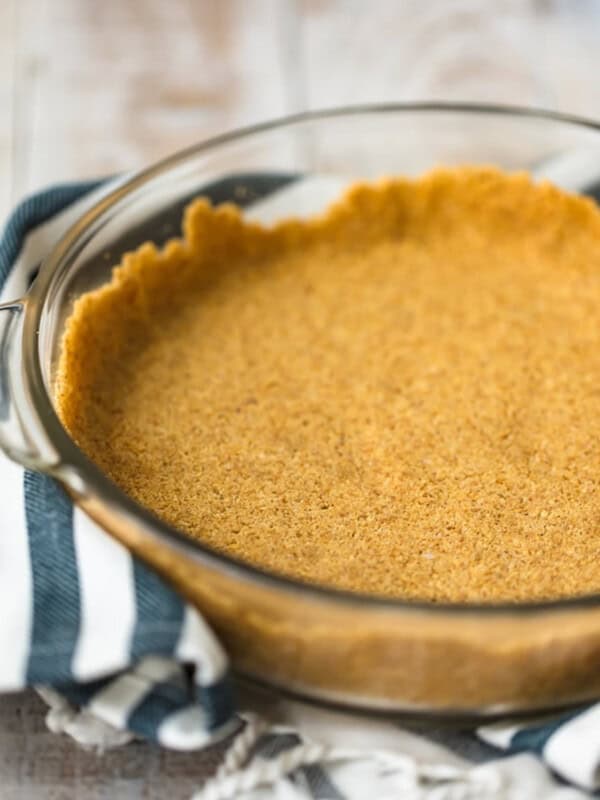
Homemade Graham Cracker Crust (Graham Cracker Pie Crust)
3 Ingredient Pie Crust
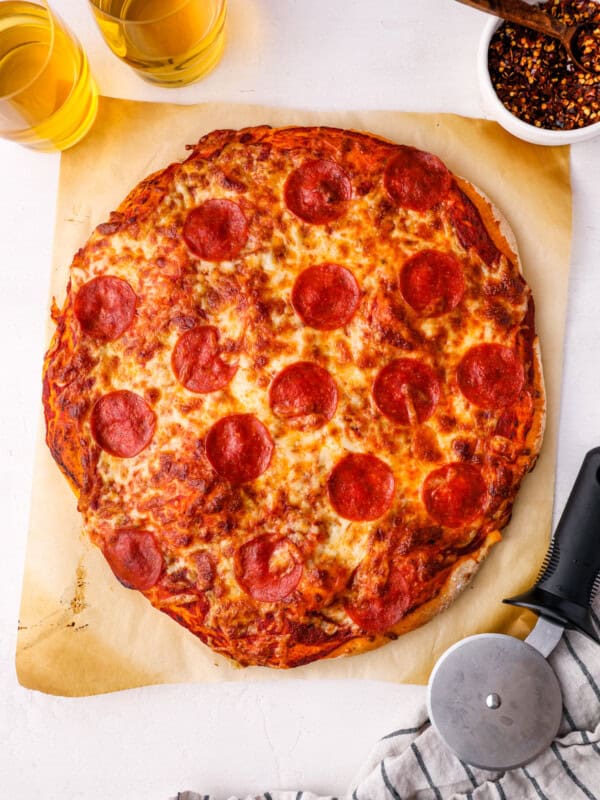
Homemade Pizza Dough
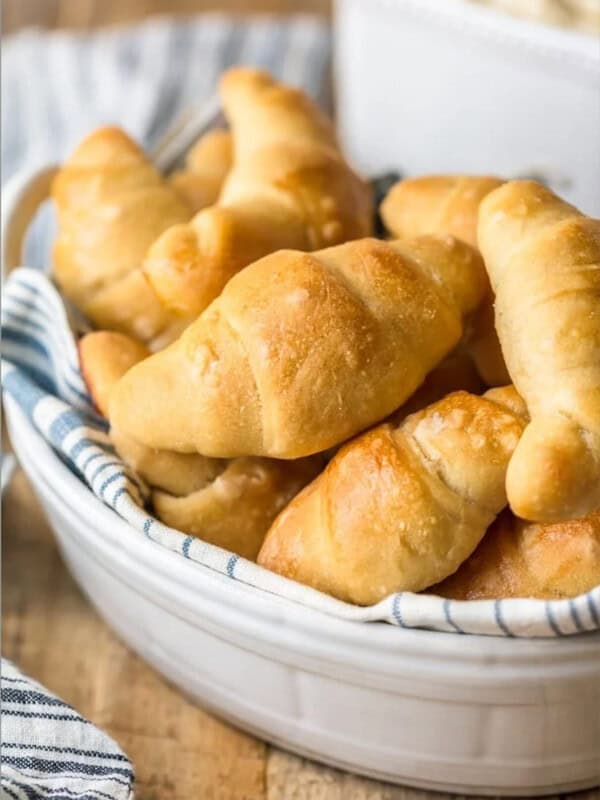
Homemade Crescent Rolls
Homemade Dinner Rolls
Homemade Cinnamon Rolls Recipe
No Knead Sandwich Bread
Homemade Brownie Mix

Homemade Pie Crust Recipe (How to Make Pie Crust)
Equipment
- Kitchen Scale (optional)
- Hand Mixer (optional)
- Rolling Pin
- Pie Pan
Ingredients
For a Single Pie Crust
- 1½ cups all-purpose flour 180 grams
- ½ teaspoon kosher salt
- ½ cup vegetable shortening 92 grams (½ stick)
- 5 tablespoons ice water 71 grams, or as needed
For a Double Crust
- 2 cups all-purpose flour 240 grams
- 1 teaspoon kosher salt 3 grams
- ⅔ cup vegetable shortening 123 grams (⅔ stick)
- 7 tablespoons ice water 99 grams, or as needed
Instructions
- Mix the flour and salt together, then add the shortening. *It is very important not to skimp on the shortening or else the crust will be harder to roll out. I use a handheld dough blender to mix the flour and shortening together so that it is in very tiny pieces. 1½ cups all-purpose flour, ½ teaspoon kosher salt, ½ cup vegetable shortening
- Sprinkle 1 tablespoon of ice water (make sure it is ice-cold and not warm) onto the flour mixture and gently toss with a fork. Repeat until all the flour mixture is moistened. (It usually takes me 7-8 tablespoons of ice water for a double crust.) 5 tablespoons ice water
- Sprinkle some flour on the counter; put a small amount of flour on top of the dough and also on the rolling pin.
- Use your hands to form the dough into a ball. If you are making a double pie crust, set aside one-third of the dough for the top crust.
- Roll out the dough starting from the center and working your way out to the edges. Once it is about half the size you want it, fold the dough over slightly to flip the dough to the other side, and then continue to roll from the center outward until it is large enough to fit into the pie plate. I flip it so that it isn’t stuck to the counter when you are trying to pick it up and place it into the pan.
- To pick up the dough and place it into the pie plate, fold it over a few times (like a burrito) and then unfold it once the dough is centered over the plate. Press the dough slightly in the corners of the plate. Cut off extra dough from the edges with a knife.
- For aesthetics and texture, I press my two thumbs together around the edges to make little ridges.
- If this is a double pie crust, roll the remaining third of the dough and repeat the steps of rolling out the dough starting with putting flour on the counter. 2 cups all-purpose flour, 1 teaspoon kosher salt, ⅔ cup vegetable shortening, 7 tablespoons ice water
- This dough will be placed on top of whatever filling you choose. Once you have placed it on top of the filling, press the two crust edges together and make ridges as described above.
- Then, dip a fork or pastry bush into milk and dab on the top layer of crust a few times.
- Sprinkle sugar or cinnamon-sugar on top of milk. (You could also use an egg wash for this step.)
- Cut a few vent holes and your pie ready to bake!
Baking Instructions
- If the filling you are putting in your pie is not cooked, bake it according to the recipe for whatever type of pie I’m making. (Do not prebake)
- If you are making a pie with filling that is already cooked, you should bake the crust before filling it (prebake). If prebaking: the crust needs to bake for 10 minutes at 450°F.
- When the pie is done baking, place it on a cooling rack until it has reached room temperature. Cutting slices will be easier if the pie has cooled completely.
Video
Notes
- Don’t skimp when it comes to mixing in the shortening, or else it will be harder to roll out the dough. I use a handheld dough blender to really get in there and mix well. The shortening should be in very tiny pieces (pea size or smaller) by the time you’re done mixing.
- Place flour on a clean counter to create a dough-friendly workspace when rolling out the dough. I also put a bit of flour on my rolling pin, and a bit on top of the dough.
- To finish to edges: press your thumbs around the edges of the pie crust as an easy way to “crimp” it. You could also press a fork into the dough, or pinch the dough between your fingers.
- I use milk and cinnamon sugar to coat the top of my double pie crust. It gives it a nice browned look. You could also use an egg wash (egg + water).
- Ingredients and dough should be kept cold/chilled through this whole process. If things start getting warm, put it in the fridge to chill before continuing.
- You can make the dough, roll it into a disc covered in plastic wrap, and keep it in the refrigerator for up to 3 days. Then roll it out, shape it into the pie plate, and finish your pie recipe.
- Nutritional information is for ⅛ of a single pie crust.
Nutrition
By Becky Hardin
Published Jul 12, 2017


This Essential Grocery List is an absolute life saver for my family on the busy weeks. When I started this journey to learn how to cook, I quickly realized that the first step in cooking is having staple ingredients on hand. I want to avoid having to run out to the grocery store every single time I prepare a new recipe. Having a well-stocked pantry has made my life in the kitchen so much simpler, because when it’s time to cook, I have what I need.

Essential Grocery List
It’s so helpful to have a basic grocery list to help me remember which foods to buy at the store. This food shopping list is my go-to!
It’s better to stock up on things like grains, seasonings and spices, baking essentials, oils, condiments, canned and frozen foods, etc. so I can just grab them when I need them. These things have a long shelf life , so I keep them in my kitchen for convenience.
However, I do have to go to the supermarket sometimes, and there’s a way to make that trip easy and hassle-free: I keep a grocery list! If I go in blindly, I’ll leave with things I don’t need, and nothing that actually helps me prepare a good meal.
In the list below, I’ve compiled everything I always have on my stock-up grocery list.
I’ve got you covered! I created an easy grocery list filled with all of the essentials. Plus there’s a free printable version that you can take with you to the grocery store. It has everything you need to stock your pantry, your freezer, and your refrigerator.

Click to get my Free Printable Grocery List
What to Buy at the Grocery Store
This is the perfect grocery list filled with all the basics and essentials. It should help get you going if you’re new to cooking, or if you’re just left staring helplessly at an empty pantry and don’t know how to fill it.
When I first started cooking, things could seem overwhelming. I quickly realized that they more prepared I could be, the more confident I felt. If you already have the basics in your kitchen, then you can shop stress-free.
So print out our easy grocery list, stock up your pantry and fridge, and you’ll be cooking in no time!
Click to get my Free Printable Grocery List for the perfectly stocked pantry and freezer!
Fresh Produce
- Apples
- Bananas
- Strawberries
- Avocados
- Bell Peppers
- Carrots
- Broccoli
- Garlic
- Lemons/Limes
- Onion
- Parsley
- Cilantro
- Basil
- Potatoes
- Spinach
- Tomatoes
GRAINS
- Breadcrumbs
- Pasta
- Quinoa
- Rice
- Sandwich Bread
- Tortillas
MEAT/PROTEIN
- Chicken
- Eggs
- Ground Beef
- Sliced Turkey
- Lunch Meat
DAIRY
- Butter
- Sliced Cheese
- Shredded Cheese
- Milk
- Sour Cream
- Greek Yogurt
BAKING GOODS
- Baking powder
- Baking Soda
- Granulated Sugar
- Brown Sugar
- Flour
- Honey
- Vanilla Extract
- Dry Yeast
- Chocolate Chips
- Cocoa Powder
- Powdered Sugar
FREEZER
- Fruit and Berries
- Frozen Veggies (Corn, Peas, Broccoli, etc)
- Juice Concentrate
- Pizza or Other Convenience Meals
- Pie Crust
- Cookie Dough
CANNED/DRIED GOODS
- Chicken stock/broth
- Salsa
- Diced Tomatoes
- Jam/Jelly
- Peanut Butter
- Pasta Sauce
- Beans (Black Beans, Chickpeas, Baked Beans, etc)
- Soups
- Tuna
- Green Chiles
- Canned Veggies
- Coffee or Tea
Get more details on the best non-perishable and pantry foods
CONDIMENTS/SPICES
- Black Pepper
- Chili Powder
- Cinnamon
- Crushed Red Pepper
- Cumin
- Garlic Powder
- Ketchup
- Mustard
- Mayo
- Nutmeg
- Paprika
- Salt (Course Sea Salt and Kosher Salt)
- Soy Sauce
- Steak Sauce
- Hot Sauce/ Buffalo Sauce
- Salad Dressings
OILS/VINEGARS
- Apple cider vinegar
- Balsamic vinegar
- Coconut Oil
- Olive Oil
- Vegetable/Canola Oil
- Red Wine Vinegar
- White Vinegar
- Cooking Wine
- White Wine Vinegar
SNACKS
- Crackers
- Nuts
- Quick Oats
- Popcorn
- Tortilla Chips
- Cereal
Click to get my Free Printable Grocery List for the perfectly stocked pantry and freezer!

Click ☝🏻 for my FREE Grocery List Printable!
I hope this essential grocery list can help you buy what you need and make your home cooking so much easier!
Stock Your Kitchen
Find more ideas for your grocery list, stock up your kitchen, and print more cooking guides and charts to keep handy!

Non-Perishable Foods to Stock Up On

Frozen Vegetables to Stock Up On (and Recipes to Make)

Ultimate List of Cooking Herbs for Your Kitchen

Ultimate List of Cooking Spices for Your Kitchen

Cooking Oil 101: Types of Cooking Oils to Use

26 Types of Pasta and When to Use Them

What Fruits and Vegetables are in Season?

Meat Temperature Chart (Free Printable)

How to Meal Prep (Guide for Beginners)

Basic Cooking Measurements & Kitchen Conversion Chart

