By Krista Teigen
Updated Jul 10, 2025
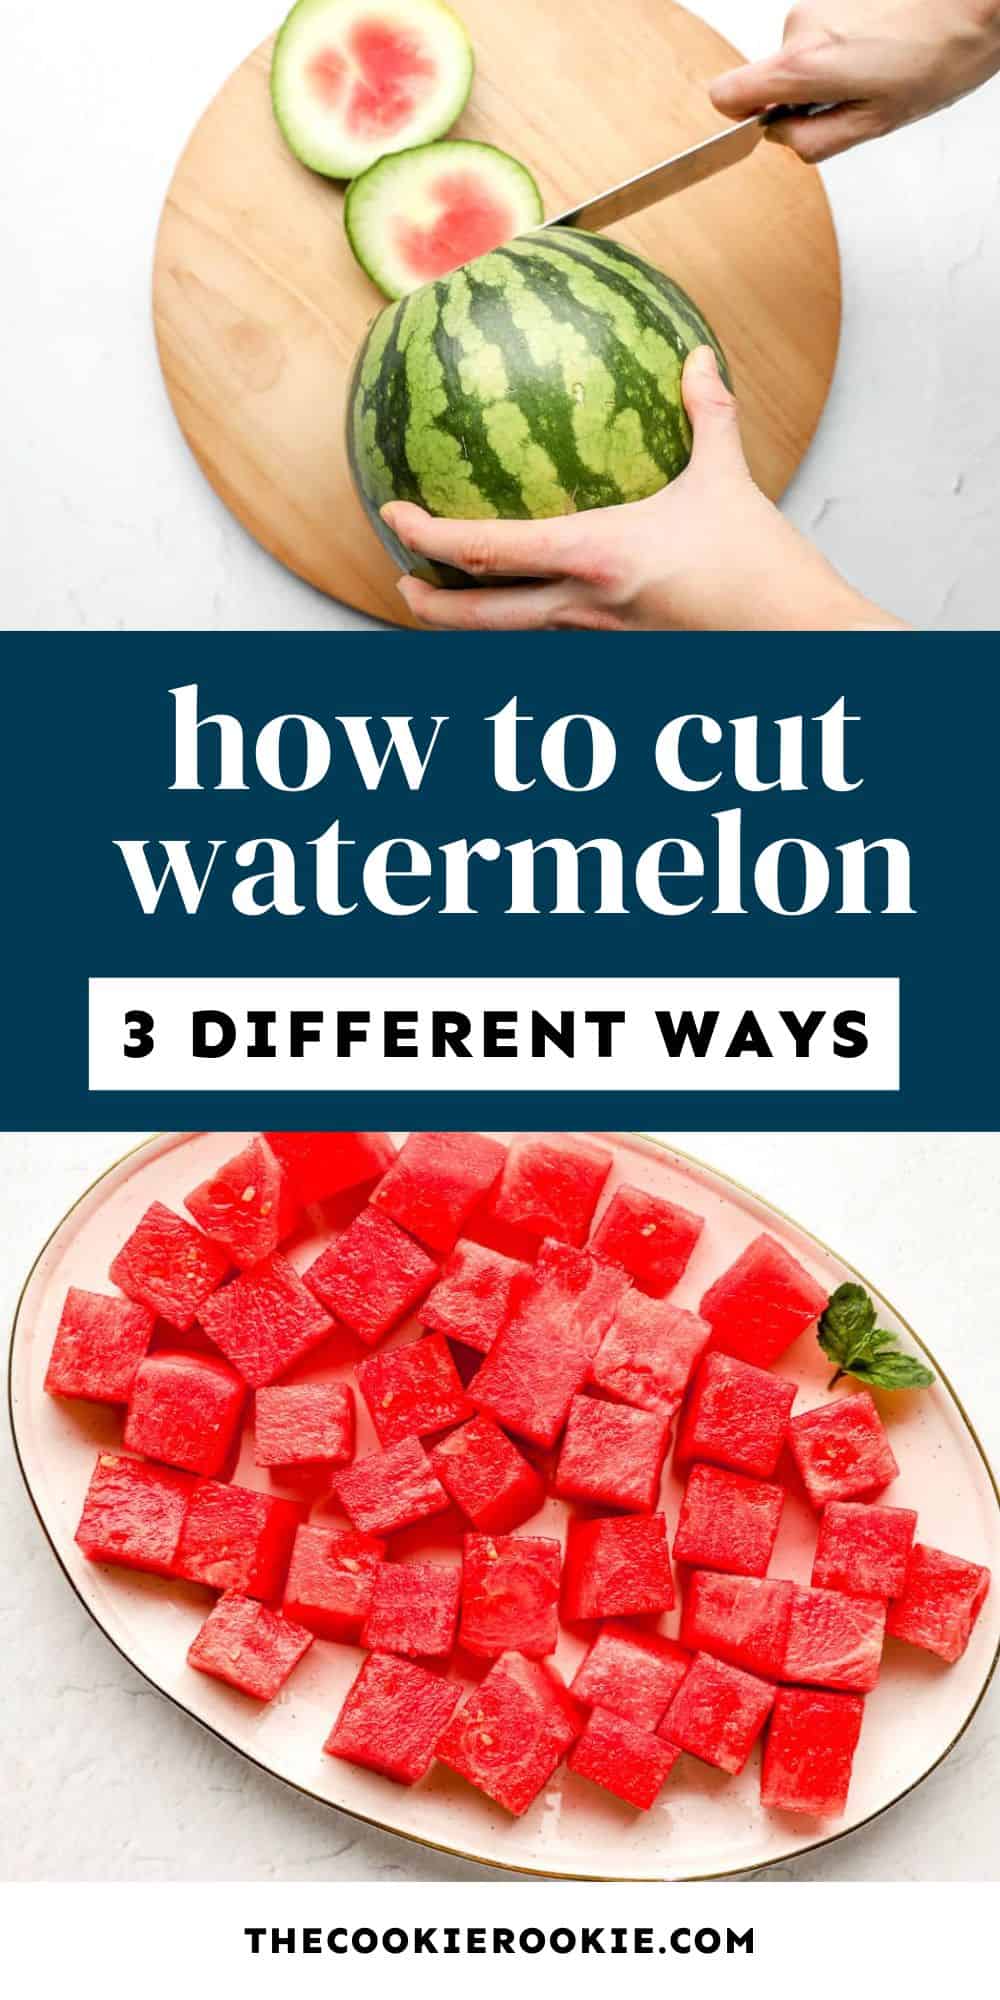
It’s almost that time of year when watermelon takes over my kitchen counters—and I’m not mad about it. This juicy, refreshing summer fruit is one of my go-to snacks for cookouts, picnics, and hot afternoons when I just need something cool and hydrating. I’ll admit, cutting into that big, messy melon used to feel intimidating, but it’s actually pretty easy once you know the right method. Whether you’re slicing it for a crowd, packing it for a picnic, or serving it to kids, I’ll show you three simple ways to cut watermelon that make snacking a breeze.
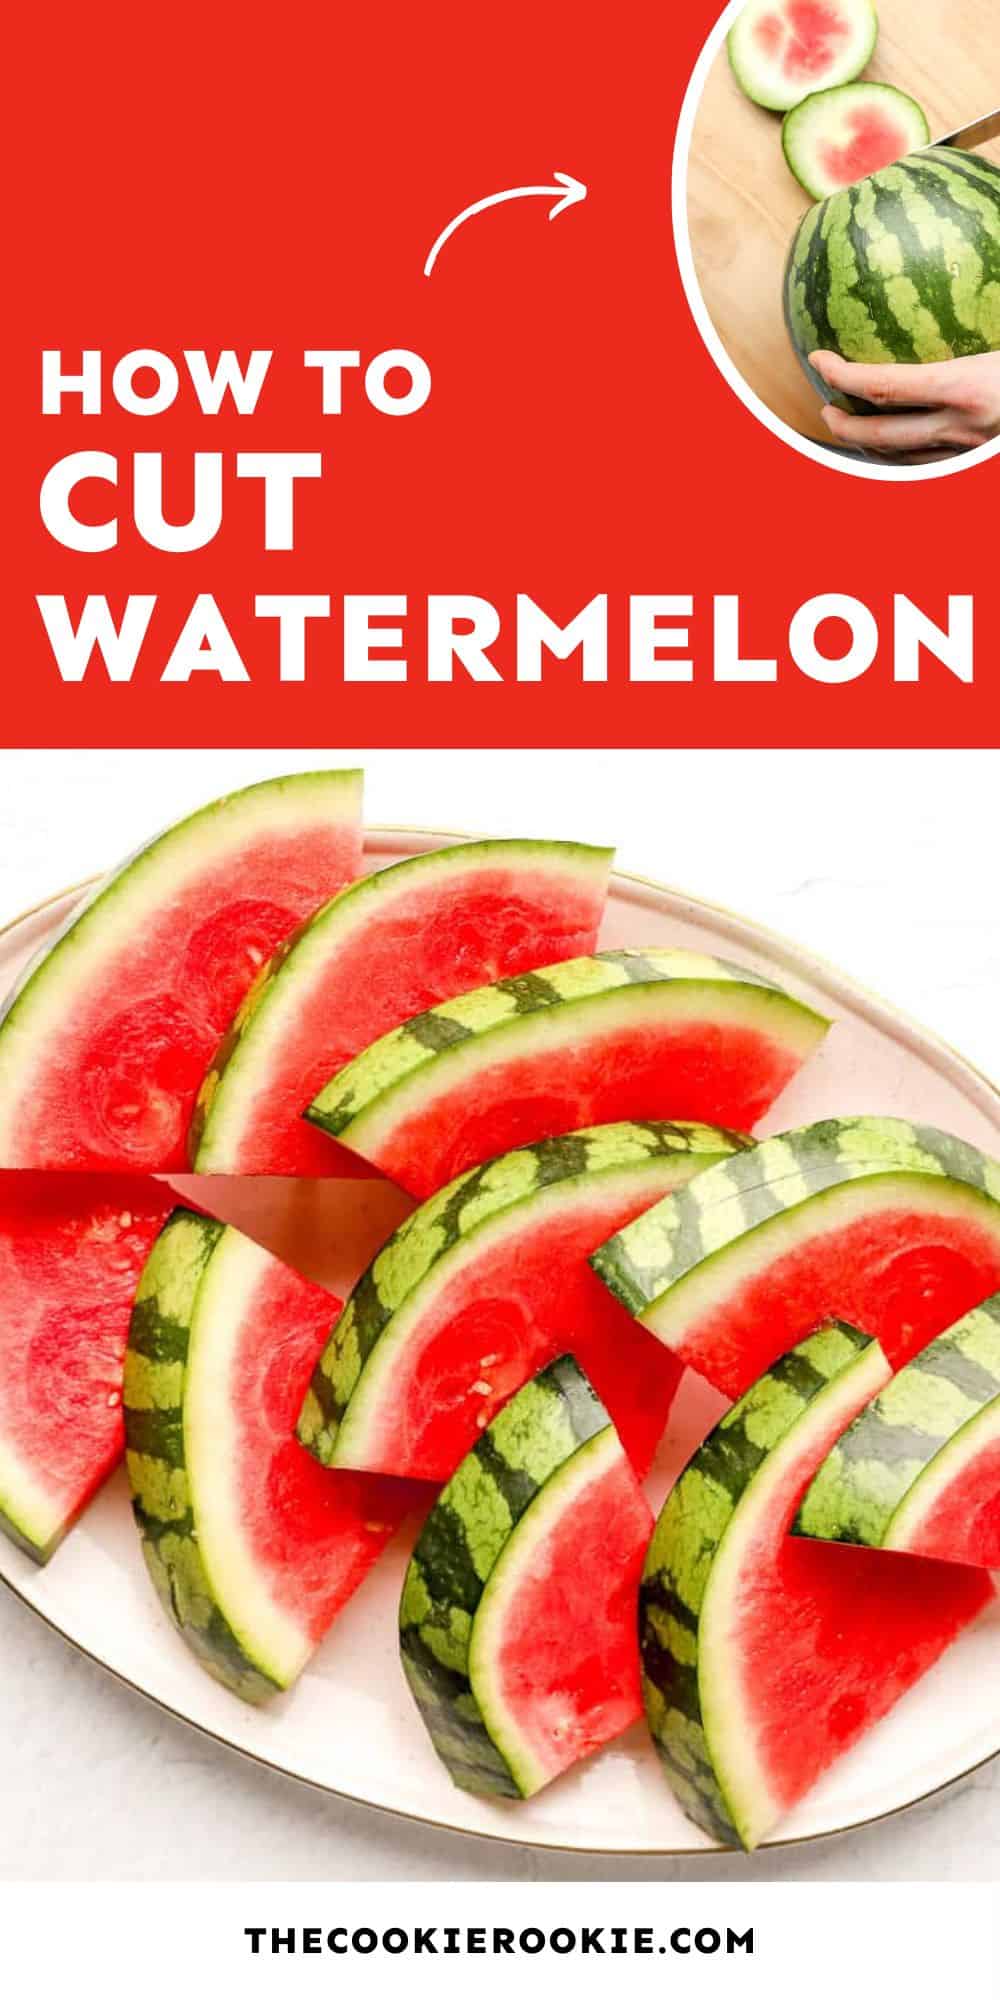
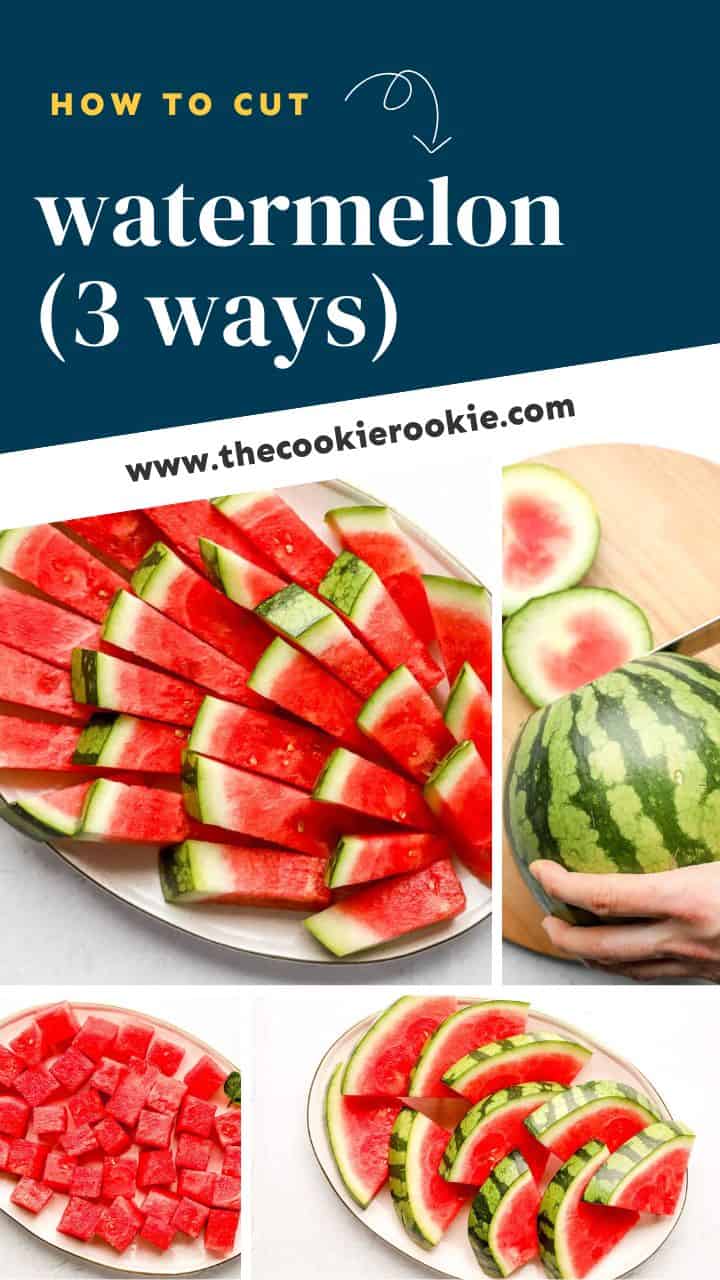
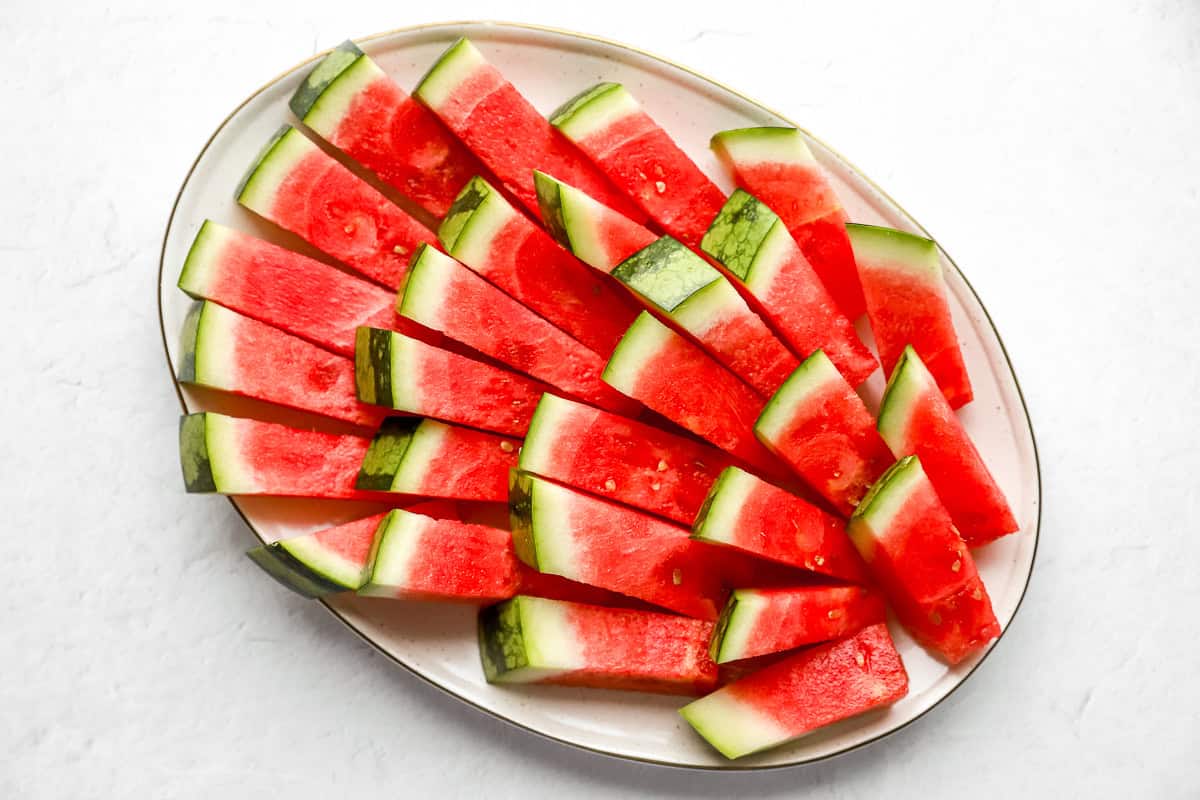
When I first started cutting watermelon, I stuck to the same old wedges every time—but over the years, I’ve found a few favorite ways to switch things up. I’m walking you through three easy methods: cubes, triangles, and sticks. Each one has its moment. Cubes are perfect for fruit salads or meal prep—easy to store and ready to grab from the fridge. Triangles are my go-to for backyard BBQs or when I want that classic slice you can hold with two hands. And sticks? They’re surprisingly fun for kids (and adults) and way less messy than you’d think—ideal for parties or picnics. No matter which style you choose, these methods make cutting watermelon feel totally doable.
Tips for Success
- I always grab my biggest chef’s knife when it’s watermelon time. A sharp blade makes slicing through the thick rind so much easier and way less frustrating.
- If your chef’s knife isn’t quite cutting it (literally), a serrated knife can be a great backup for sawing through the tough outer layer.
- Place a damp paper towel under your cutting board to stabilize it. This little trick changed the game for me. I use it every time I use my cutting board. It keeps the board from sliding around while you cut, which makes the whole process feel much safer and more stable.
- How to choose a ripe watermelon: I always go for one that’s uniform in shape, feels heavy for its size, and makes a deep, hollow sound when tapped. Those are usually the sweetest and juiciest—and that’s exactly what you want on a hot day.
Ingredients1x2x3x
- ▢ 1 watermelon
Video
Instructions
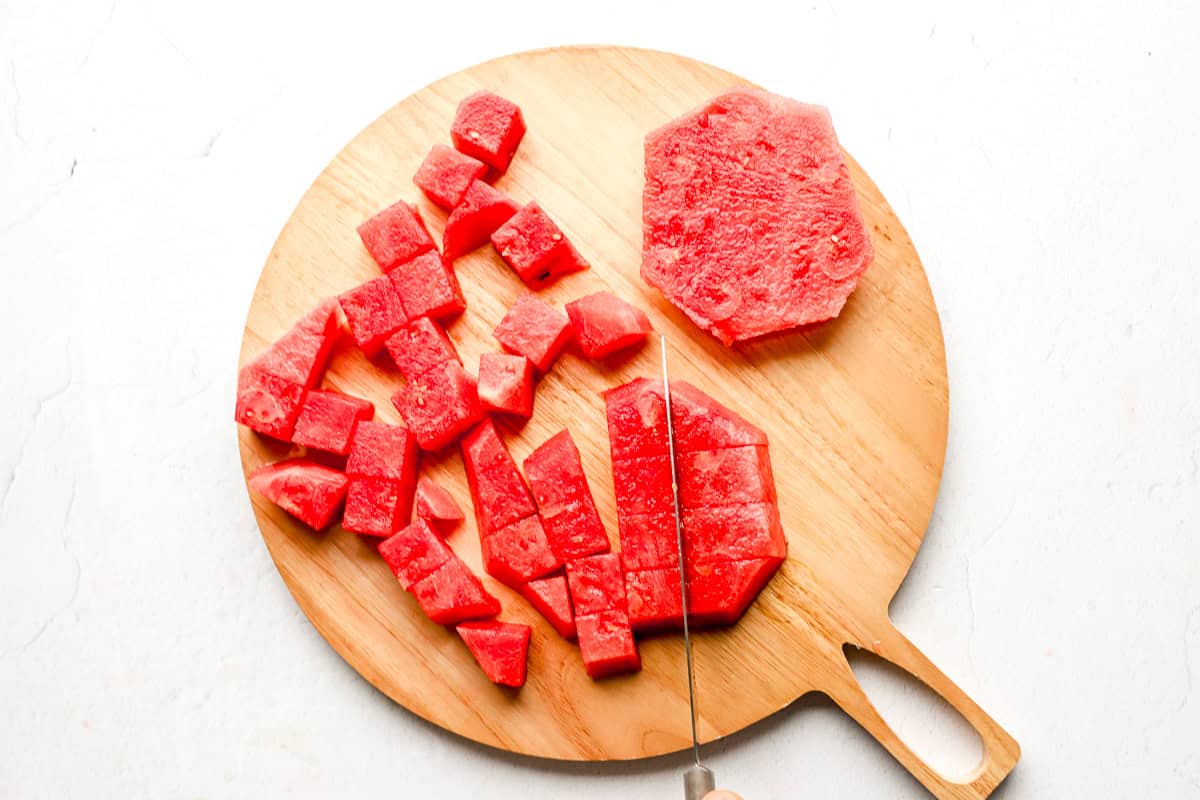
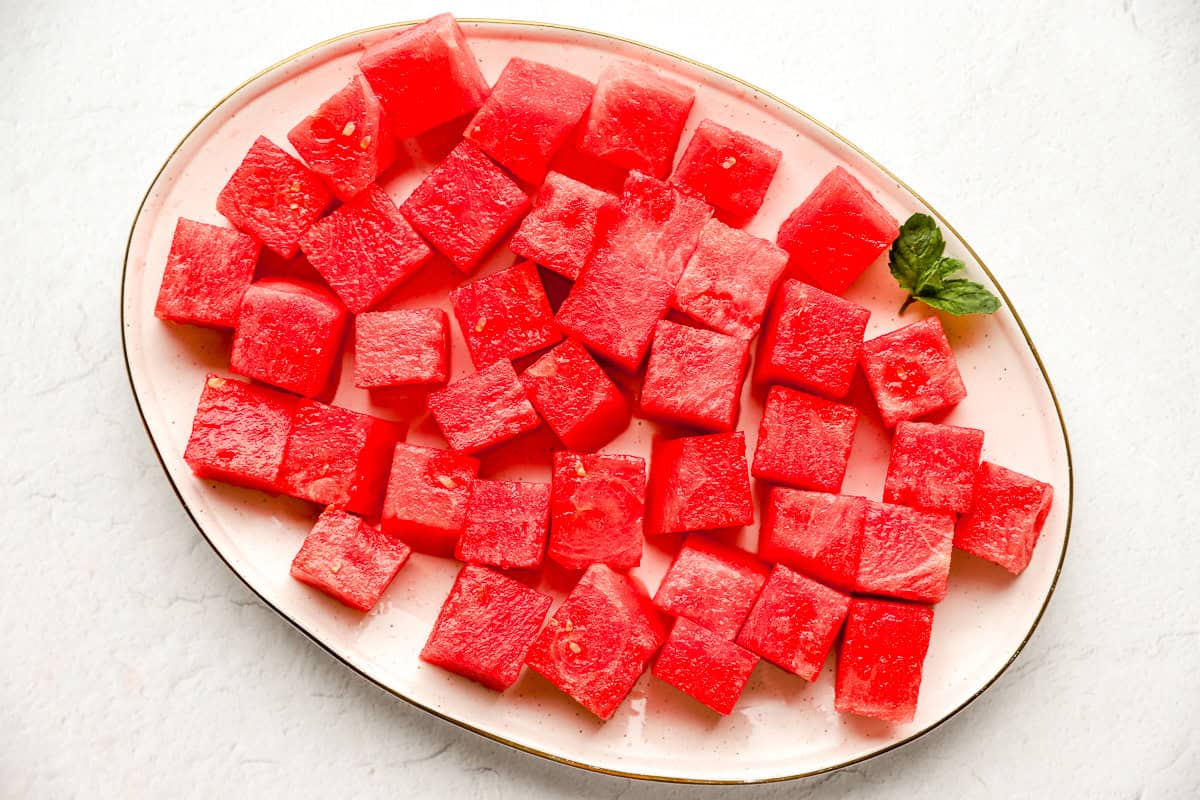
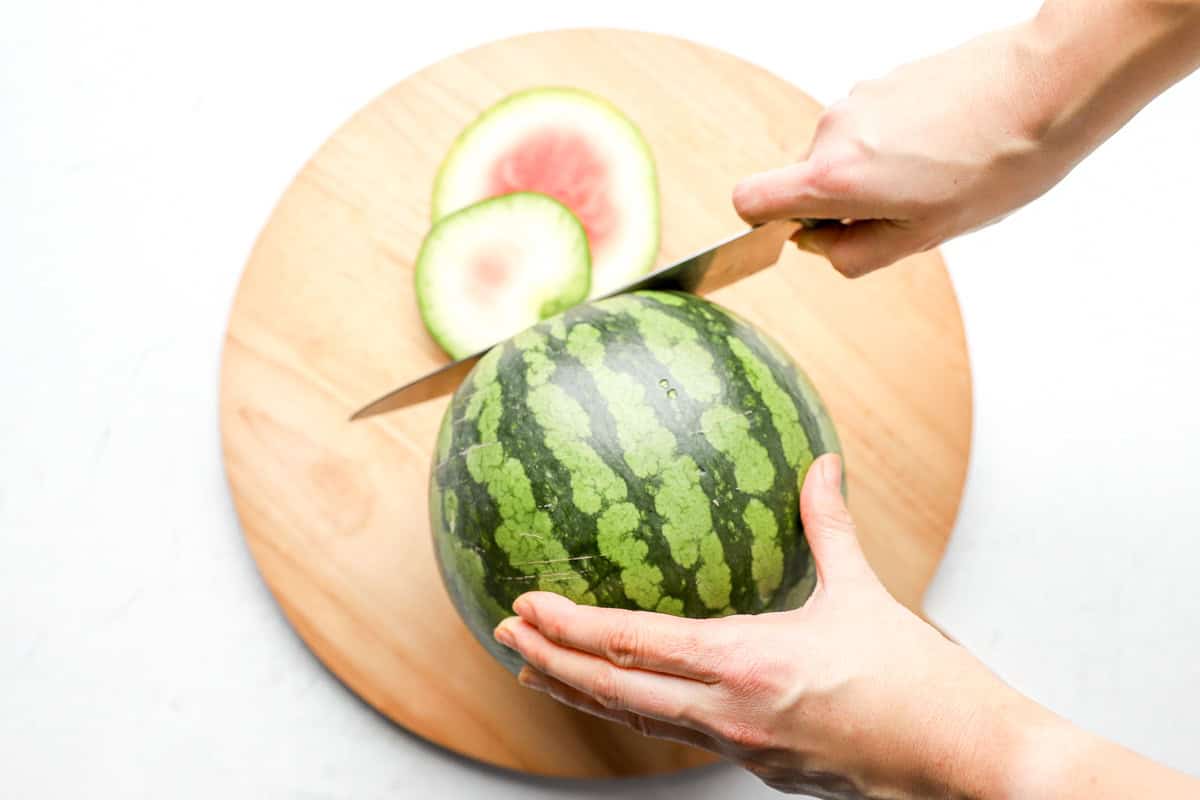
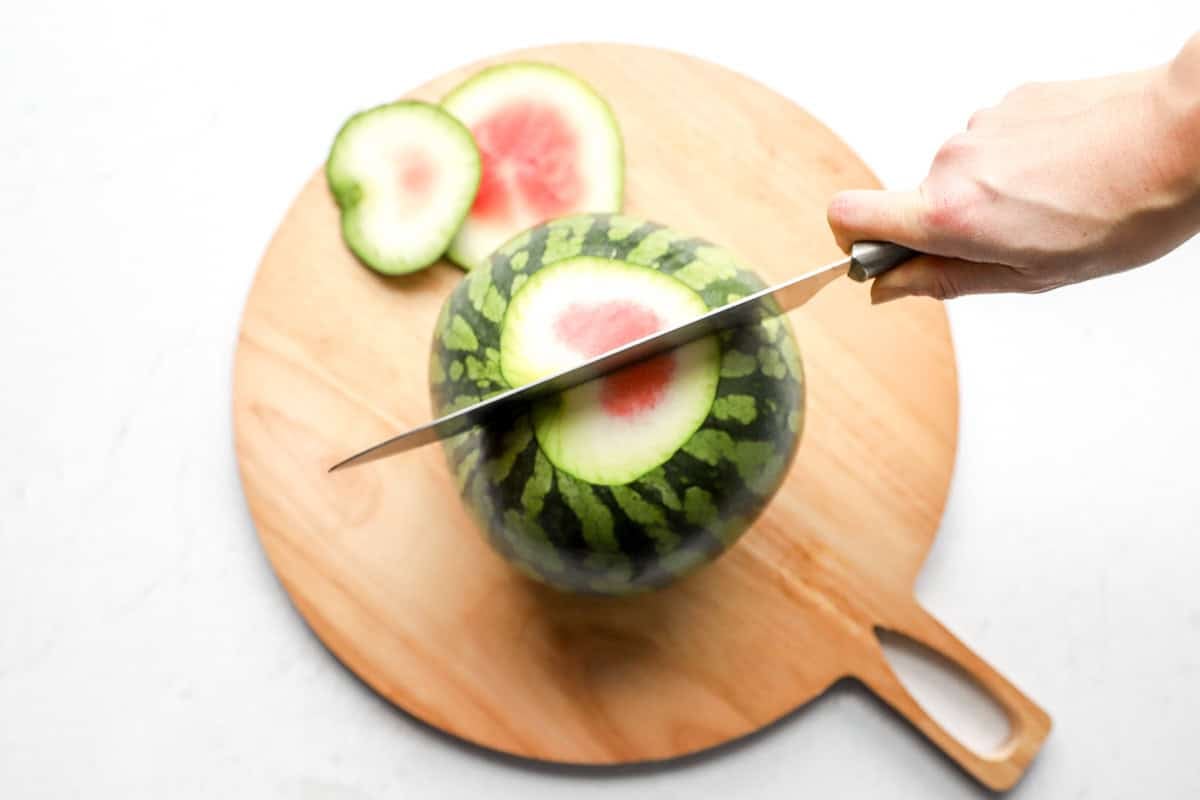
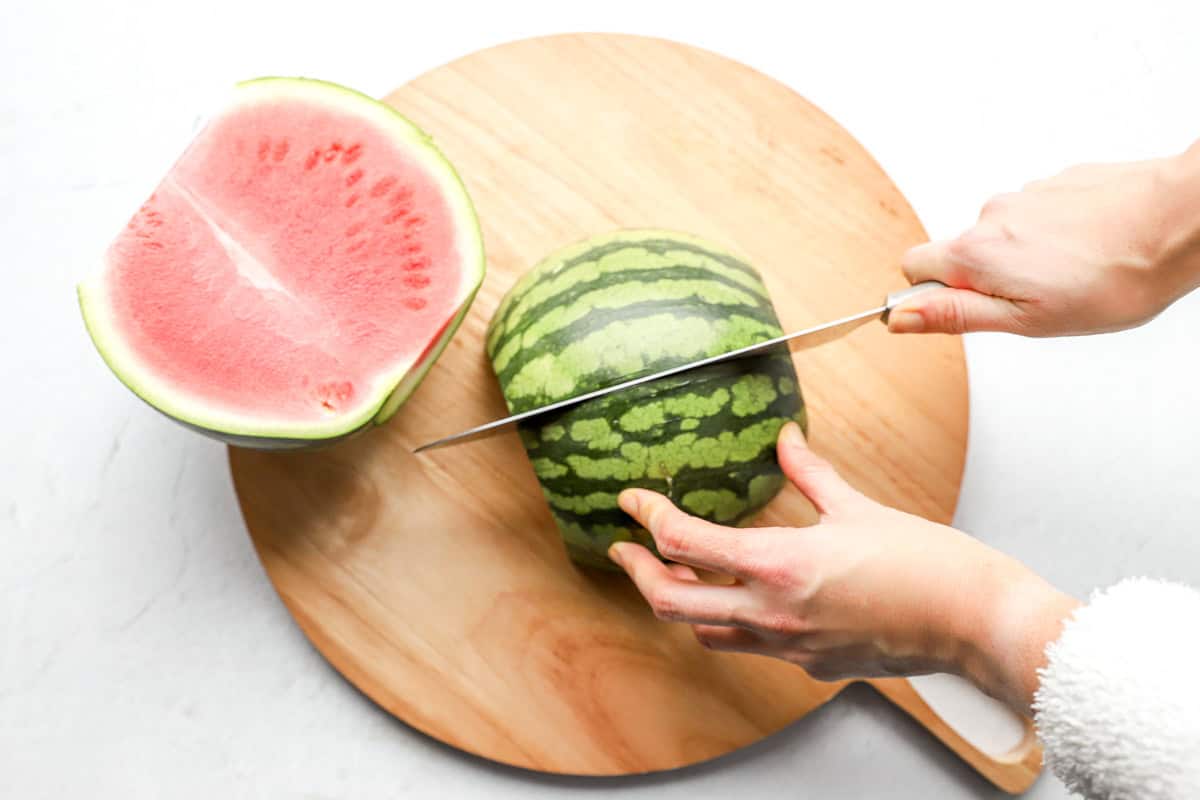
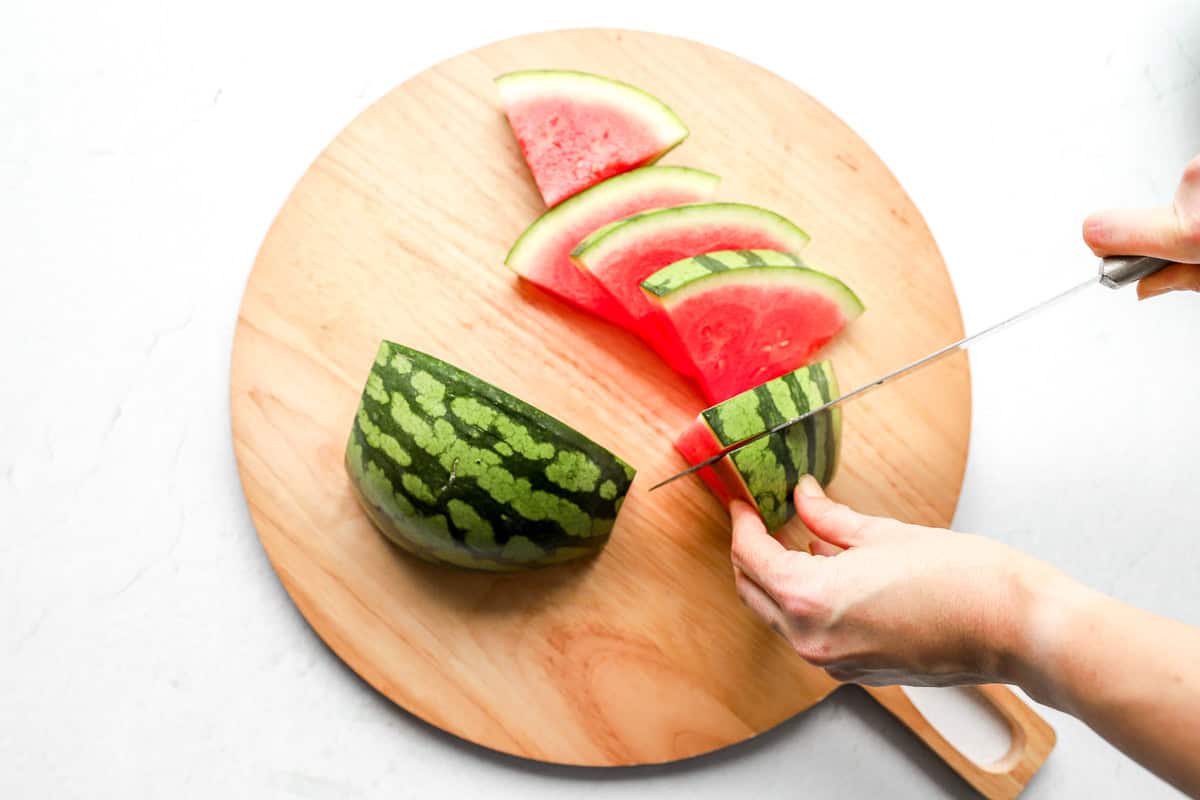
To Cut Into Cubes
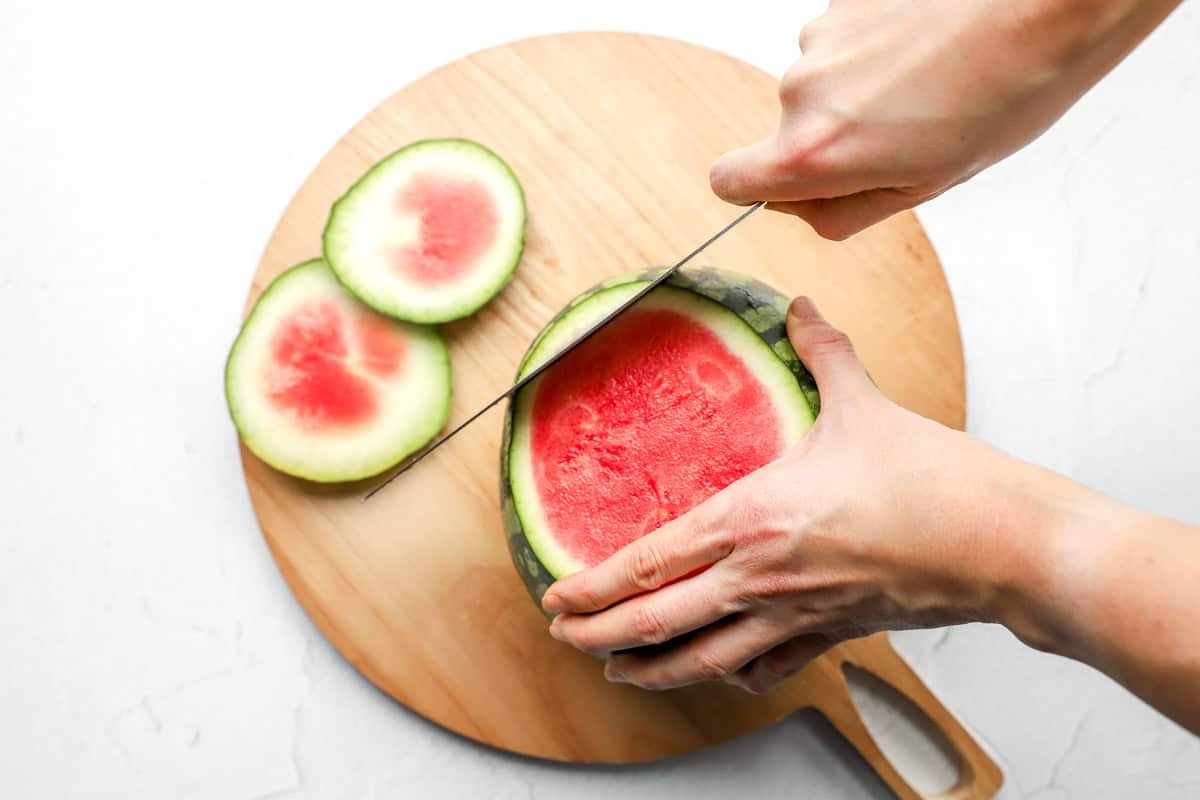
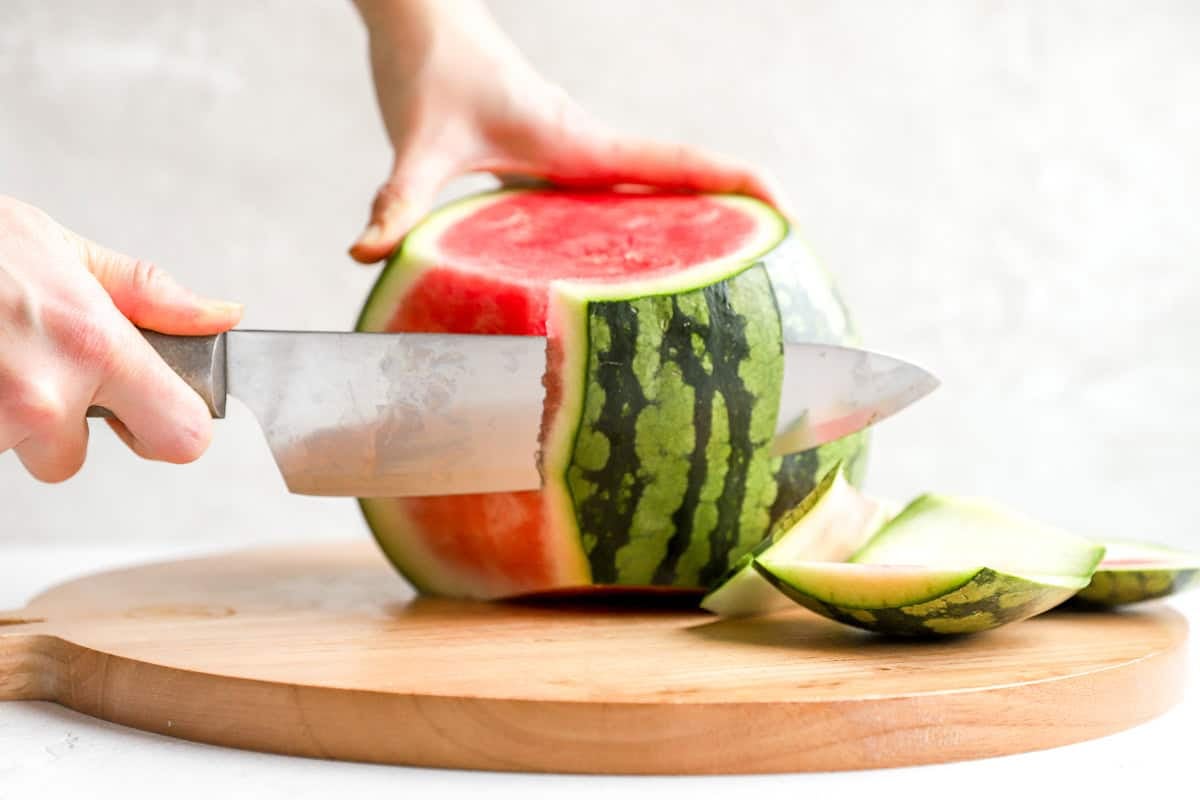
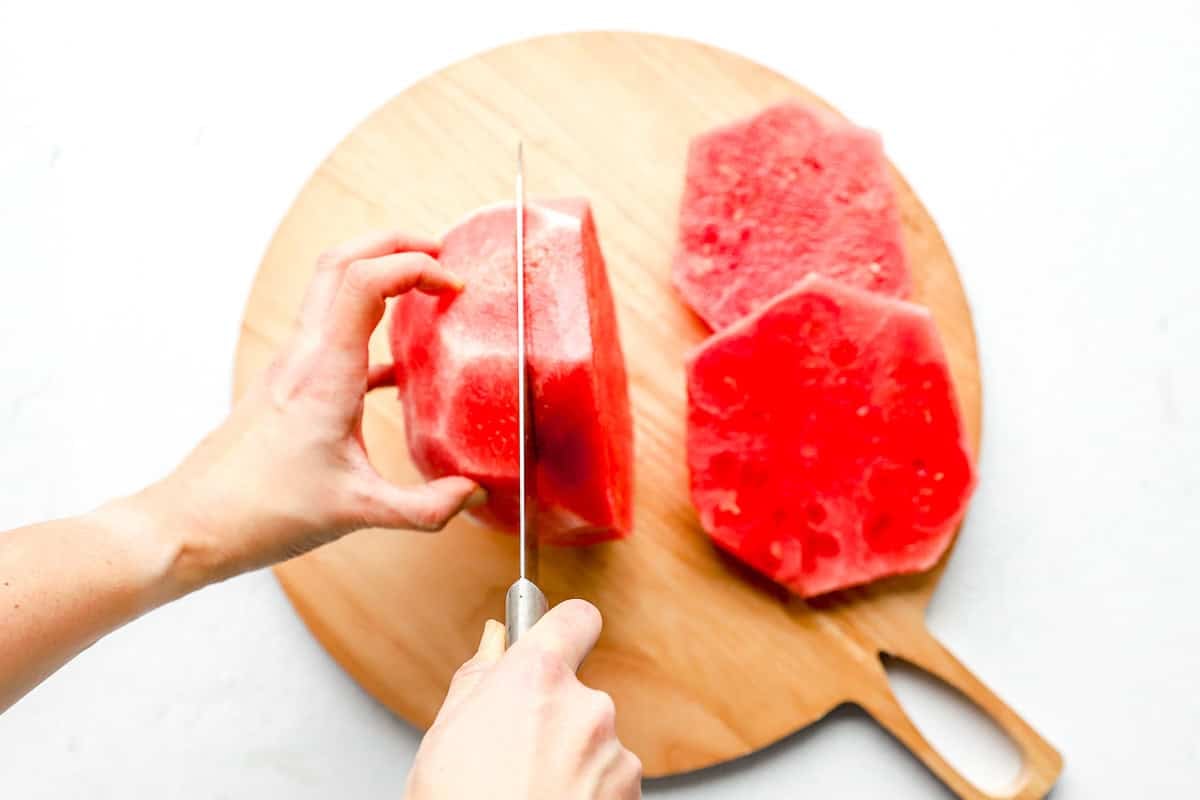
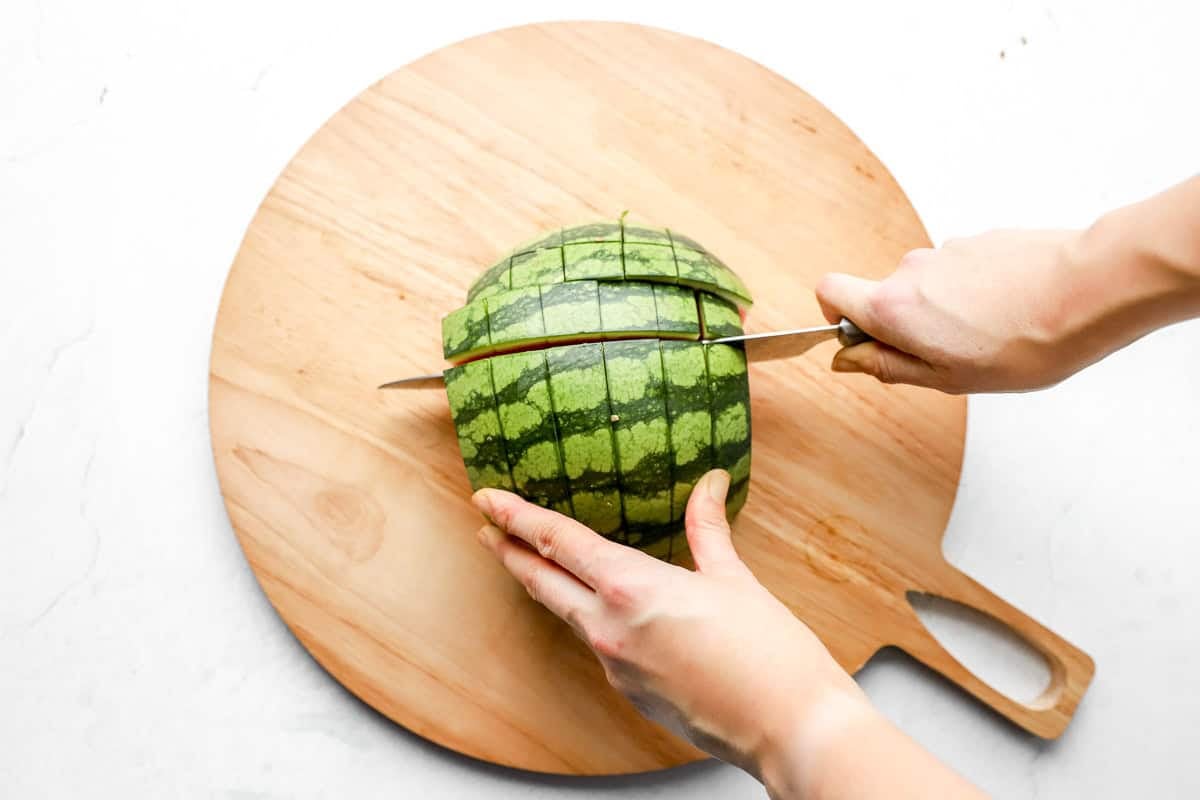
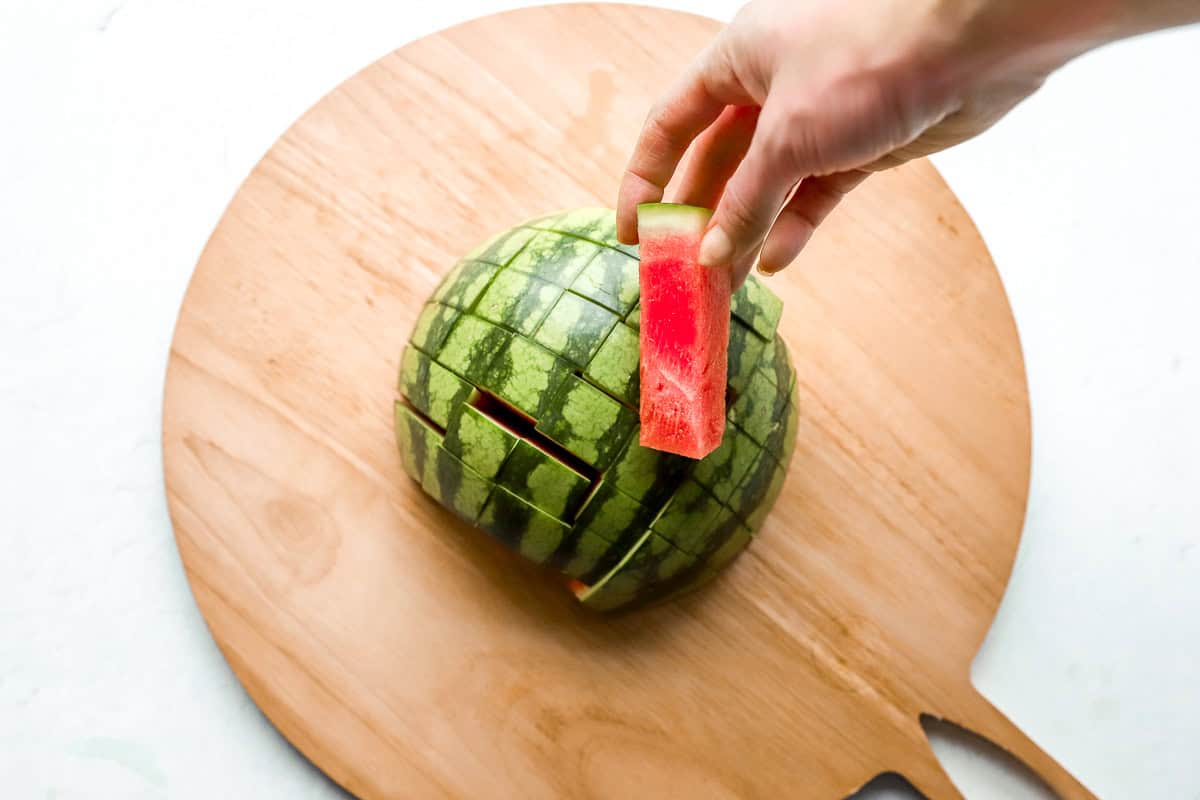
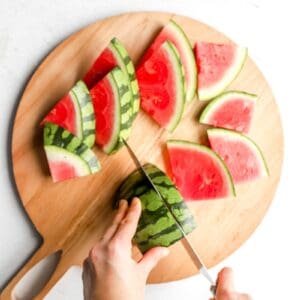
- Slice off both ends of the watermelon, so the red flesh is exposed and the top and bottom ends are flat. Rest one flat end of the watermelon on the cutting board. Starting at the top, run your knife down the sides, following the shape of the watermelon, to slice off the rind. Place the watermelon on its side and slice it into 1-inch rounds. Lay the rounds flat on the cutting board, and slice into cubes.
To Cut Into Triangles
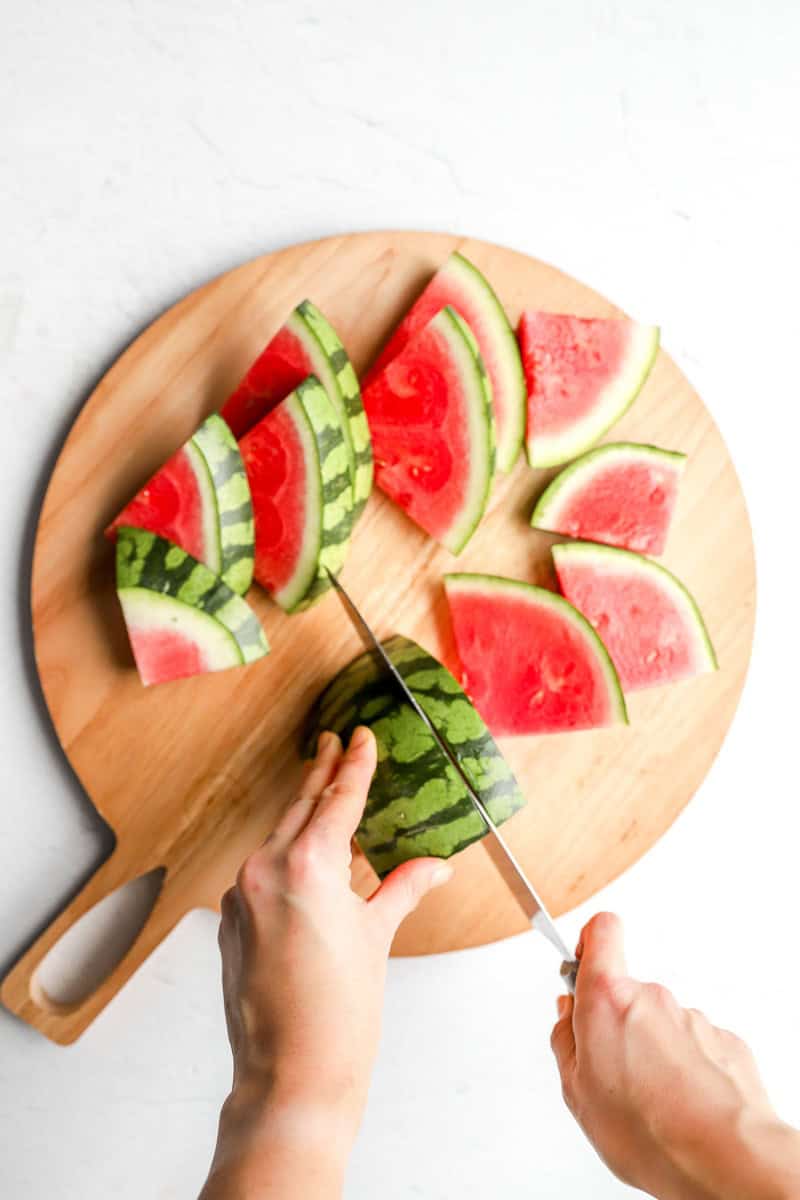
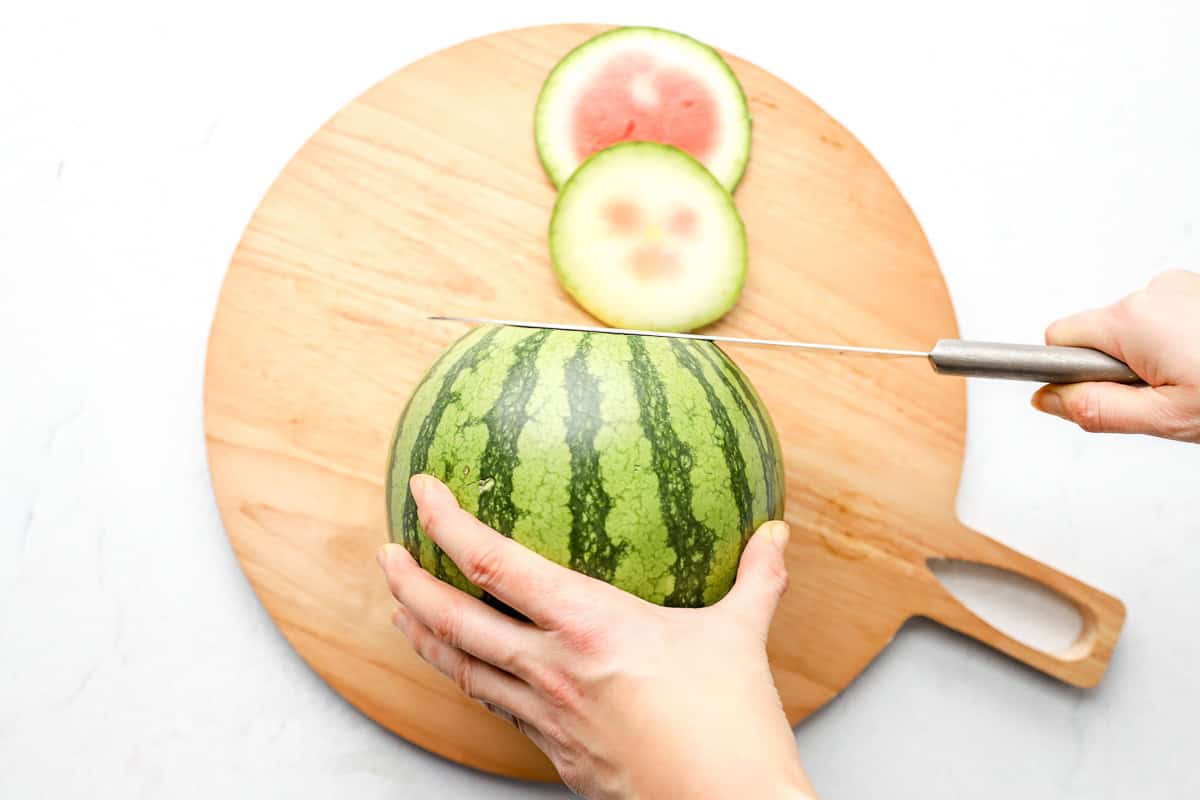
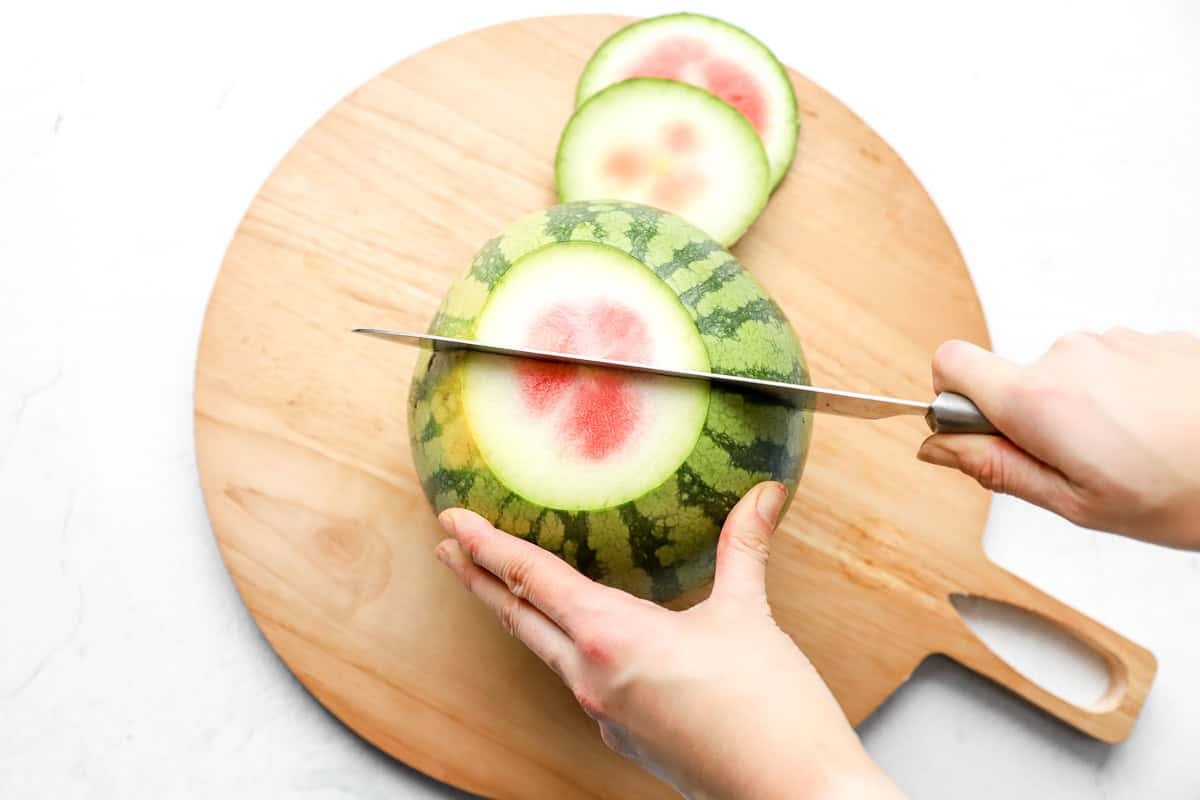
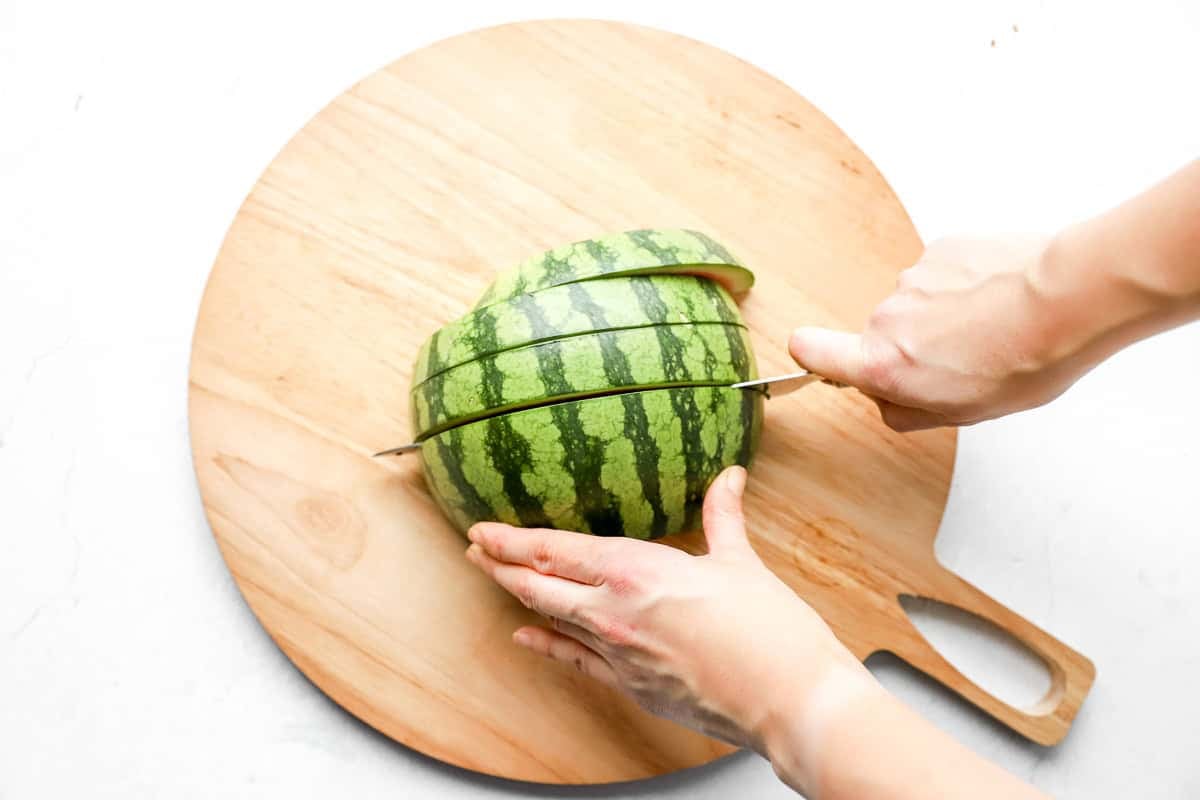
- Slice off both ends of the watermelon, so the red flesh is exposed and the top and bottom ends are flat. Rest one flat end of the watermelon on the cutting board. Starting at the top of the watermelon, slice it down the middle. Lay each half flat on the cutting board. Then, slice each piece in half lengthwise. Slice across the halves, cutting 1-inch triangles.
To Cut Into Sticks
- Slice off both ends of the watermelon, so the red flesh is exposed and the top and bottom ends are flat. Rest one flat end of the watermelon on the cutting board. Starting at the top of the watermelon, slice it down the middle. Lay each half flat on the cutting board. Cut 1-inch vertical slices across the watermelon half. Then, cut 1-inch horizontal slices across the same watermelon half to create sticks.
Equipment
- 1 Cutting board
- 1 Chef’s knife
Nutrition information is automatically calculated, so should only be used as an approximation.
How to Cut Watermelon Step by Step (3 Different Ways)
Cut into Cubes:
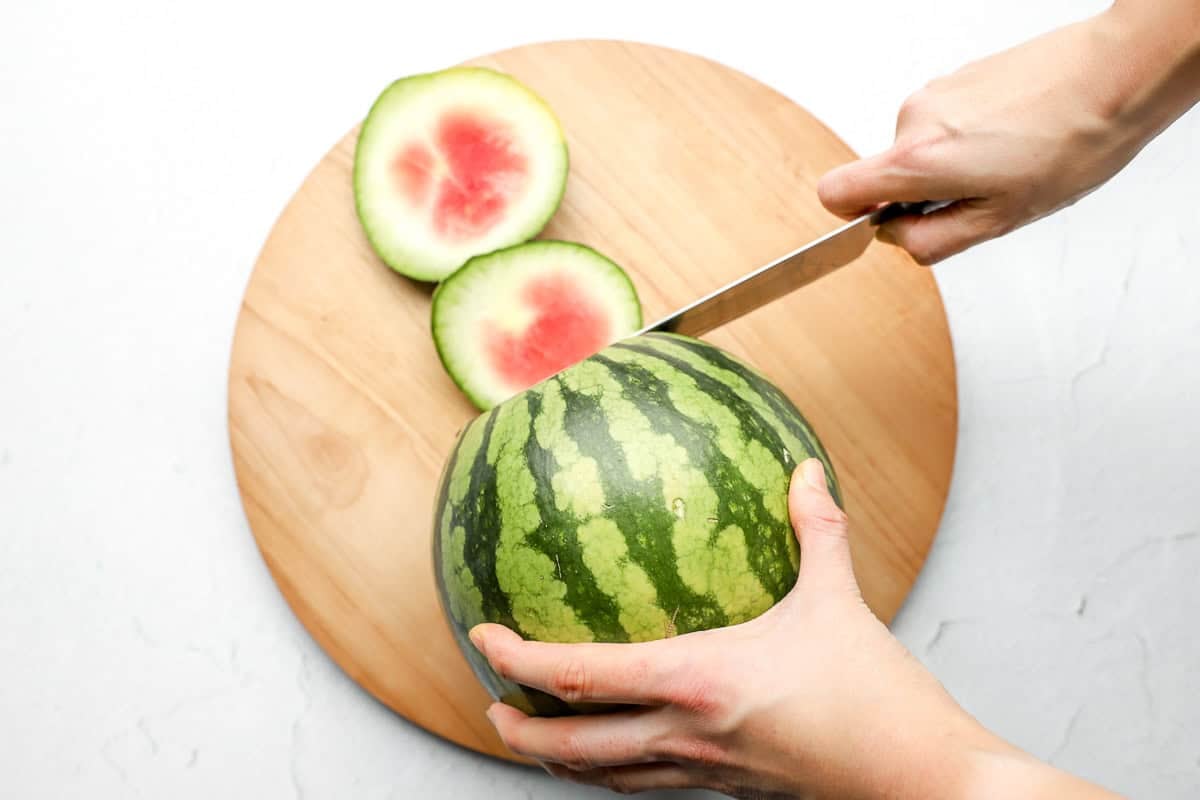
Start by trimming off both ends of the watermelon so it sits flat and you can see the red flesh.
Stand it upright on one of the flat ends.
Working from top to bottom, slice down the sides to remove the rind, following the curve of the fruit.
Once the rind is removed, lay the watermelon on its side and cut it into 1-inch thick rounds.
Stack a few rounds at a time and slice them into strips, then rotate and slice again to create cubes.
Cut into Triangles:
Begin by slicing off both ends so the melon is flat on top and bottom.
Stand it up and cut straight down the middle to create two halves.
Place a half, cut-side down on the board, and slice it in half lengthwise again to make quarters.
From there, cut across each quarter into 1-inch wide wedges for easy-to-hold triangles—perfect for serving at parties or picnics.

Cut into Sticks:
Trim off both ends of the watermelon so it stands securely.
Cut it in half lengthwise from top to bottom.
With the cut side down, slice each half vertically into 1-inch wide pieces.
Then, turn the board and slice those pieces crosswise into 1-inch-thick strips.
You’ll end up with easy-to-grab sticks that are great for kids, snack trays, or dipping into fruit dips.
How to Store
I like to store cut watermelon in an airtight container in the fridge, where it stays fresh for up to 5 days. It’s perfect for grabbing a quick snack or tossing into a salad whenever I need it.
Make sure it’s tightly covered—this helps lock in all that juicy moisture and keeps it tasting sweet and crisp instead of drying out.
Don’t leave cut watermelon sitting out. I always pop it in the fridge right away to keep it safe to eat and tasting its best. Room temp watermelon just doesn’t hold up the same.
Serving Suggestions
Watermelon is one of my favorite summer fruits to enjoy. It’s light, refreshing, and easy to grab and go for a snack. I use it for beach days, BBQs, or just keep some in the fridge to snack on throughout the day. It’s also super versatile—toss it into a watermelon salad , whip up some watermelon margaritas for happy hour, or serve it alongside a creamy cheese dip for an easy appetizer everyone loves.
More summer recipes to try

Mexican Corn on the Cob (Mexican Grilled Corn)
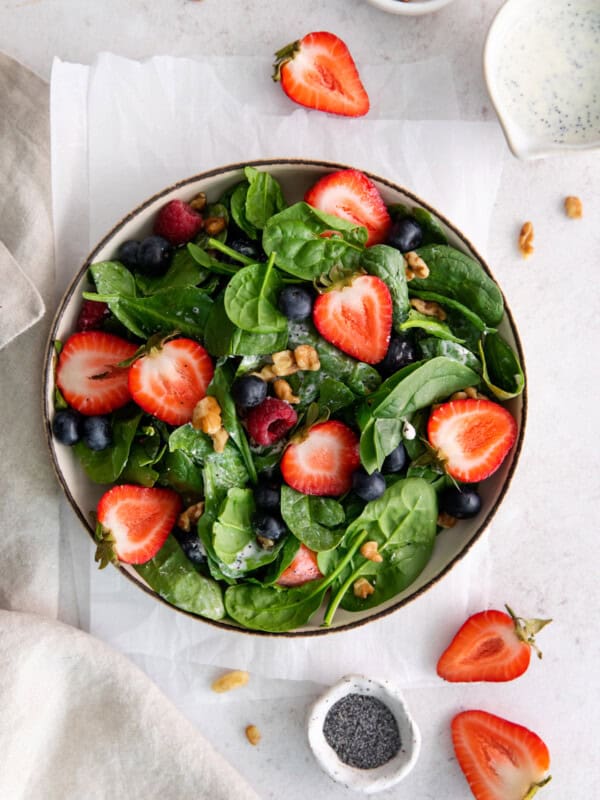
Spinach Berry Salad (with Poppy Seed Dressing)
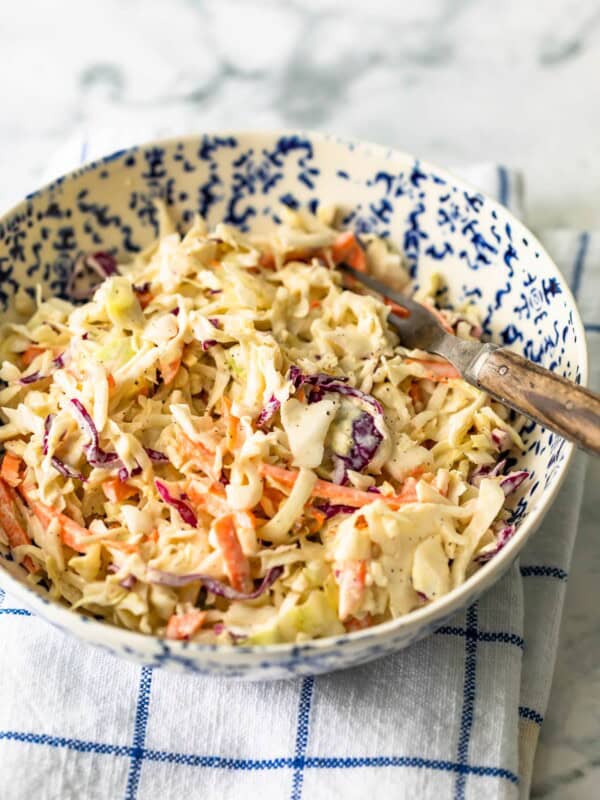
Creamy Coleslaw Recipe
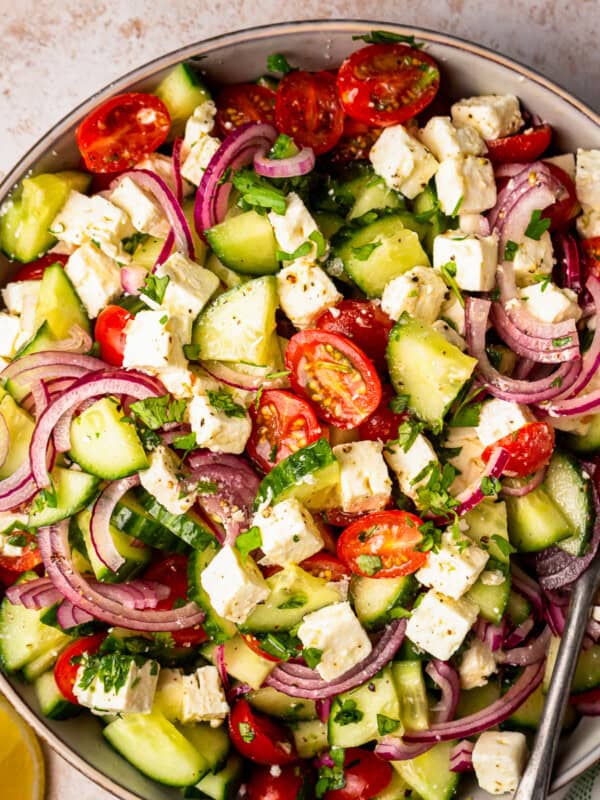
Cucumber Tomato Salad
How to Cut Watermelon
Equipment
- 1 Cutting board
- 1 Chef’s knife
Ingredients
- 1 watermelon
Instructions
To Cut Into Cubes
- Slice off both ends of the watermelon, so the red flesh is exposed and the top and bottom ends are flat. Rest one flat end of the watermelon on the cutting board. Starting at the top, run your knife down the sides, following the shape of the watermelon, to slice off the rind. Place the watermelon on its side and slice it into 1-inch rounds. Lay the rounds flat on the cutting board, and slice into cubes.
To Cut Into Triangles
- Slice off both ends of the watermelon, so the red flesh is exposed and the top and bottom ends are flat. Rest one flat end of the watermelon on the cutting board. Starting at the top of the watermelon, slice it down the middle. Lay each half flat on the cutting board. Then, slice each piece in half lengthwise. Slice across the halves, cutting 1-inch triangles.
To Cut Into Sticks
- Slice off both ends of the watermelon, so the red flesh is exposed and the top and bottom ends are flat. Rest one flat end of the watermelon on the cutting board. Starting at the top of the watermelon, slice it down the middle. Lay each half flat on the cutting board. Cut 1-inch vertical slices across the watermelon half. Then, cut 1-inch horizontal slices across the same watermelon half to create sticks.
Video
Nutrition

By Becky Hardin
Published Jul 12, 2017


This Essential Grocery List is an absolute life saver for my family on the busy weeks. When I started this journey to learn how to cook, I quickly realized that the first step in cooking is having staple ingredients on hand. I want to avoid having to run out to the grocery store every single time I prepare a new recipe. Having a well-stocked pantry has made my life in the kitchen so much simpler, because when it’s time to cook, I have what I need.

Essential Grocery List
It’s so helpful to have a basic grocery list to help me remember which foods to buy at the store. This food shopping list is my go-to!
It’s better to stock up on things like grains, seasonings and spices, baking essentials, oils, condiments, canned and frozen foods, etc. so I can just grab them when I need them. These things have a long shelf life , so I keep them in my kitchen for convenience.
However, I do have to go to the supermarket sometimes, and there’s a way to make that trip easy and hassle-free: I keep a grocery list! If I go in blindly, I’ll leave with things I don’t need, and nothing that actually helps me prepare a good meal.
In the list below, I’ve compiled everything I always have on my stock-up grocery list.
I’ve got you covered! I created an easy grocery list filled with all of the essentials. Plus there’s a free printable version that you can take with you to the grocery store. It has everything you need to stock your pantry, your freezer, and your refrigerator.

Click to get my Free Printable Grocery List
What to Buy at the Grocery Store
This is the perfect grocery list filled with all the basics and essentials. It should help get you going if you’re new to cooking, or if you’re just left staring helplessly at an empty pantry and don’t know how to fill it.
When I first started cooking, things could seem overwhelming. I quickly realized that they more prepared I could be, the more confident I felt. If you already have the basics in your kitchen, then you can shop stress-free.
So print out our easy grocery list, stock up your pantry and fridge, and you’ll be cooking in no time!
Click to get my Free Printable Grocery List for the perfectly stocked pantry and freezer!
Fresh Produce
- Apples
- Bananas
- Strawberries
- Avocados
- Bell Peppers
- Carrots
- Broccoli
- Garlic
- Lemons/Limes
- Onion
- Parsley
- Cilantro
- Basil
- Potatoes
- Spinach
- Tomatoes
GRAINS
- Breadcrumbs
- Pasta
- Quinoa
- Rice
- Sandwich Bread
- Tortillas
MEAT/PROTEIN
- Chicken
- Eggs
- Ground Beef
- Sliced Turkey
- Lunch Meat
DAIRY
- Butter
- Sliced Cheese
- Shredded Cheese
- Milk
- Sour Cream
- Greek Yogurt
BAKING GOODS
- Baking powder
- Baking Soda
- Granulated Sugar
- Brown Sugar
- Flour
- Honey
- Vanilla Extract
- Dry Yeast
- Chocolate Chips
- Cocoa Powder
- Powdered Sugar
FREEZER
- Fruit and Berries
- Frozen Veggies (Corn, Peas, Broccoli, etc)
- Juice Concentrate
- Pizza or Other Convenience Meals
- Pie Crust
- Cookie Dough
CANNED/DRIED GOODS
- Chicken stock/broth
- Salsa
- Diced Tomatoes
- Jam/Jelly
- Peanut Butter
- Pasta Sauce
- Beans (Black Beans, Chickpeas, Baked Beans, etc)
- Soups
- Tuna
- Green Chiles
- Canned Veggies
- Coffee or Tea
Get more details on the best non-perishable and pantry foods
CONDIMENTS/SPICES
- Black Pepper
- Chili Powder
- Cinnamon
- Crushed Red Pepper
- Cumin
- Garlic Powder
- Ketchup
- Mustard
- Mayo
- Nutmeg
- Paprika
- Salt (Course Sea Salt and Kosher Salt)
- Soy Sauce
- Steak Sauce
- Hot Sauce/ Buffalo Sauce
- Salad Dressings
OILS/VINEGARS
- Apple cider vinegar
- Balsamic vinegar
- Coconut Oil
- Olive Oil
- Vegetable/Canola Oil
- Red Wine Vinegar
- White Vinegar
- Cooking Wine
- White Wine Vinegar
SNACKS
- Crackers
- Nuts
- Quick Oats
- Popcorn
- Tortilla Chips
- Cereal
Click to get my Free Printable Grocery List for the perfectly stocked pantry and freezer!

Click ☝🏻 for my FREE Grocery List Printable!
I hope this essential grocery list can help you buy what you need and make your home cooking so much easier!
Stock Your Kitchen
Find more ideas for your grocery list, stock up your kitchen, and print more cooking guides and charts to keep handy!

Non-Perishable Foods to Stock Up On

Frozen Vegetables to Stock Up On (and Recipes to Make)

Ultimate List of Cooking Herbs for Your Kitchen

Ultimate List of Cooking Spices for Your Kitchen

Cooking Oil 101: Types of Cooking Oils to Use

26 Types of Pasta and When to Use Them

What Fruits and Vegetables are in Season?

Meat Temperature Chart (Free Printable)

How to Meal Prep (Guide for Beginners)

Basic Cooking Measurements & Kitchen Conversion Chart

