
By Becky Hardin
Published Dec 9, 2022
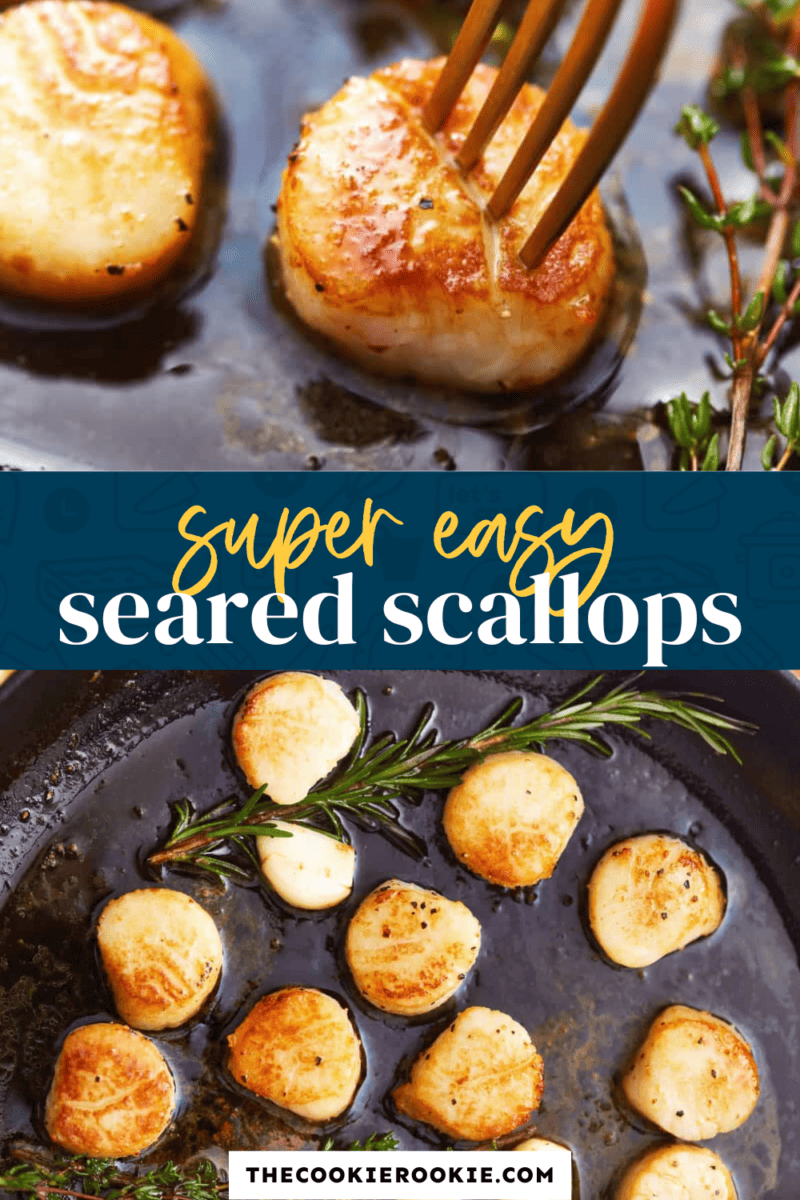
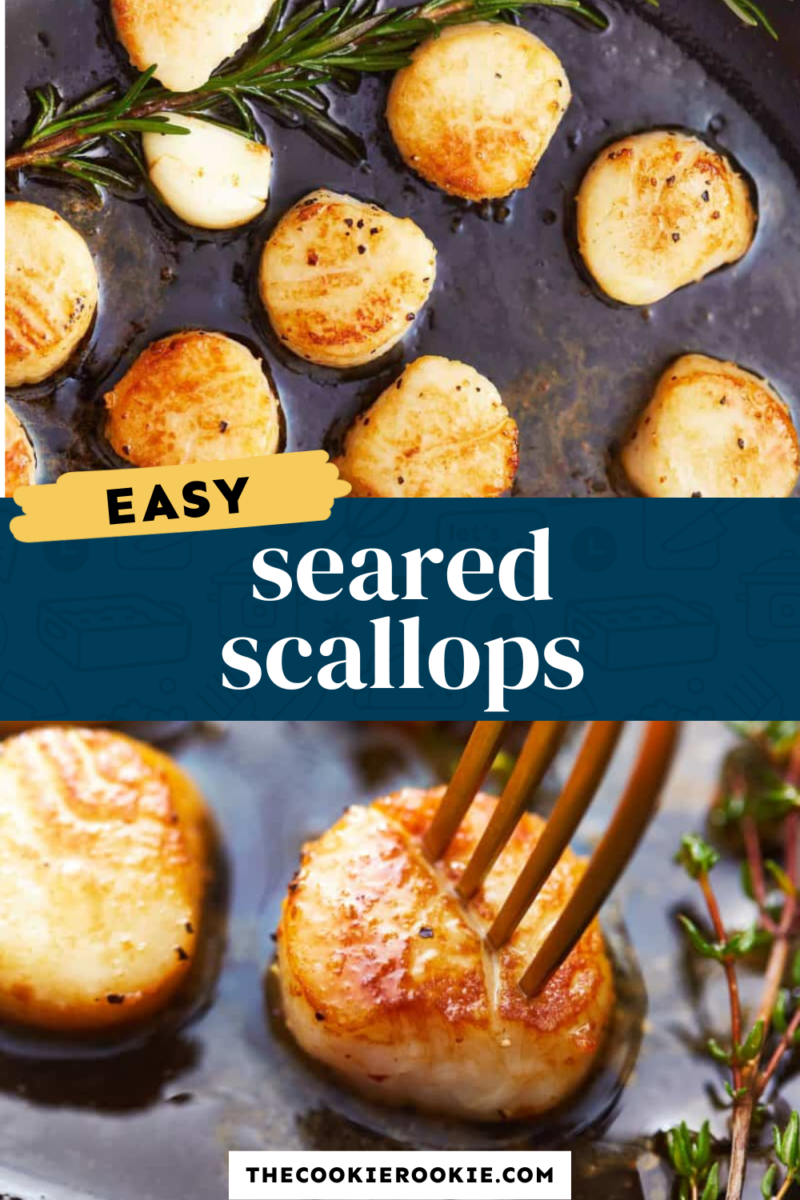
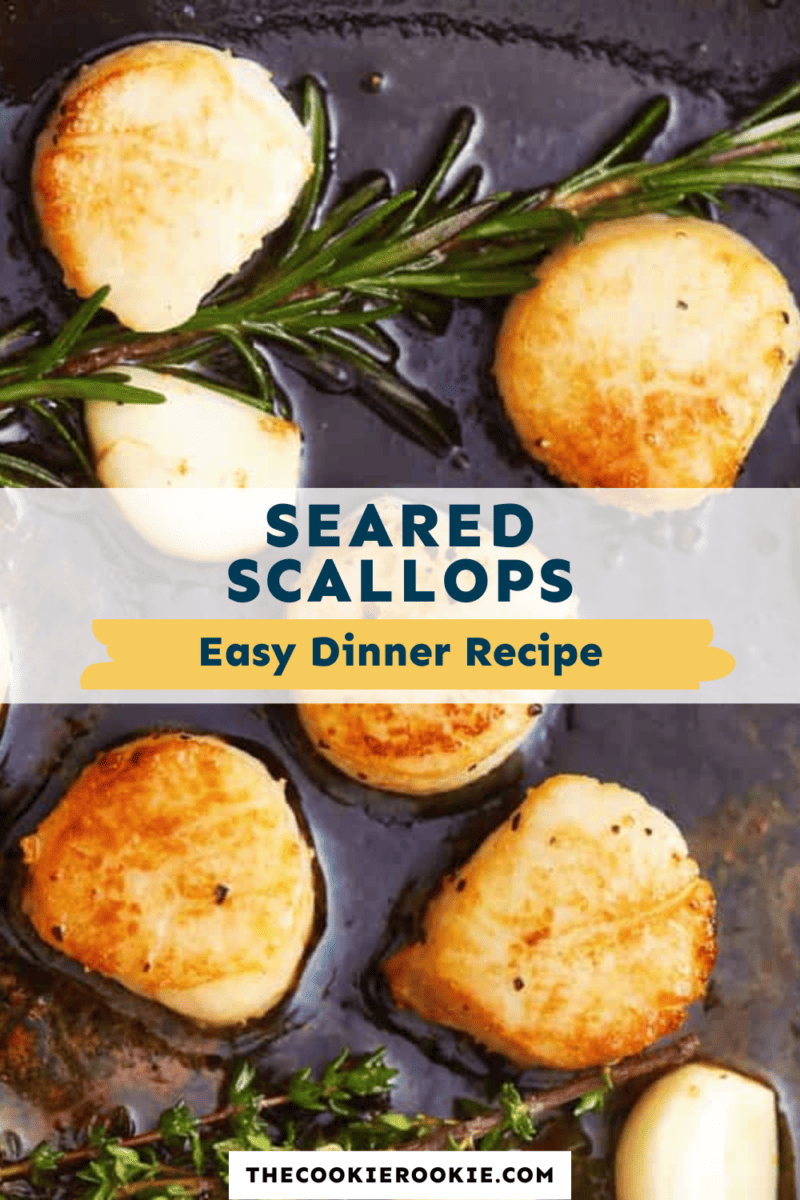
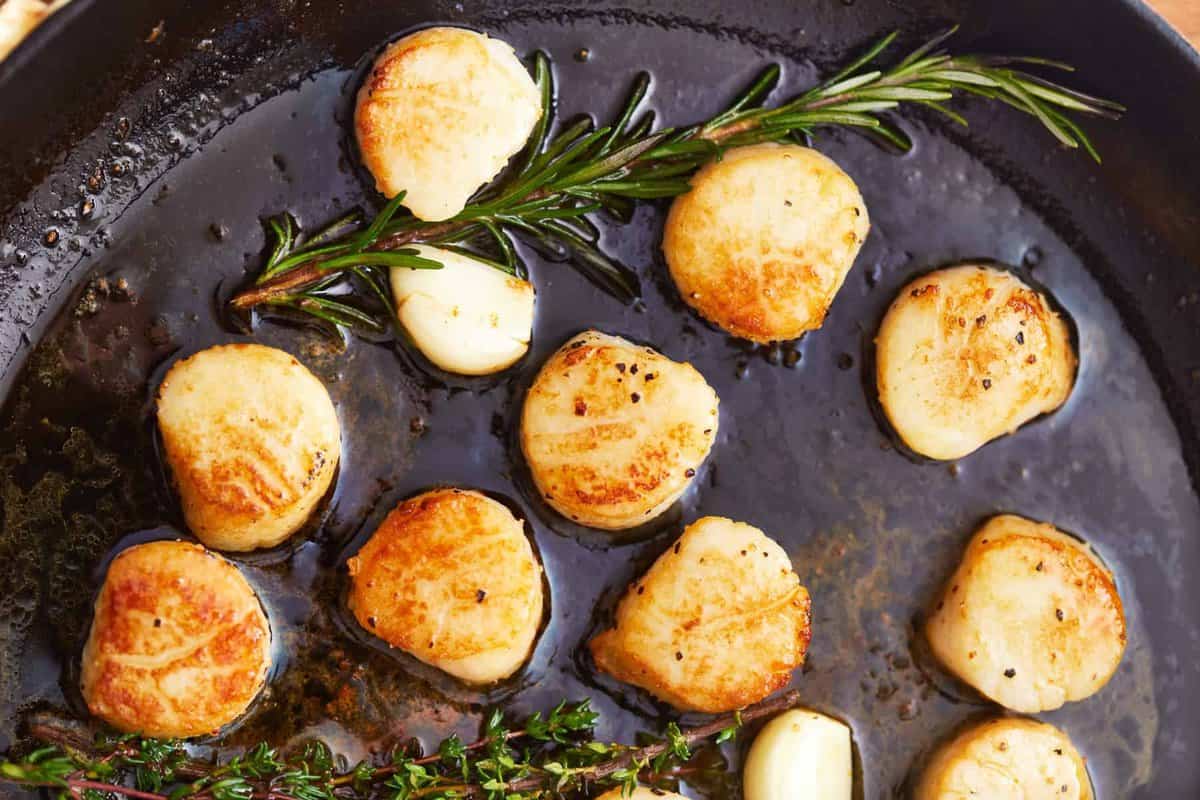
Seared Scallops are a simple delicacy that’s easier to make than you think. Learn how to sear scallops with this simple recipe. They’re perfectly pan-seared in butter and lightly seasoned for the best flavor.
Why We Love This Seared Scallops Recipe
Scallops may seem intimidating to cook, but this recipe will walk you step-by-step through how to cook scallops with a perfect sear.
- Easy. You only need a few ingredients and about 15 minutes. Season them as you like, with salt and pepper, fresh herbs of your choice, or serve with a homemade sauce.
- One Pan. You can cook the scallops and the sauce in the same pan, saving you from spending all night washing dishes.
- Flavorful. The best part about seared scallops is the simple yet rich flavor. This dish will impress guests as part of a nice dinner or as an appetizer.
How to Choose the Right Scallops
There are two kinds of scallops: bay scallops and sea scallops . Bay scallops are dime-sized, while sea scallops can have a diameter of up to about 2 inches. Bay scallops are much more rare and expensive, so I recommend using wild-caught sea scallops in this recipe.
There are two preparations for scallops: wet scallops and dry scallops . A wet scallop has been soaked in a solution that preserves and plumps up the scallop, while a dry scallop has not been treated with any additives. Dry scallops tend to be a bit darker in color and have a better flavor, while wet scallops are lighter in color and tend to shrivel while being cooked. I recommend using dry scallops.
- Dry scallops will be labeled as either “dry” or “dry-packed”.
- Be sure to buy your scallops just 1-2 days before you plan to cook them, as they are very perishable.
- When fresh, scallops will smell briny; when they start to spoil, they will smell fishy.
- You can also use frozen scallops in this recipe; let the scallops thaw overnight in the refrigerator before using.
How to Store and Reheat
While seared scallops are best enjoyed on the day they are made, they can be stored in an airtight container in the refrigerator for up to 2 days. Reheat coated in residual sauce in the microwave at 90% power in 20-second intervals until 115°F internally.
How to Freeze
Freeze seared scallops in an airtight container or Ziplock bag for up to 3 months. Let thaw overnight in the refrigerator before reheating.
Serving Suggestions
If you’re making these buttery, pan seared scallops for dinner, a drizzle of buerre blanc and a side of creamy mashed potatoes bring the meal together. For something different, try cheesy polenta with its velvety, savory bite. Steamed or sauteed asparagus adds freshness and color, while a bed of fluffy rice makes a simple base that catches all the buttery goodness.
More Seafood Recipes To Try
- Bacon Wrapped Shrimp
- Surf and Turf
- Grilled Salmon with Avocado
- Seafood Lasagna
- Brown Sugar Salmon
- Baked Fish Sticks
Notes from the Test Kitchen
- Dry your scallops on paper towels before cooking. You don’t want too much liquid in the pan, as this will cause the scallops to steam rather than sear.
- When cleaning fresh scallops, be sure to remove the side muscles from the sides of the scallops. The side muscles will feel a bit tougher than the rest of the scallop. Simply pull the tissue away from the scallop with your fingers to remove it.
- Use a heavy-bottomed stainless steel or cast iron pan, not a nonstick pan.
- If there’s excess liquid in the pan while you are searing the scallops, use the corner of a paper towel to soak up the excess liquid from the pan.
- Let the scallops cook about 90% of the way on the first side, about 3-4 minutes. Once all but the top of the scallop has become opaque, flip it and allow it to finish cooking for about 1-2 minutes.
Ingredients1x2x3x
- ▢ 1 pound large sea scallops (about 15 scallops)
- ▢ 1 teaspoon kosher salt
- ▢ ¼ teaspoon freshly ground black pepper
- ▢ 3 tablespoons olive oil
- ▢ 2 tablespoons unsalted butter (¼ stick)
- ▢ 2 cloves garlic smashed and peeled
- ▢ 1 sprig fresh rosemary (about 4 inches)
- ▢ 6 sprigs fresh thyme
- ▢ ½ lemon juiced
Video
Instructions
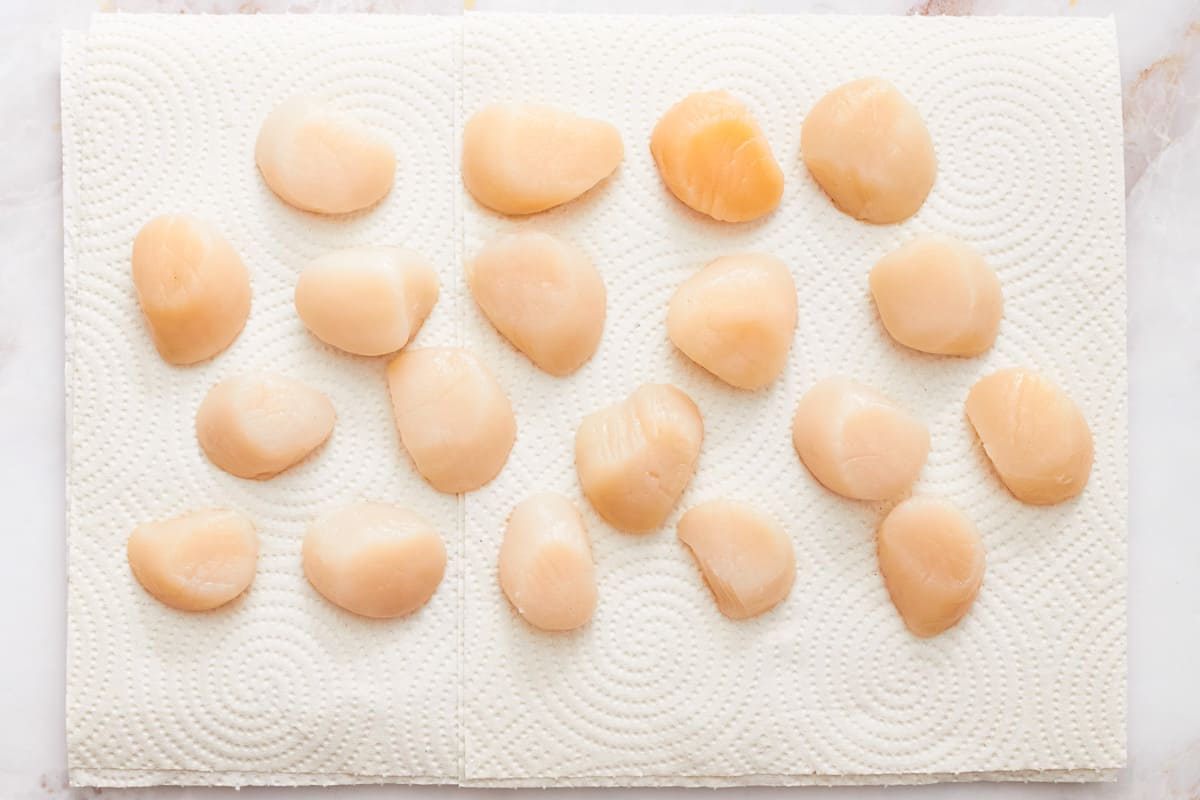
- Spread the scallops out on a paper towel and pat them dry on both sides. If the scallops still have the adductor muscle attached to the side (the little rectangular piece), gently pull it off with your fingers. 1 pound large sea scallops
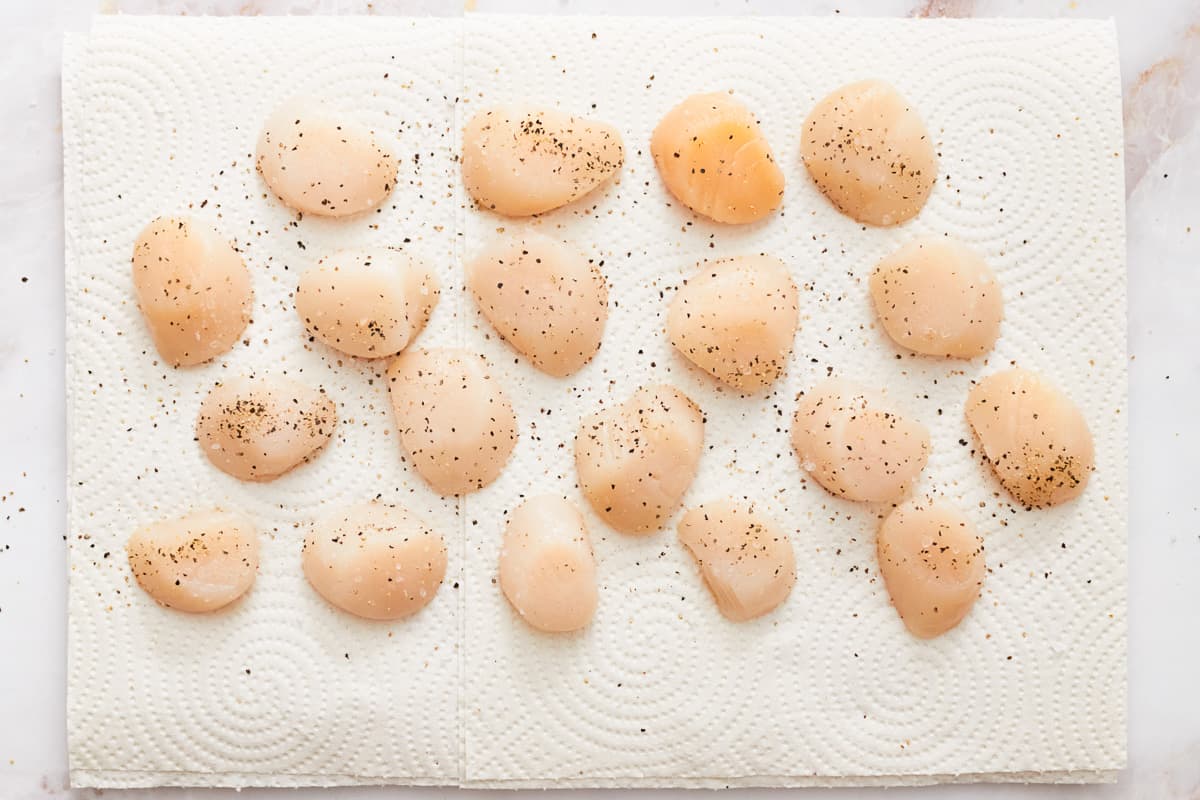
- Sprinkle the kosher salt and black pepper over the scallops. 1 teaspoon kosher salt, ¼ teaspoon freshly ground black pepper
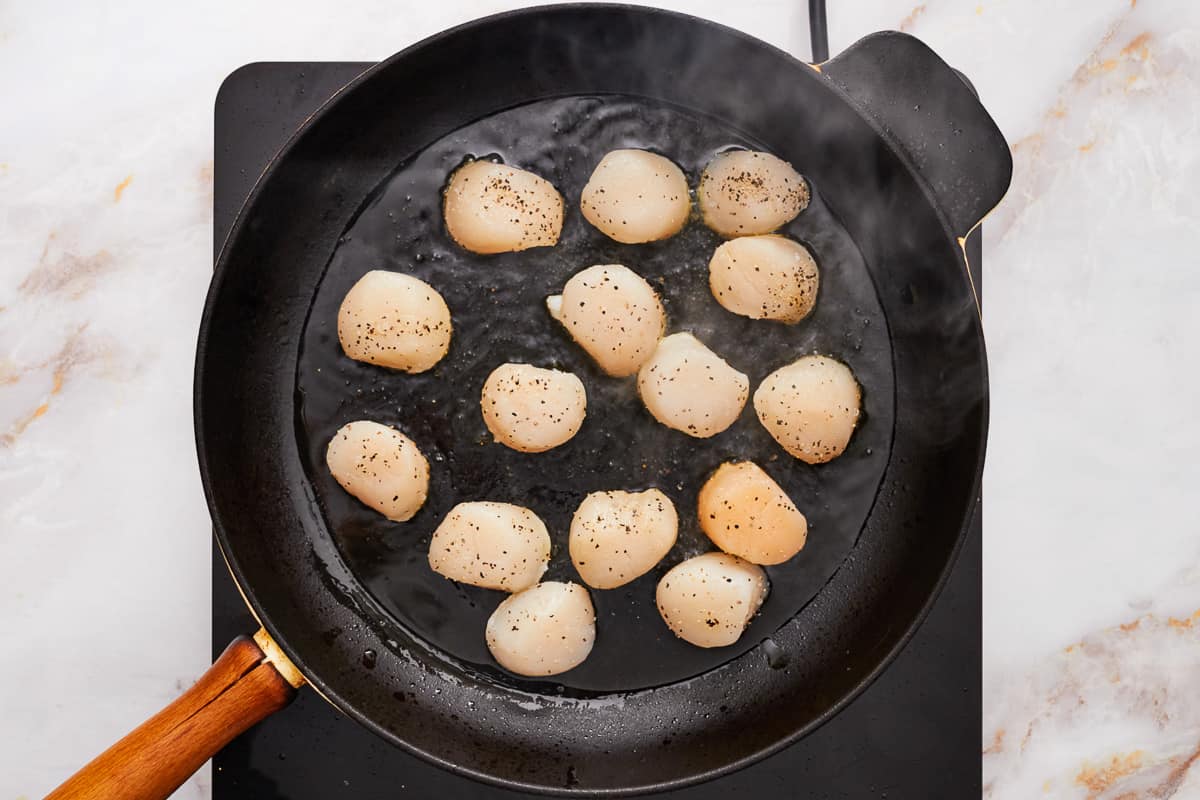
- Heat a large heavy bottomed (preferably cast iron) skillet over medium heat. Add the olive oil. When the oil is hot and fragrant, add the scallops. They should begin to sizzle immediately – if the first scallop doesn’t sizzle, remove it from the pan and wait for the pan to heat up more. Make sure to place the scallops on one of the flat sides for an even sear. 3 tablespoons olive oil
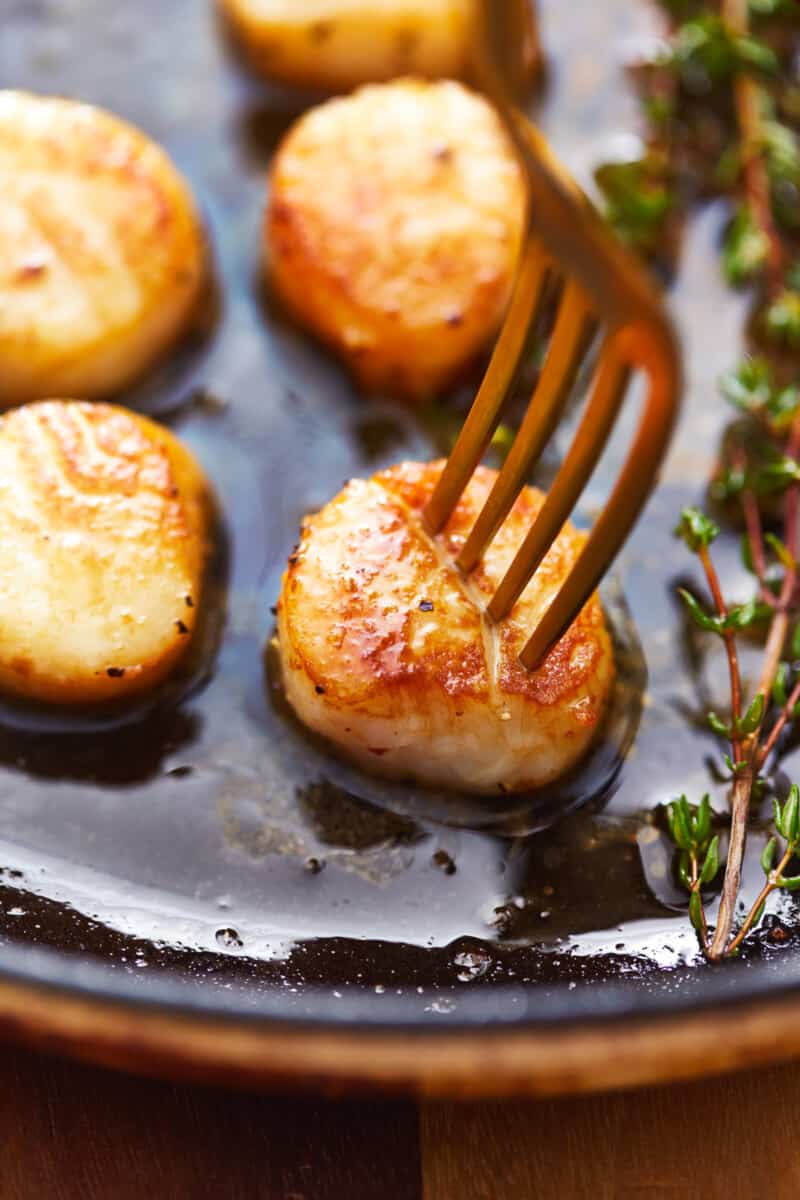
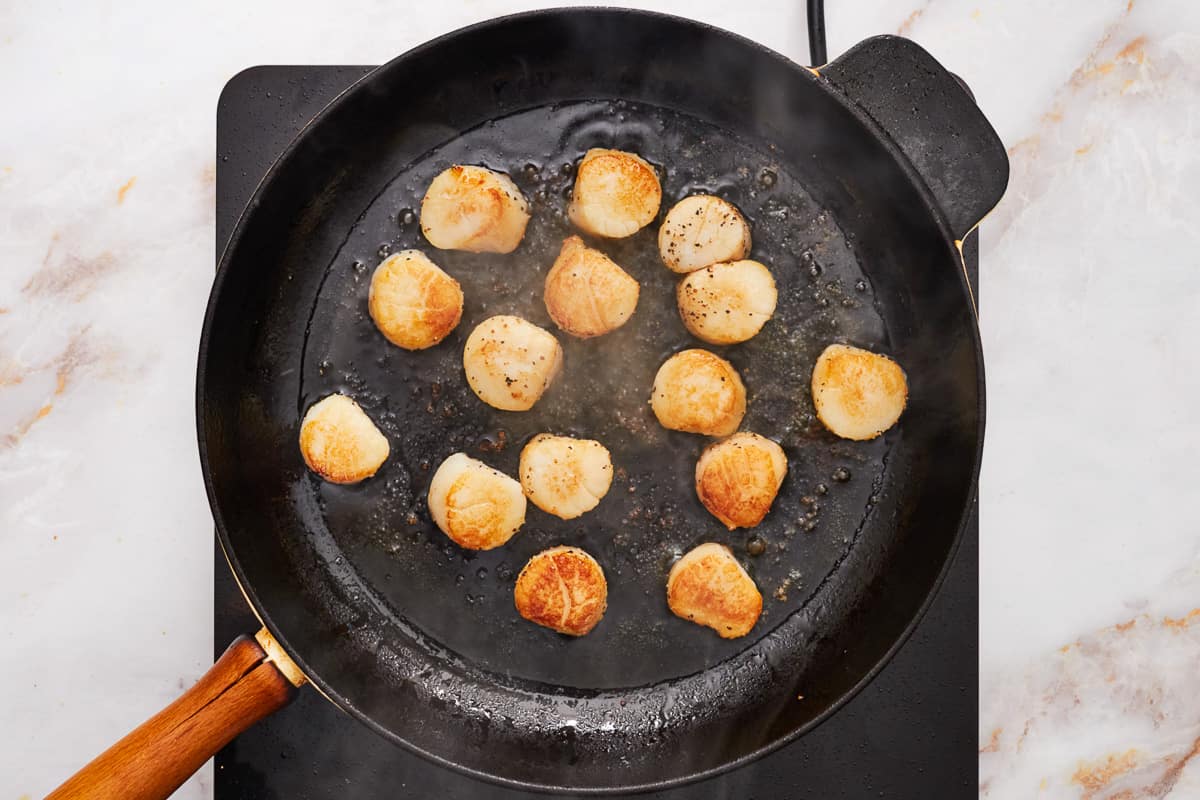
- Cook the scallops for 3 minutes. After 3 minutes, the scallops should easily release from the pan so you can flip them and they should be a deep golden brown color. If the scallops do not release easily, let them sear for an additional minute. You shouldn’t have to pull the scallops off of the pan!
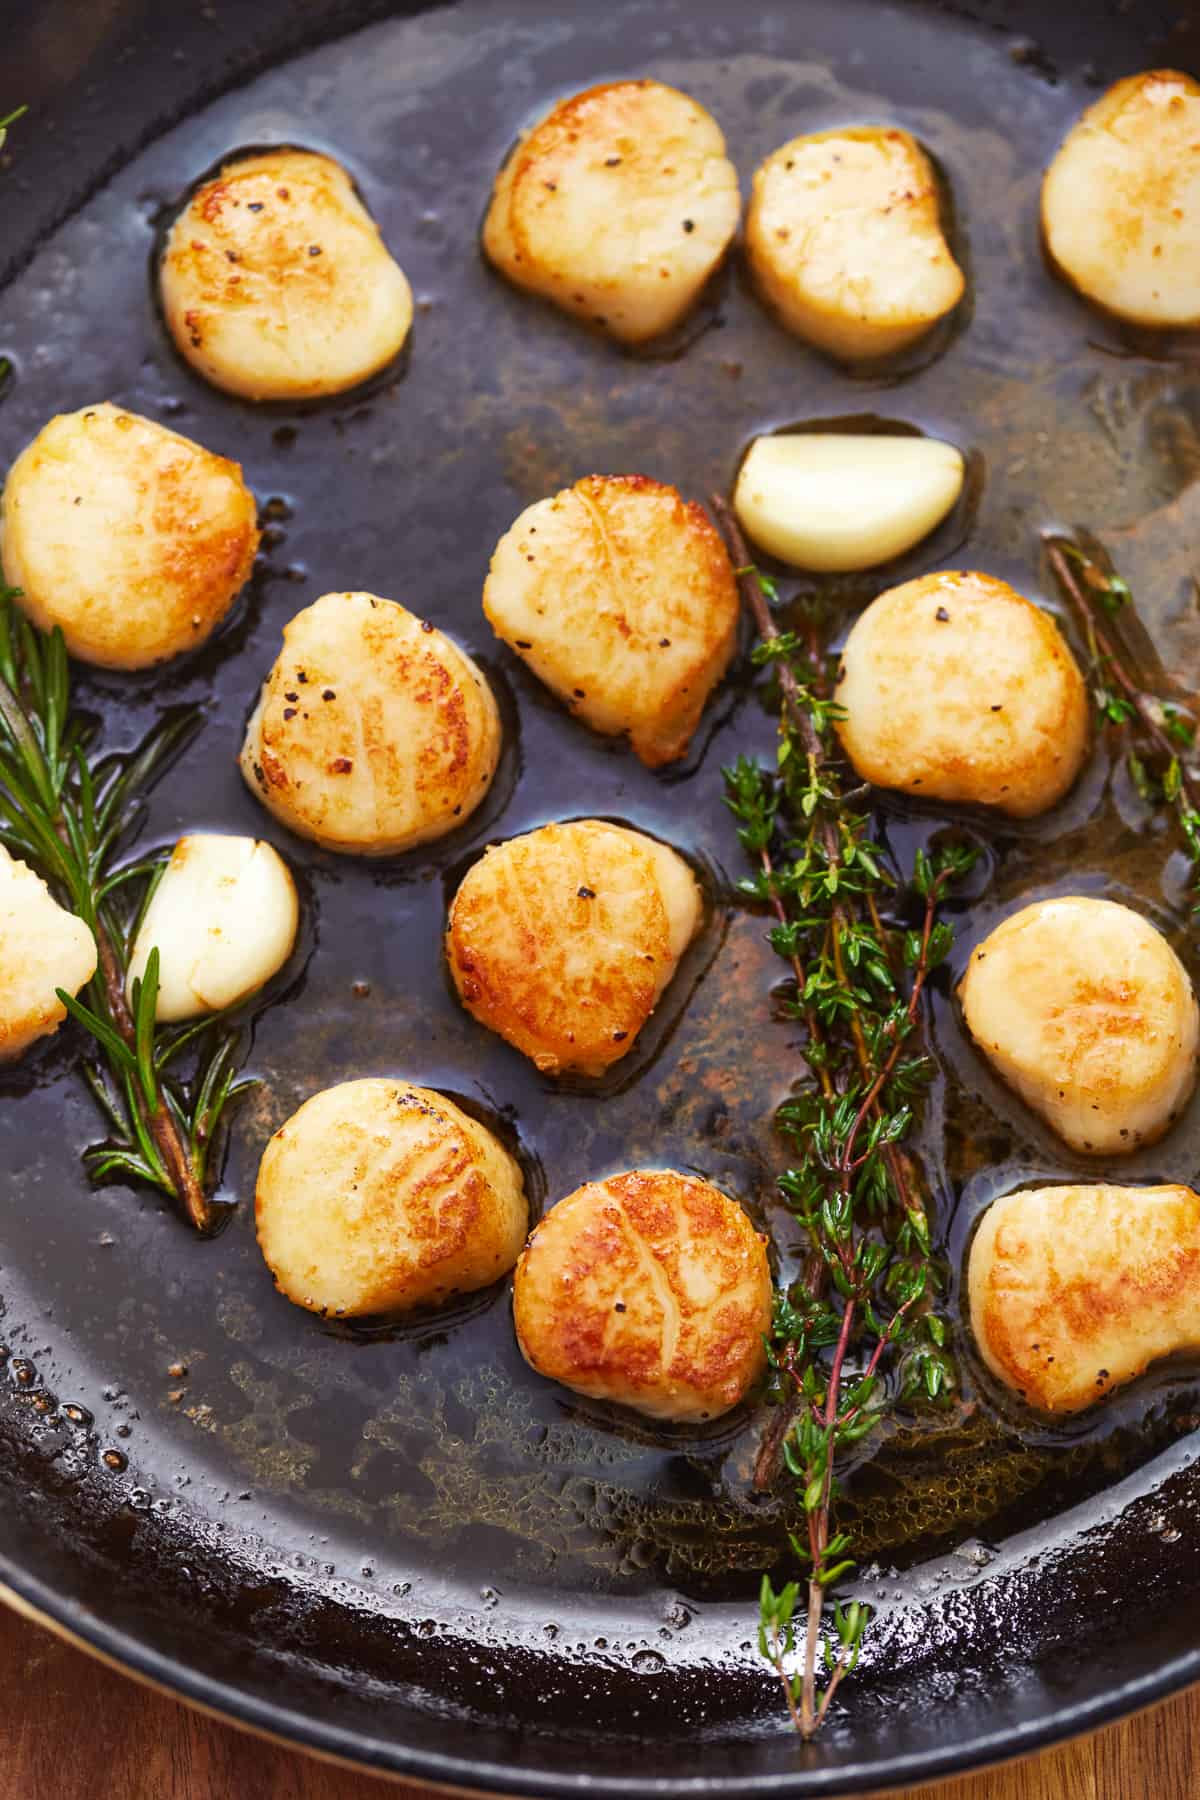
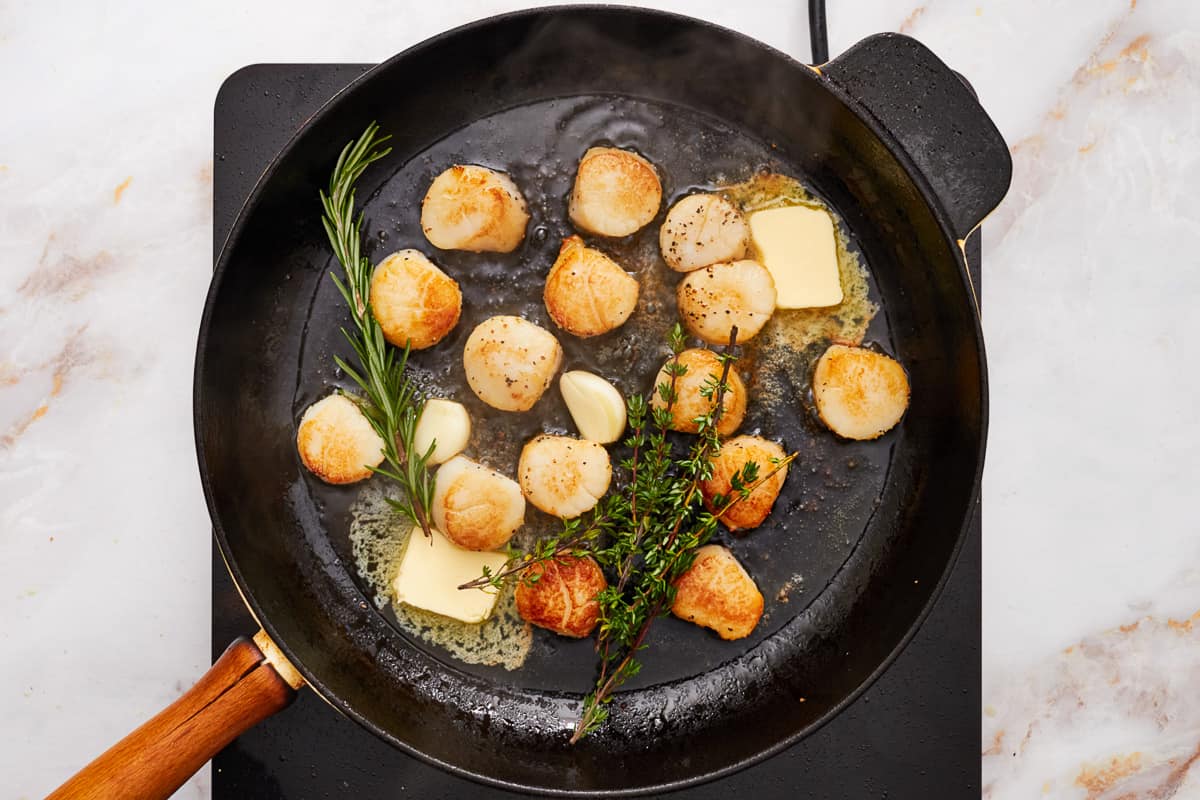
- When you flip the scallops, reduce the heat to low and add the butter, garlic, rosemary, thyme, and lemon juice. Cook the scallops for an additional 2 minutes while spooning the butter over the top of the scallops. 2 tablespoons unsalted butter, 1 sprig fresh rosemary, 6 sprigs fresh thyme, ½ lemon, 2 cloves garlic
- Remove the scallops from the heat and serve them immediately with your favorite sides.
Equipment
- Cast Iron Skillet (optional)
Becky’s Tips
- I recommend using wild-caught sea scallops in this recipe.
- I recommend using dry scallops, which will be labeled as either “dry” or “dry-packed”.
- Be sure to buy your scallops just 1-2 days before you plan to cook them, as they are very perishable.
- When fresh, scallops will smell briny; when they start to spoil, they will smell fishy.
- You can also use frozen scallops in this recipe; let the scallops thaw overnight in the refrigerator before using.
- Dry your scallops on paper towels before cooking. You don’t want too much liquid in the pan, as this will cause the scallops to steam rather than sear.
- When cleaning fresh scallops, be sure to remove the side muscles from the sides of the scallops. The side muscles will feel a bit tougher than the rest of the scallop. Simply pull the tissue away from the scallop with your fingers to remove it.
- Use a heavy-bottomed stainless steel or cast iron pan, not a nonstick pan.
- If there’s excess liquid in the pan while you are searing the scallops, use the corner of a paper towel to soak up the excess liquid from the pan.
- Let the scallops cook about 90% of the way on the first side, about 3-4 minutes. Once all but the top of the scallop has become opaque, flip it and allow it to finish cooking for about 1-2 minutes.
Nutrition information is automatically calculated, so should only be used as an approximation.
How to Sear Scallops Step by Step
Prep the Scallops: Spread 1 pound of large sea scallops out on a paper towel and pat them dry on both sides. If the scallops still have the adductor muscle attached to the side (the little rectangular piece), gently pull it off with your fingers.
Season the Scallops: Sprinkle 1 teaspoon of kosher salt and ¼ teaspoon of black pepper over the scallops.
Heat the Pan: Heat a large heavy-bottomed (preferably cast iron) skillet over medium heat. Add 3 tablespoons of olive oil. When the oil is hot and fragrant, add the scallops. They should begin to sizzle immediately – if the first scallop doesn’t sizzle, remove it from the pan and wait for the pan to heat up more. Make sure to place the scallops on one of the flat sides for an even sear.
Cook the Scallops: Cook the scallops for 3 minutes. After 3 minutes, the scallops should easily release from the pan so you can flip them and they should be a deep golden brown color. If the scallops do not release easily, let them sear for an additional minute. You shouldn’t have to pull the scallops off of the pan!
Make the Sauce: When you flip the scallops, reduce the heat to low and add 2 tablespoons of unsalted butter, 2 minced cloves of garlic, 1 sprig of fresh rosemary, 6 sprigs of fresh thyme, and the juice of half a lemon. Cook the scallops for an additional 2 minutes while spooning the butter over the top of the scallops. Remove the scallops from the heat and serve them immediately with your favorite sides.
Scallops are protein-packed and a good source of both potassium and magnesium. They are great as part of a healthy diet.
Yes! We always recommend seasoning your scallops before cooking them to enhance their naturally sweet flavor.
We like to cook them in a mixture of butter and oil. The oil helps protect the butter from burning in the pan before the scallops have cooked through, and the butter adds a wonderful flavor.
There’s no need to rinse your scallops, but do make sure to pat them dry so the seasoning will stick.
Seared Scallops Recipe
Equipment
- Cast Iron Skillet (optional)
Ingredients
- 1 pound large sea scallops (about 15 scallops)
- 1 teaspoon kosher salt
- ¼ teaspoon freshly ground black pepper
- 3 tablespoons olive oil
- 2 tablespoons unsalted butter (¼ stick)
- 2 cloves garlic smashed and peeled
- 1 sprig fresh rosemary (about 4 inches)
- 6 sprigs fresh thyme
- ½ lemon juiced
Instructions
- Spread the scallops out on a paper towel and pat them dry on both sides. If the scallops still have the adductor muscle attached to the side (the little rectangular piece), gently pull it off with your fingers. 1 pound large sea scallops
- Sprinkle the kosher salt and black pepper over the scallops. 1 teaspoon kosher salt, ¼ teaspoon freshly ground black pepper
- Heat a large heavy bottomed (preferably cast iron) skillet over medium heat. Add the olive oil. When the oil is hot and fragrant, add the scallops. They should begin to sizzle immediately – if the first scallop doesn’t sizzle, remove it from the pan and wait for the pan to heat up more. Make sure to place the scallops on one of the flat sides for an even sear. 3 tablespoons olive oil
- Cook the scallops for 3 minutes. After 3 minutes, the scallops should easily release from the pan so you can flip them and they should be a deep golden brown color. If the scallops do not release easily, let them sear for an additional minute. You shouldn’t have to pull the scallops off of the pan!
- When you flip the scallops, reduce the heat to low and add the butter, garlic, rosemary, thyme, and lemon juice. Cook the scallops for an additional 2 minutes while spooning the butter over the top of the scallops. 2 tablespoons unsalted butter, 1 sprig fresh rosemary, 6 sprigs fresh thyme, ½ lemon, 2 cloves garlic
- Remove the scallops from the heat and serve them immediately with your favorite sides.
Video
Notes
- I recommend using wild-caught sea scallops in this recipe.
- I recommend using dry scallops, which will be labeled as either “dry” or “dry-packed”.
- Be sure to buy your scallops just 1-2 days before you plan to cook them, as they are very perishable.
- When fresh, scallops will smell briny; when they start to spoil, they will smell fishy.
- You can also use frozen scallops in this recipe; let the scallops thaw overnight in the refrigerator before using.
- Dry your scallops on paper towels before cooking. You don’t want too much liquid in the pan, as this will cause the scallops to steam rather than sear.
- When cleaning fresh scallops, be sure to remove the side muscles from the sides of the scallops. The side muscles will feel a bit tougher than the rest of the scallop. Simply pull the tissue away from the scallop with your fingers to remove it.
- Use a heavy-bottomed stainless steel or cast iron pan, not a nonstick pan.
- If there’s excess liquid in the pan while you are searing the scallops, use the corner of a paper towel to soak up the excess liquid from the pan.
- Let the scallops cook about 90% of the way on the first side, about 3-4 minutes. Once all but the top of the scallop has become opaque, flip it and allow it to finish cooking for about 1-2 minutes.
Nutrition
By Becky Hardin
Published Jul 12, 2017


This Essential Grocery List is an absolute life saver for my family on the busy weeks. When I started this journey to learn how to cook, I quickly realized that the first step in cooking is having staple ingredients on hand. I want to avoid having to run out to the grocery store every single time I prepare a new recipe. Having a well-stocked pantry has made my life in the kitchen so much simpler, because when it’s time to cook, I have what I need.

Essential Grocery List
It’s so helpful to have a basic grocery list to help me remember which foods to buy at the store. This food shopping list is my go-to!
It’s better to stock up on things like grains, seasonings and spices, baking essentials, oils, condiments, canned and frozen foods, etc. so I can just grab them when I need them. These things have a long shelf life , so I keep them in my kitchen for convenience.
However, I do have to go to the supermarket sometimes, and there’s a way to make that trip easy and hassle-free: I keep a grocery list! If I go in blindly, I’ll leave with things I don’t need, and nothing that actually helps me prepare a good meal.
In the list below, I’ve compiled everything I always have on my stock-up grocery list.
I’ve got you covered! I created an easy grocery list filled with all of the essentials. Plus there’s a free printable version that you can take with you to the grocery store. It has everything you need to stock your pantry, your freezer, and your refrigerator.

Click to get my Free Printable Grocery List
What to Buy at the Grocery Store
This is the perfect grocery list filled with all the basics and essentials. It should help get you going if you’re new to cooking, or if you’re just left staring helplessly at an empty pantry and don’t know how to fill it.
When I first started cooking, things could seem overwhelming. I quickly realized that they more prepared I could be, the more confident I felt. If you already have the basics in your kitchen, then you can shop stress-free.
So print out our easy grocery list, stock up your pantry and fridge, and you’ll be cooking in no time!
Click to get my Free Printable Grocery List for the perfectly stocked pantry and freezer!
Fresh Produce
- Apples
- Bananas
- Strawberries
- Avocados
- Bell Peppers
- Carrots
- Broccoli
- Garlic
- Lemons/Limes
- Onion
- Parsley
- Cilantro
- Basil
- Potatoes
- Spinach
- Tomatoes
GRAINS
- Breadcrumbs
- Pasta
- Quinoa
- Rice
- Sandwich Bread
- Tortillas
MEAT/PROTEIN
- Chicken
- Eggs
- Ground Beef
- Sliced Turkey
- Lunch Meat
DAIRY
- Butter
- Sliced Cheese
- Shredded Cheese
- Milk
- Sour Cream
- Greek Yogurt
BAKING GOODS
- Baking powder
- Baking Soda
- Granulated Sugar
- Brown Sugar
- Flour
- Honey
- Vanilla Extract
- Dry Yeast
- Chocolate Chips
- Cocoa Powder
- Powdered Sugar
FREEZER
- Fruit and Berries
- Frozen Veggies (Corn, Peas, Broccoli, etc)
- Juice Concentrate
- Pizza or Other Convenience Meals
- Pie Crust
- Cookie Dough
CANNED/DRIED GOODS
- Chicken stock/broth
- Salsa
- Diced Tomatoes
- Jam/Jelly
- Peanut Butter
- Pasta Sauce
- Beans (Black Beans, Chickpeas, Baked Beans, etc)
- Soups
- Tuna
- Green Chiles
- Canned Veggies
- Coffee or Tea
Get more details on the best non-perishable and pantry foods
CONDIMENTS/SPICES
- Black Pepper
- Chili Powder
- Cinnamon
- Crushed Red Pepper
- Cumin
- Garlic Powder
- Ketchup
- Mustard
- Mayo
- Nutmeg
- Paprika
- Salt (Course Sea Salt and Kosher Salt)
- Soy Sauce
- Steak Sauce
- Hot Sauce/ Buffalo Sauce
- Salad Dressings
OILS/VINEGARS
- Apple cider vinegar
- Balsamic vinegar
- Coconut Oil
- Olive Oil
- Vegetable/Canola Oil
- Red Wine Vinegar
- White Vinegar
- Cooking Wine
- White Wine Vinegar
SNACKS
- Crackers
- Nuts
- Quick Oats
- Popcorn
- Tortilla Chips
- Cereal
Click to get my Free Printable Grocery List for the perfectly stocked pantry and freezer!

Click ☝🏻 for my FREE Grocery List Printable!
I hope this essential grocery list can help you buy what you need and make your home cooking so much easier!
Stock Your Kitchen
Find more ideas for your grocery list, stock up your kitchen, and print more cooking guides and charts to keep handy!

Non-Perishable Foods to Stock Up On

Frozen Vegetables to Stock Up On (and Recipes to Make)

Ultimate List of Cooking Herbs for Your Kitchen

Ultimate List of Cooking Spices for Your Kitchen

Cooking Oil 101: Types of Cooking Oils to Use

26 Types of Pasta and When to Use Them

What Fruits and Vegetables are in Season?

Meat Temperature Chart (Free Printable)

How to Meal Prep (Guide for Beginners)

Basic Cooking Measurements & Kitchen Conversion Chart

