
By Becky Hardin
Updated Jul 23, 2025
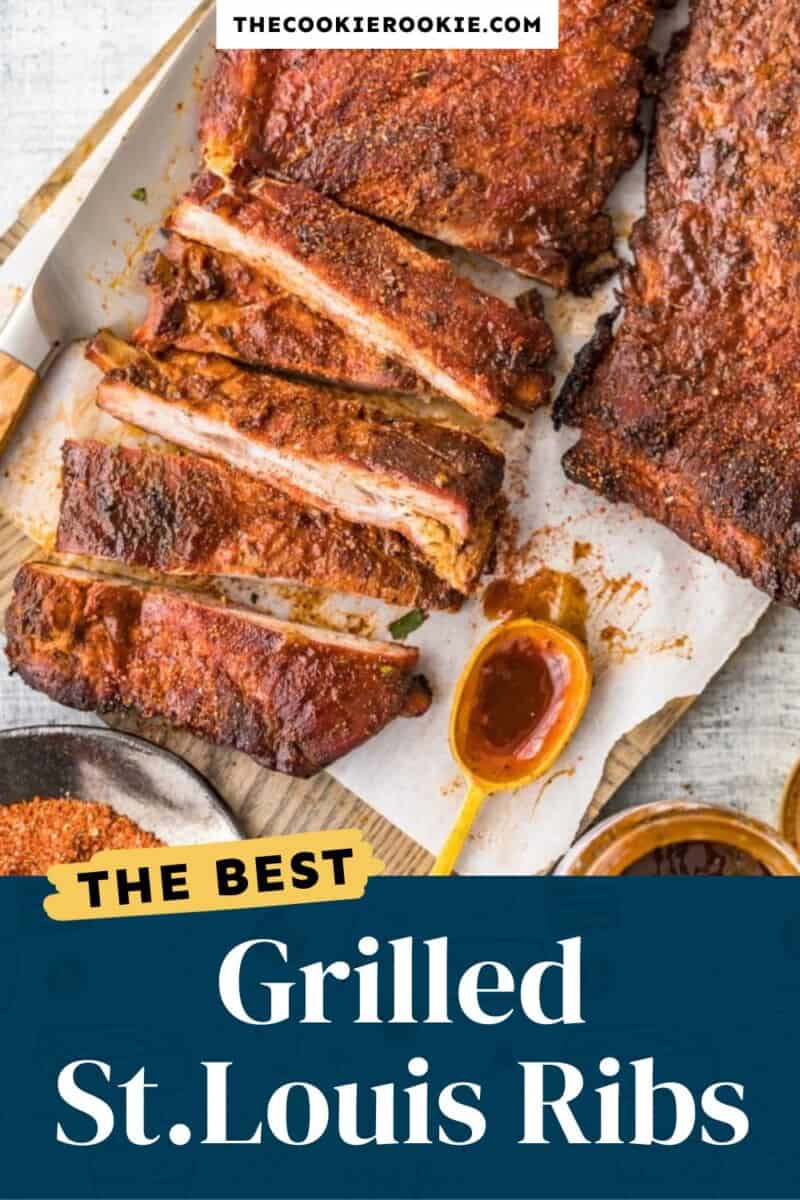
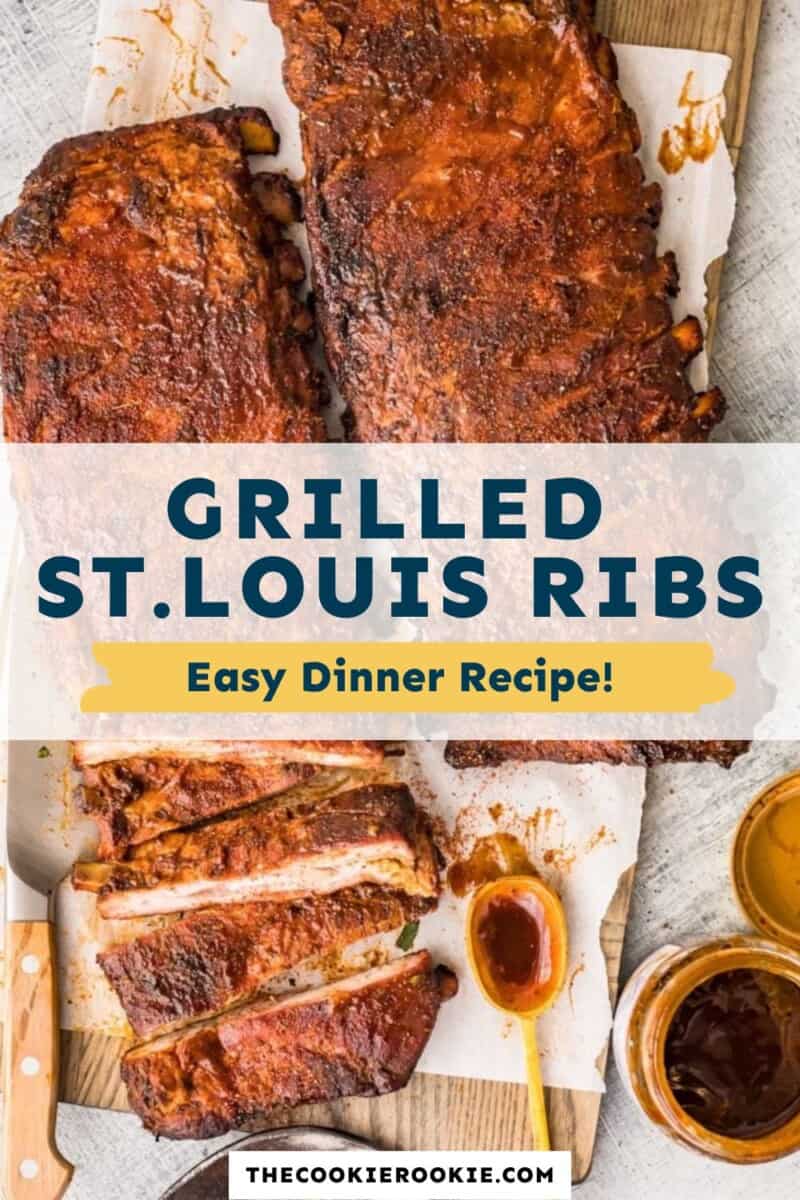
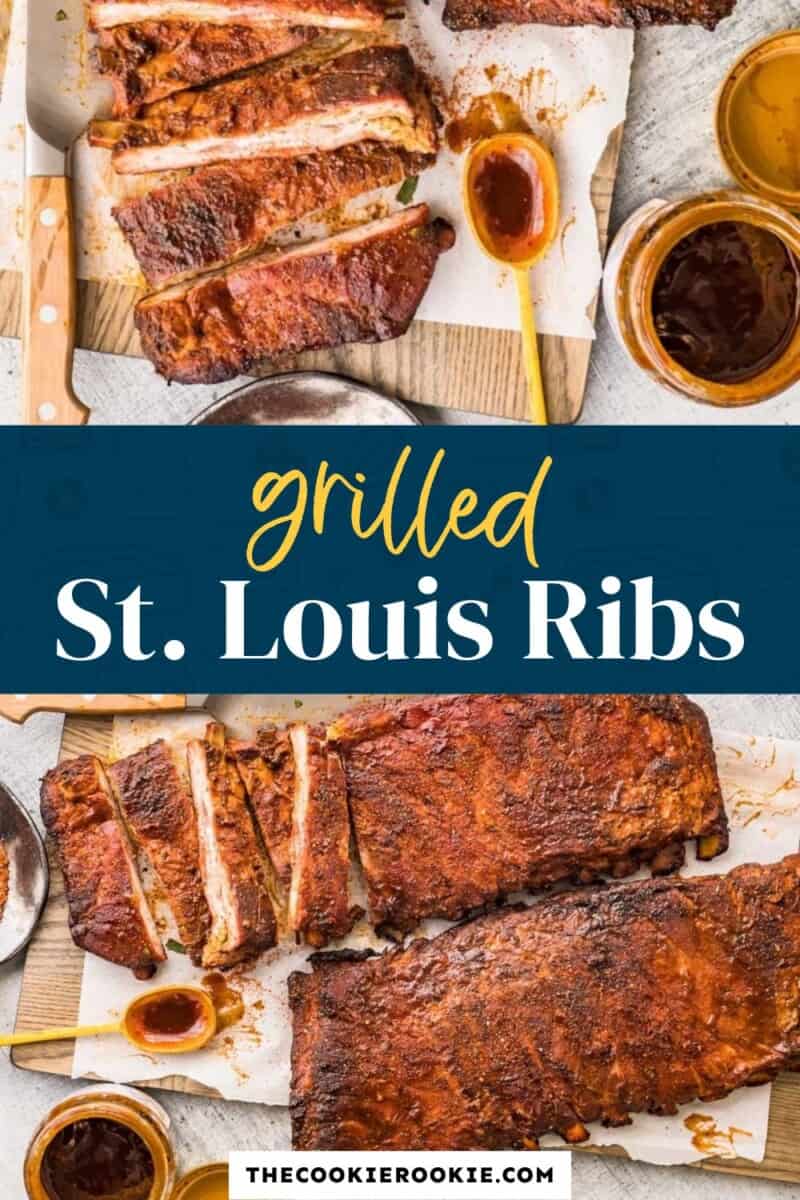
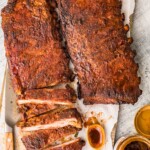
Grilling season is in full swing and these St. Louis Grilled Ribs are one recipe that you need in your barbecue repertoire! These succulent, fall-of-the-bone ribs are always a hit. Find out how to grill the perfect ribs every single time and become a pit master!
Pin this recipe for later!
5-Star Review
“These ribs are so good. The family loved them!” – Katie
Easy St. Louis Style Ribs
I don’t think there’s anything more impressive when it comes to grilling than serving up succulent and juicy ribs—they are such a crowd-pleaser! Follow this recipe for perfect St. Louis Grilled Ribs every single time!
St. Louis style ribs come from the belly side of the rib cage of a pig, just above the breast bone. They contain more bone than meat, but they also have a high fat content, which makes them tender and flavorsome. Also known as spare ribs, they are my favorite when it comes to grilling ribs.
This recipe takes a bit of time, but if you plan carefully, you can enjoy juicy and succulent ribs hot off the grill. If you’re not into that classic barbecue rib flavor, you can baste these ribs with Hoisin sauce, mustard sauce , ah-so sauce, or teriyaki sauce .
Ingredients1x2x3x
For the Ribs
- ▢ 2 slabs St. Louis-Style Ribs 7-9 ribs each
- ▢ 2 tsp kosher salt
- ▢ canola oil
- ▢ 2 tbsp dry rub for pork
- ▢ ¼ cup barbecue sauce Homemade or Blue’s Hog Original are our favorites
For the Vinegar Mopping Mixture
- ▢ ½ cup distilled white vinegar
- ▢ ½ cup water
- ▢ ½ cup dry rub for pork
Instructions
For the Vinegar Mopping Mixture
- Mix all ingredients together in a small bowl. Set aside for now. ½ cup distilled white vinegar, ½ cup water, ½ cup dry rub for pork
For Prepping the Ribs
- Rinse the ribs under cool water to remove any bone chips from butchering. 2 slabs St. Louis-Style Ribs
- Remove the membrane from the ribs if it is still intact. HERE is a great instructional video.
- To dry brine the ribs, season them with kosher salt like you would if they were served to you unsalted; about ¼ tsp per pound of ribs. Wrap each slab with plastic wrap and refrigerate 1-2 hours. 2 tsp kosher salt
- After 1-2 hours, remove the ribs and liberally brush both with canola oil. Sprinkle 2 tbsp of the pork dry rub evenly over both sides of each slab of ribs, and wrap the ribs with plastic wrap. canola oil, 2 tbsp dry rub for pork
- Place the ribs in the fridge for 8-24 hours.
For Cooking the Ribs
- When it’s time to grill the ribs, a two-heat-zone grilling method will be used, and 225°F is the optimal temperature.
- To set up a kettle-style grill for slow, low cooking, start by heating half a chimney of briquettes.
- Remove the ribs from the fridge to warm to room temperature.
- Once the briquettes are ready, pour them over the lower grate and against one side of the grill. “Bank” them up the side of the grill. Place 4 oz. of wood chips/chunks on top of the coals. Fill a stainless steel pan with 2 cups of water and set it on the cool side of the grate opposite the coals, and close the grill lid.
- Adjust the intake damper on the bottom of the grill to get the temperature of the grill to 225°F before adding the ribs. Place the upper grate over the grills with the lift-up opening placed over the coals. Preheat the grill 5 minutes, then open it and clean and oil the upper grate.
- Place a stainless steel pan filled with 2 cups of water, on the grate, directly over the coals.
- Unwrap the ribs and place them, meaty side up, on the cool side of the grate opposite the pan of water. “Mop” the ribs with the Vinegar Mopping Mixture.
- Place the lid on, with the vent over the ribs, and cook 30 minutes.
- After 30 minutes, place another 4 ounces of wood chips/chunks directly onto the coals. Replace the lid and cook an additional 2½ hours.
- If the temperature goes below 200°F, add 10 hot briquettes over the coals (as needed). Also, add additional water to the water pans, as needed.
- After the ribs have cooked a total of 3 hours, “mop” the slabs with the Vinegar Mopping Mixture and turn them 180°. Do NOT flip them over. Close the lid and cook an additional 2 hours. Keep a close eye on the grill’s internal temperature and add more hot coals and water, if needed.
- After a total of 5 hours cooking time, heat another ½ chimney of briquettes. While the briquettes heat, take a peek at the ribs, and give the ribs the “bend test.” (Pick the meat up, with tongs, by one end to see if the meat will “break” or slightly tear apart, if it does, it’s ready). Transfer the ribs to a baking sheet to coat lightly with your favorite BBQ sauce and to rest while the coals heat. ¼ cup barbecue sauce
- Once the coals are hot, place a slab of ribs directly over the coals and cook 30 seconds each side. Repeat with the second slab of ribs.
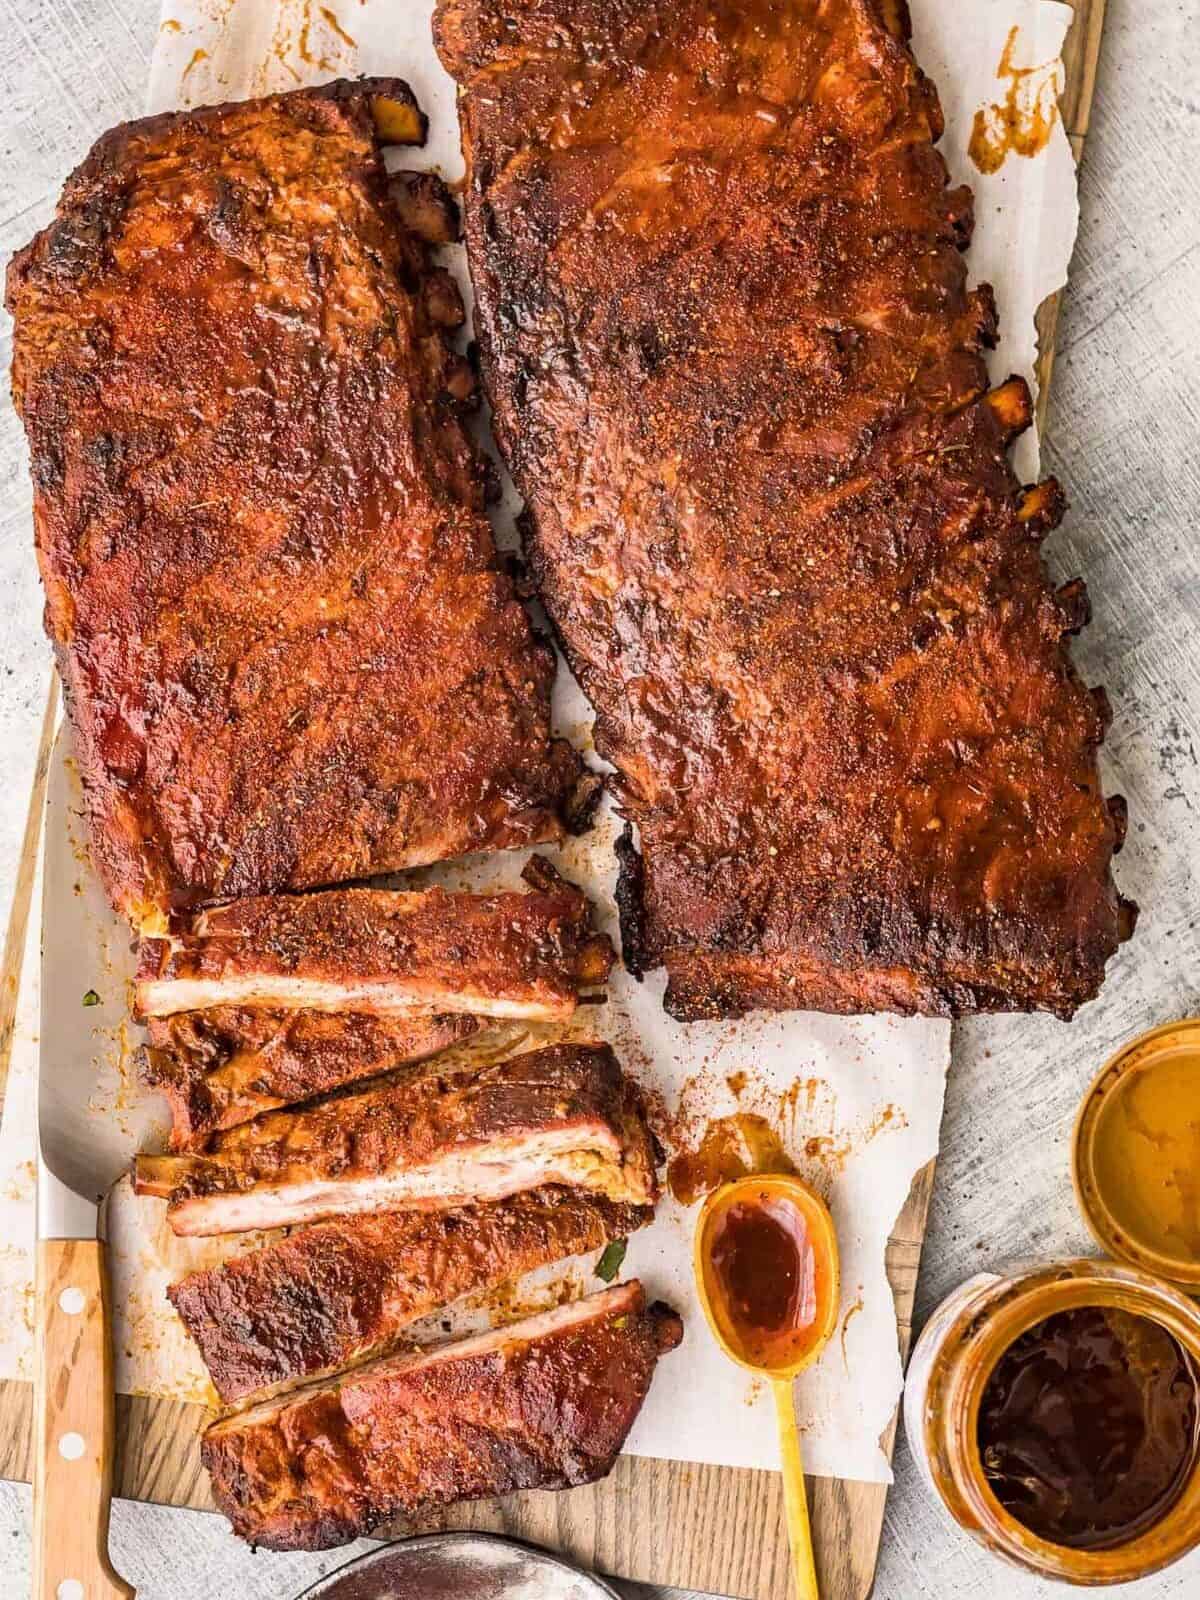
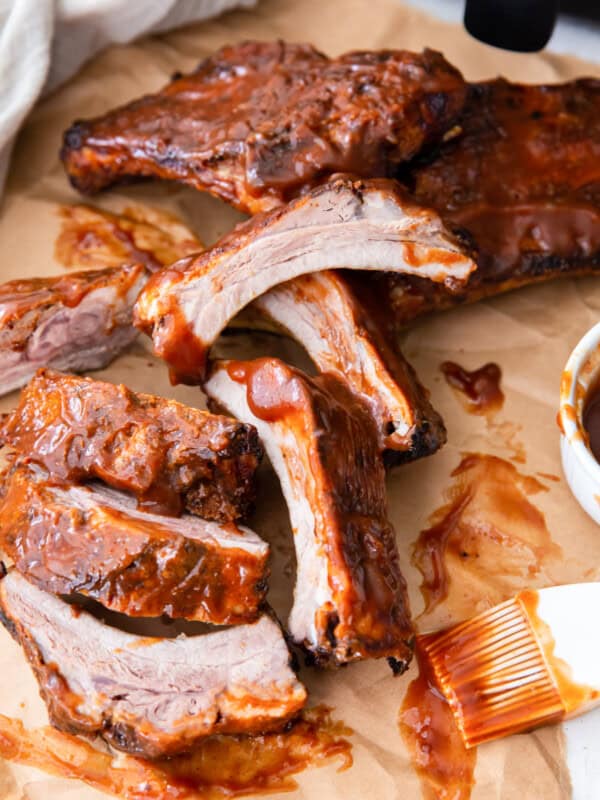
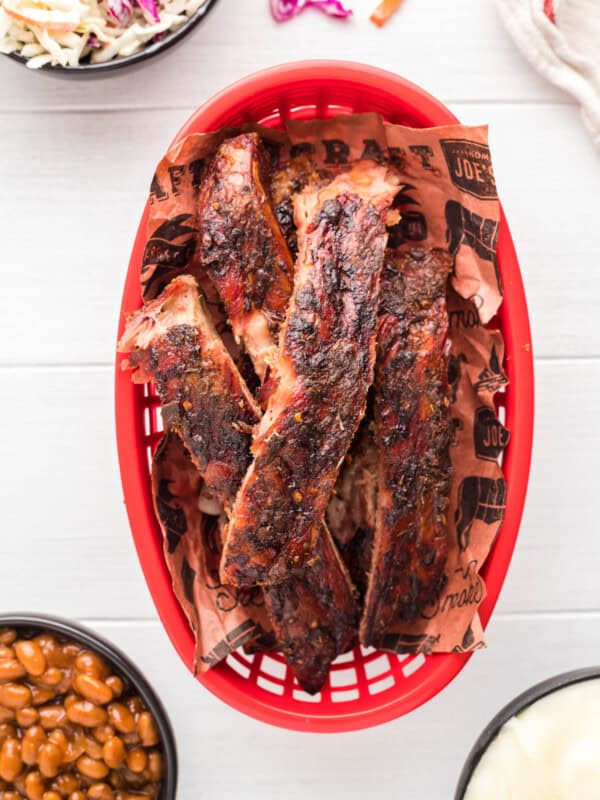
- Cut the ribs between the bones and serve.
Equipment
- Grill or Indoor Grill Pan
- 8 ounces Apple or hickory wood chips or chunks
- Baking Sheet
Becky’s Tips
- Ask your butcher to remove the membrane on the ribs to save you some prep time!
Nutrition information is automatically calculated, so should only be used as an approximation.
How to make St. Louis Ribs Step by Step
Prepare the vinegar mopping mixture: Mix ½ cup distilled white vinegar, ½ cup water, and ½ cup dry rub for pork together in a small bowl. Set aside for now.
Prep the ribs: Rinse the ribs under cool water to remove any bone chips from butchering and remove the membrane, if it is still intact. HERE is a great instructional video.
Dry brine the ribs: Season the ribs with salt like you would if they were served to you unsalted; about ¼ tsp per pound of ribs. Wrap each slab with plastic wrap and refrigerate 1-2 hours.
Season the ribs : After 1-2 hours, remove the ribs and liberally brush both with canola oil. Sprinkle 2 tbsp of the pork dry rub evenly over both sides of each slab of ribs, and wrap the ribs with plastic wrap.
Marinate the ribs: Place the ribs in the fridge for 8-24 hours.
Cook the ribs: Use a two-heat-zone grilling method. 225°F is the optimal temperature. Set up a kettle-style grill for slow, low cooking. Start by heating half a chimney of briquettes.
Bring ribs to room temperature: Remove the ribs from the fridge to warm to room temperature.
Get the grill ready : Once the briquettes are ready, pour them over the lower grate and against one side of the grill. “Bank” them up the side of the grill. Place 4 oz. of wood chips/chunks on top of the coals. Fill a stainless steel pan with 2 cups of water and set it on the cool side of the grate opposite the coals, and close the grill lid.
Preheat and clean grill : Adjust the intake damper on the bottom of the grill to get the temperature of the grill to 225°F before adding the ribs. Place the upper grate over the grills with the lift-up opening placed over the coals. Preheat the grill 5 minutes, then open it and clean and oil the upper grate.
Place water over coals: Place a stainless steel pan filled with 2 cups of water, on the grate, directly over the coals.
Place ribs on grill: Unwrap the ribs and place them, meaty side up, on the cool side of the grate opposite the pan of water. “Mop” the ribs with the Vinegar Mopping Mixture.
Cook the ribs: Place the lid on, with the vent over the ribs, and cook 30 minutes.
Add more wood chips : After 30 minutes, place another 4 oz. of wood chips/chunks directly onto the coals. Replace the lid and cook an additional 2½ hours.
If the temperature goes below 200°F, add 10 hot briquettes over the coals (as needed). Also, add additional water to the water pans, as needed.
Mop the ribs: After the ribs have cooked a total of 3 hours, “mop” the slabs with the Vinegar Mopping Mixture and turn them 180°. Do NOT flip them over. Close the lid and cook an additional 2 hours. Keep a close eye on the grill’s internal temperature and add more hot coals and water, if needed.

Add BBQ sauce : After 5 hours cooking time, heat another ½ chimney of briquettes. While the briquettes heat, take a peek at the ribs, and give the ribs the “bend test.” (Pick the meat up, with tongs, by one end to see if the meat will “break” or slightly tear apart. If it does, it’s ready). Transfer the ribs to a baking sheet to coat lightly with ¼ cup of your favorite BBQ sauce and to rest while the coals heat.
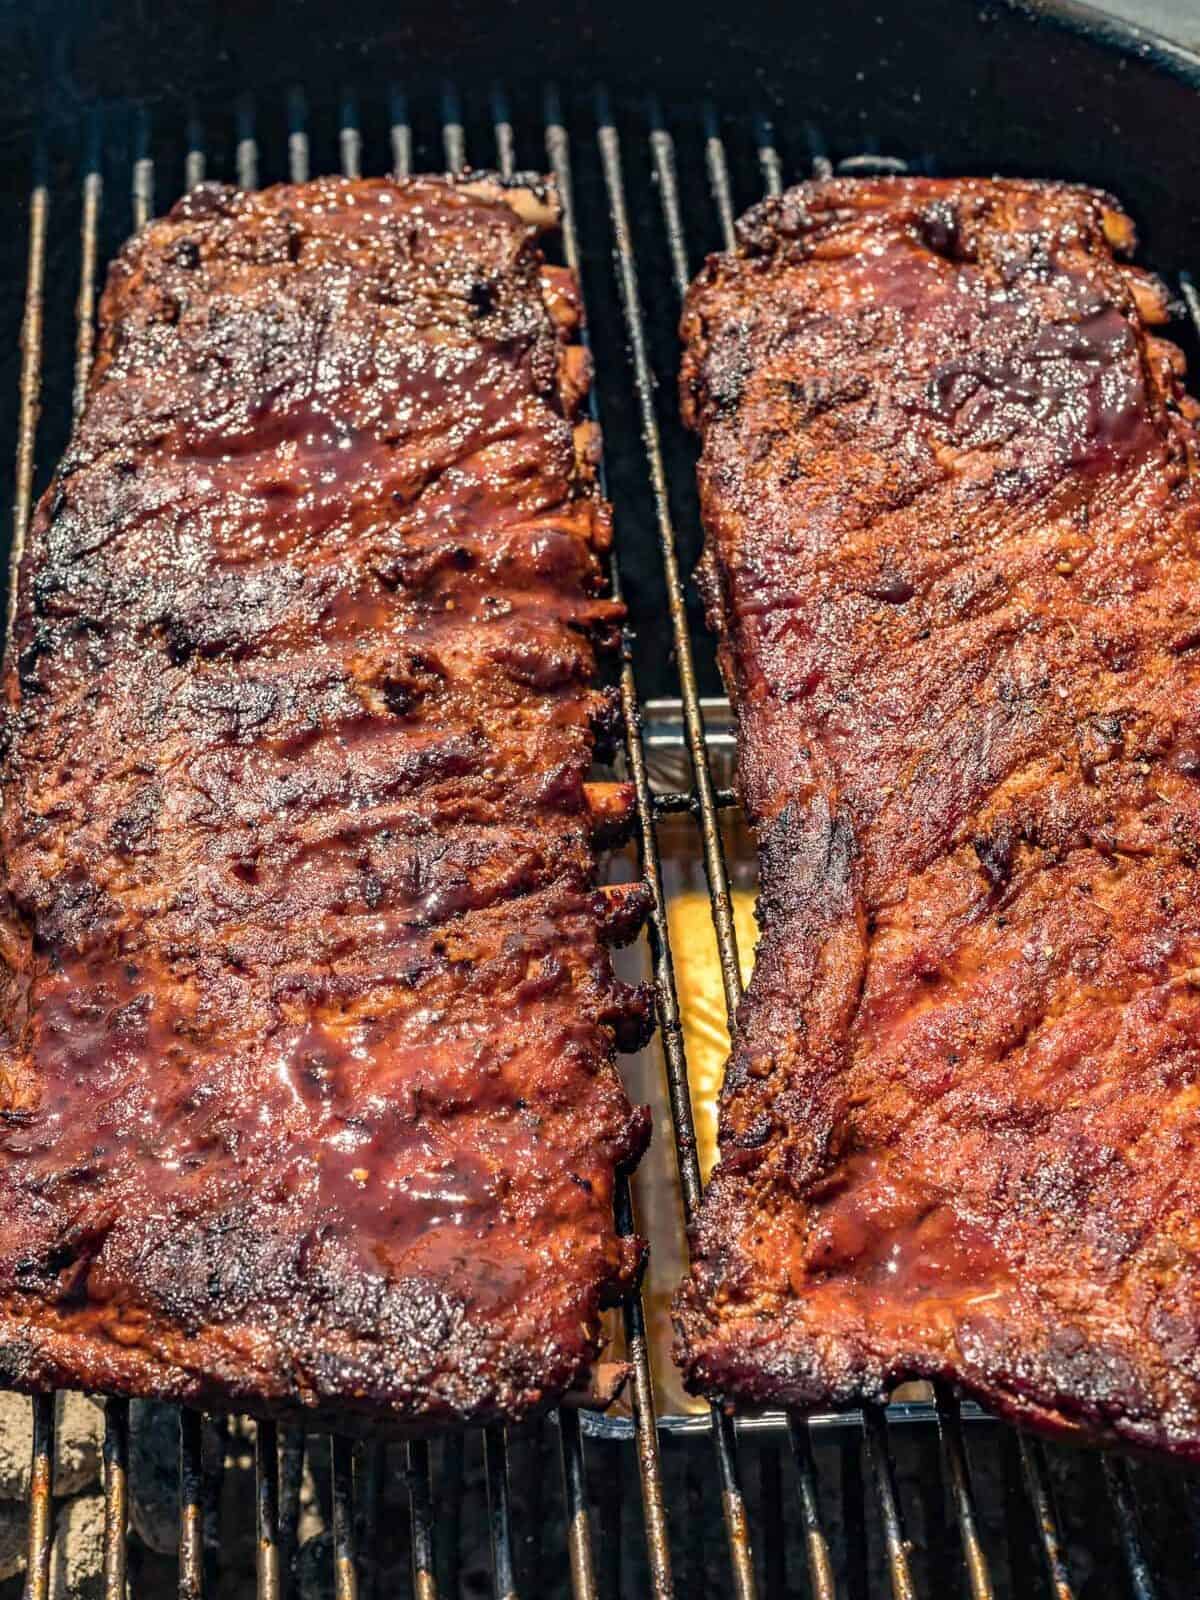
Place ribs on coals: Once the coals are hot, place a slab of ribs directly over the coals and cook 30 seconds on each side. Repeat with the second slab of ribs.

Cut and serve: Cut the ribs between the bones and serve.
How to Store
Store leftover St. Louis ribs in an airtight container in the refrigerator for up to 4 days. Reheat in a pan covered with aluminum foil in a 250°F oven until the meat reaches an internal temperature of 130-140°F.
Freeze St. Louis Ribs in an airtight container or Ziplock bag for up to 3 months. Let thaw overnight in the refrigerator before reheating.
Serving Suggestions
Ribs are the perfect summertime grilling food , and I serve them alongside my favorites, like potato salad , creamy coleslaw , or classic baked beans . If I’m preparing salad, I’ll usually go for a Caesar salad , or make a side of macaroni salad . If corn is in season, I’ll cook up some corn on the cob , or cornbread .
more rib recipes we love

Instant Pot Ribs
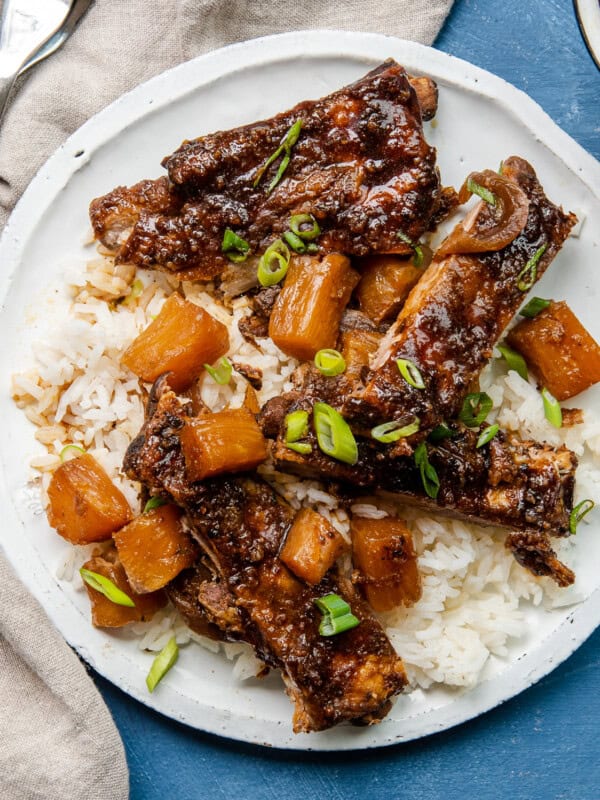
Crockpot Hawaiian Ribs
Air Fryer BBQ Ribs
Smoked Ribs
St. Louis Ribs (Grilled)
Equipment
- Grill or Indoor Grill Pan
- 8 ounces Apple or hickory wood chips or chunks
- Baking Sheet
Ingredients
For the Ribs
- 2 slabs St. Louis-Style Ribs 7-9 ribs each
- 2 tsp kosher salt
- canola oil
- 2 tbsp dry rub for pork
- ¼ cup barbecue sauce Homemade or Blue’s Hog Original are our favorites
For the Vinegar Mopping Mixture
- ½ cup distilled white vinegar
- ½ cup water
- ½ cup dry rub for pork
Instructions
For the Vinegar Mopping Mixture
- Mix all ingredients together in a small bowl. Set aside for now. ½ cup distilled white vinegar, ½ cup water, ½ cup dry rub for pork
For Prepping the Ribs
- Rinse the ribs under cool water to remove any bone chips from butchering. 2 slabs St. Louis-Style Ribs
- Remove the membrane from the ribs if it is still intact. HERE is a great instructional video.
- To dry brine the ribs, season them with kosher salt like you would if they were served to you unsalted; about ¼ tsp per pound of ribs. Wrap each slab with plastic wrap and refrigerate 1-2 hours. 2 tsp kosher salt
- After 1-2 hours, remove the ribs and liberally brush both with canola oil. Sprinkle 2 tbsp of the pork dry rub evenly over both sides of each slab of ribs, and wrap the ribs with plastic wrap. canola oil, 2 tbsp dry rub for pork
- Place the ribs in the fridge for 8-24 hours.
For Cooking the Ribs
- When it’s time to grill the ribs, a two-heat-zone grilling method will be used, and 225°F is the optimal temperature.
- To set up a kettle-style grill for slow, low cooking, start by heating half a chimney of briquettes.
- Remove the ribs from the fridge to warm to room temperature.
- Once the briquettes are ready, pour them over the lower grate and against one side of the grill. “Bank” them up the side of the grill. Place 4 oz. of wood chips/chunks on top of the coals. Fill a stainless steel pan with 2 cups of water and set it on the cool side of the grate opposite the coals, and close the grill lid.
- Adjust the intake damper on the bottom of the grill to get the temperature of the grill to 225°F before adding the ribs. Place the upper grate over the grills with the lift-up opening placed over the coals. Preheat the grill 5 minutes, then open it and clean and oil the upper grate.
- Place a stainless steel pan filled with 2 cups of water, on the grate, directly over the coals.
- Unwrap the ribs and place them, meaty side up, on the cool side of the grate opposite the pan of water. “Mop” the ribs with the Vinegar Mopping Mixture.
- Place the lid on, with the vent over the ribs, and cook 30 minutes.
- After 30 minutes, place another 4 ounces of wood chips/chunks directly onto the coals. Replace the lid and cook an additional 2½ hours.
- If the temperature goes below 200°F, add 10 hot briquettes over the coals (as needed). Also, add additional water to the water pans, as needed.
- After the ribs have cooked a total of 3 hours, “mop” the slabs with the Vinegar Mopping Mixture and turn them 180°. Do NOT flip them over. Close the lid and cook an additional 2 hours. Keep a close eye on the grill’s internal temperature and add more hot coals and water, if needed.
- After a total of 5 hours cooking time, heat another ½ chimney of briquettes. While the briquettes heat, take a peek at the ribs, and give the ribs the “bend test.” (Pick the meat up, with tongs, by one end to see if the meat will “break” or slightly tear apart, if it does, it’s ready). Transfer the ribs to a baking sheet to coat lightly with your favorite BBQ sauce and to rest while the coals heat. ¼ cup barbecue sauce
- Once the coals are hot, place a slab of ribs directly over the coals and cook 30 seconds each side. Repeat with the second slab of ribs.
- Cut the ribs between the bones and serve.
Notes
- Ask your butcher to remove the membrane on the ribs to save you some prep time!
Nutrition
By Becky Hardin
Published Jul 12, 2017


This Essential Grocery List is an absolute life saver for my family on the busy weeks. When I started this journey to learn how to cook, I quickly realized that the first step in cooking is having staple ingredients on hand. I want to avoid having to run out to the grocery store every single time I prepare a new recipe. Having a well-stocked pantry has made my life in the kitchen so much simpler, because when it’s time to cook, I have what I need.

Essential Grocery List
It’s so helpful to have a basic grocery list to help me remember which foods to buy at the store. This food shopping list is my go-to!
It’s better to stock up on things like grains, seasonings and spices, baking essentials, oils, condiments, canned and frozen foods, etc. so I can just grab them when I need them. These things have a long shelf life , so I keep them in my kitchen for convenience.
However, I do have to go to the supermarket sometimes, and there’s a way to make that trip easy and hassle-free: I keep a grocery list! If I go in blindly, I’ll leave with things I don’t need, and nothing that actually helps me prepare a good meal.
In the list below, I’ve compiled everything I always have on my stock-up grocery list.
I’ve got you covered! I created an easy grocery list filled with all of the essentials. Plus there’s a free printable version that you can take with you to the grocery store. It has everything you need to stock your pantry, your freezer, and your refrigerator.

Click to get my Free Printable Grocery List
What to Buy at the Grocery Store
This is the perfect grocery list filled with all the basics and essentials. It should help get you going if you’re new to cooking, or if you’re just left staring helplessly at an empty pantry and don’t know how to fill it.
When I first started cooking, things could seem overwhelming. I quickly realized that they more prepared I could be, the more confident I felt. If you already have the basics in your kitchen, then you can shop stress-free.
So print out our easy grocery list, stock up your pantry and fridge, and you’ll be cooking in no time!
Click to get my Free Printable Grocery List for the perfectly stocked pantry and freezer!
Fresh Produce
- Apples
- Bananas
- Strawberries
- Avocados
- Bell Peppers
- Carrots
- Broccoli
- Garlic
- Lemons/Limes
- Onion
- Parsley
- Cilantro
- Basil
- Potatoes
- Spinach
- Tomatoes
GRAINS
- Breadcrumbs
- Pasta
- Quinoa
- Rice
- Sandwich Bread
- Tortillas
MEAT/PROTEIN
- Chicken
- Eggs
- Ground Beef
- Sliced Turkey
- Lunch Meat
DAIRY
- Butter
- Sliced Cheese
- Shredded Cheese
- Milk
- Sour Cream
- Greek Yogurt
BAKING GOODS
- Baking powder
- Baking Soda
- Granulated Sugar
- Brown Sugar
- Flour
- Honey
- Vanilla Extract
- Dry Yeast
- Chocolate Chips
- Cocoa Powder
- Powdered Sugar
FREEZER
- Fruit and Berries
- Frozen Veggies (Corn, Peas, Broccoli, etc)
- Juice Concentrate
- Pizza or Other Convenience Meals
- Pie Crust
- Cookie Dough
CANNED/DRIED GOODS
- Chicken stock/broth
- Salsa
- Diced Tomatoes
- Jam/Jelly
- Peanut Butter
- Pasta Sauce
- Beans (Black Beans, Chickpeas, Baked Beans, etc)
- Soups
- Tuna
- Green Chiles
- Canned Veggies
- Coffee or Tea
Get more details on the best non-perishable and pantry foods
CONDIMENTS/SPICES
- Black Pepper
- Chili Powder
- Cinnamon
- Crushed Red Pepper
- Cumin
- Garlic Powder
- Ketchup
- Mustard
- Mayo
- Nutmeg
- Paprika
- Salt (Course Sea Salt and Kosher Salt)
- Soy Sauce
- Steak Sauce
- Hot Sauce/ Buffalo Sauce
- Salad Dressings
OILS/VINEGARS
- Apple cider vinegar
- Balsamic vinegar
- Coconut Oil
- Olive Oil
- Vegetable/Canola Oil
- Red Wine Vinegar
- White Vinegar
- Cooking Wine
- White Wine Vinegar
SNACKS
- Crackers
- Nuts
- Quick Oats
- Popcorn
- Tortilla Chips
- Cereal
Click to get my Free Printable Grocery List for the perfectly stocked pantry and freezer!

Click ☝🏻 for my FREE Grocery List Printable!
I hope this essential grocery list can help you buy what you need and make your home cooking so much easier!
Stock Your Kitchen
Find more ideas for your grocery list, stock up your kitchen, and print more cooking guides and charts to keep handy!

Non-Perishable Foods to Stock Up On

Frozen Vegetables to Stock Up On (and Recipes to Make)

Ultimate List of Cooking Herbs for Your Kitchen

Ultimate List of Cooking Spices for Your Kitchen

Cooking Oil 101: Types of Cooking Oils to Use

26 Types of Pasta and When to Use Them

What Fruits and Vegetables are in Season?

Meat Temperature Chart (Free Printable)

How to Meal Prep (Guide for Beginners)

Basic Cooking Measurements & Kitchen Conversion Chart

